Crime scene cleaning represents a critical yet frequently overlooked component in addressing the aftermath of traumatic events. This specialised service encompasses more than simple cleaning; it entails the meticulous removal of biohazardous materials, thorough sanitization, and restoration of the affected area. Various types of crime scenes, ranging from homicides to unattended deaths, are examined, with an emphasis on the essential steps and safety measures necessary during the cleaning process. Recognising the significance of professional crime scene cleaning illuminates the complexities involved and underscores the legal requirements that regulate this vital service. This discourse aims to provide a comprehensive understanding of this important subject.

What Is Crime Scene Cleaning?
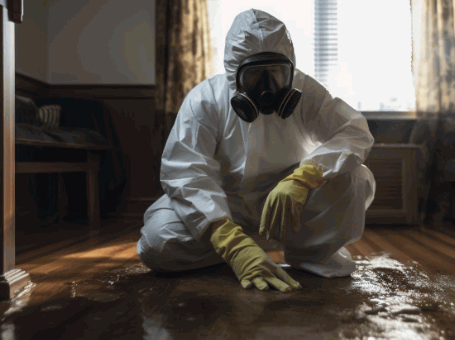
Crime scene cleaning, commonly referred to as biohazard remediation, entails the thorough cleanup of locations where violent crimes, accidents, or traumatic events have taken place. This specialised process is conducted by trained professionals who employ various decontamination methods to effectively address and remove hazardous materials, including blood and other potentially infectious substances.
Their primary objective is to ensure that the site is rendered safe for habitation and devoid of health risks. Along with the cleaning process, these professionals frequently engage in trauma cleaning, providing support to families and communities as they recover from the emotional repercussions of such events, all while adhering to established legal and health guidelines.

What Are The Types Of Crime Scenes?
Crime scenes can significantly differ in nature and severity, encompassing a range of situations that necessitate specialised cleaning and remediation services. These scenarios include:
- Homicide, characterised by violent acts resulting in death;
- Suicide, which involves self-inflicted harm;
- Accidental death, arising from various unfortunate incidents;
- Unattended death, often linked to health issues and subsequent decomposition;
- Trauma scenes, involving substantial bodily injury;
- Biohazard scenes, where infectious materials pose a threat to public health.
Each type presents unique challenges and requires a customised cleanup strategy.
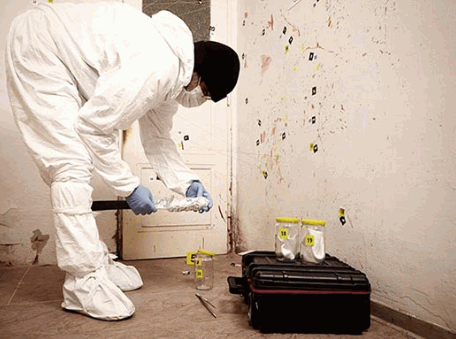
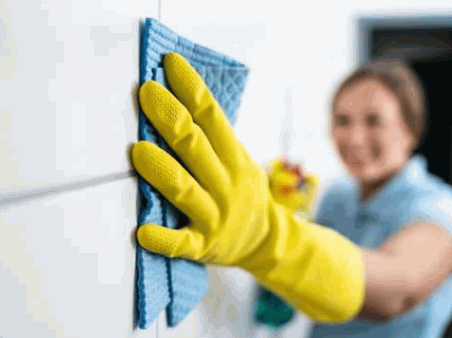
Homicide
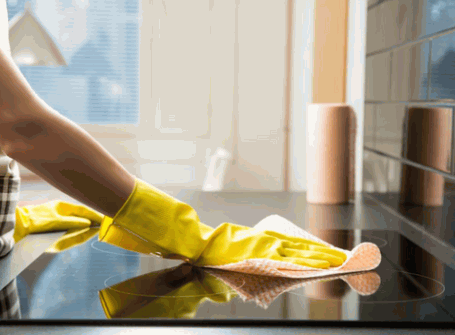
Homicide scenes present significant challenges for crime scene clean-up professionals due to the presence of blood and other biohazard materials. Immediate and thorough cleaning is essential to restore safety and health to the environment.
These professionals encounter a range of difficulties, including the removal of hazardous waste such as bodily fluids, tissue, and contaminated materials, which can pose serious health risks if not managed appropriately.
The psychological impact on families coping with the aftermath of such tragic events is profound. Clean-up crews must navigate this sensitive emotional landscape while ensuring that the process is conducted with the utmost respect and dignity.
The techniques employed in trauma cleaning involve specialised equipment and methods designed to effectively eliminate pathogens and odours. Compliance with legal regulations is critical; improper clean-up can result in legal consequences and health hazards.
Professionals in this field prioritise the safety and well-being of the environment, ensuring that every surface is treated and restored to a state of cleanliness that alleviates concerns for the affected families.

Suicide
Suicide scenes necessitate sensitive handling and expertise from cleaning professionals due to the emotional weight and biohazard risks involved. Specialist trauma cleaning techniques are essential for safely managing the aftermath of such events.
These complex situations require not only physical cleanup but also a comprehensive understanding of the profound emotional impact on affected individuals and families. When a death occurs, the lingering presence of biohazards, such as blood and other potentially infectious materials, complicates the environment, demanding meticulous attention to personal safety and thorough sanitation practices.
Professional cleaning services are trained to navigate these challenges with compassion and discretion, ensuring they approach the scene with the utmost respect for those who are grieving. They employ advanced safety gear and adhere to strict protocols to effectively manage health risks. Furthermore, these professionals recognise the importance of providing emotional support during such trying times. By prioritising both safety and sensitivity, they assist in restoring the space while alleviating some of the burdens faced by families.
Ultimately, the objective is to create a healing environment that enables survivors to move forward.

Accidental Death
Accidental death scenes often present unique clean-up challenges due to the unforeseen nature of the incident, which may involve hazardous materials necessitating professional biohazard remediation and specialised cleaning techniques.
In these circumstances, the presence of biological fluids, toxic substances, and various chemical agents can pose significant risks not only to the property involved but also to the health of individuals in proximity. Common scenarios may include fatalities resulting from accidents, suicides, or homicides, each accompanied by its own specific hazards. These scenes frequently contain materials such as bodily fluids, broken glass, or remnants of chemical products, all of which require a careful and methodical approach to ensure that proper safety protocols are adhered to.
- Thorough cleaning is essential not only to eliminate visible traces but also to sanitise the area comprehensively, thereby mitigating the potential for infectious diseases.
- Professional services are equipped to handle these situations meticulously, ensuring that all hazardous materials are disposed of in accordance with local regulations.
Ultimately, entrusting such clean-up to specialists safeguards community health and restores the site to a safe, habitable condition.

Unattended Death
Unattended death, frequently resulting from natural causes, presents considerable challenges for crime scene cleaning professionals due to the likelihood of decomposition and the presence of biohazard materials that necessitate trauma cleaning.
When an individual passes away without immediate discovery, the duration before the body is located may vary significantly, complicating the subsequent cleanup process. This extended timeframe often leads to advanced decomposition, which can produce hazardous bioaerosols and attract pests, thereby increasing the scope of cleanup requirements.
- Biohazard Risks: Decomposed organic matter poses significant health hazards.
- Professional Cleaning Necessity: Specialist techniques and equipment are essential for ensuring complete decontamination.
- Emotional Aspects: Addressing the aftermath of an unattended death can be profoundly distressing for families and friends.
Engaging trained professionals not only guarantees compliance with health and safety regulations but also offers vital support during a challenging time, allowing families to concentrate on healing rather than the daunting task of cleanup.

Trauma Scenes
Trauma scenes encompass a range of incidents that involve significant injury or psychological distress, in which professional cleaning services play a vital role in addressing both biohazard risks from blood and other infectious materials, as well as the emotional needs of those affected.
These unfortunate events may include violent crimes and serious accidents, necessitating specialised knowledge and skills to safely handle hazardous materials. In instances where trauma is present, it is imperative for professionals to adhere to stringent protocols to effectively manage biohazards while remaining sensitive to the emotional state of individuals involved.
Common types of trauma scenes include:
- Crime scenes involving blood and bodily fluids
- Vehicle accidents resulting in fatalities or severe injuries
- Suicide or unattended death scenes
Cleaning professionals employ advanced equipment and supplies to sanitise and restore the environment, in accordance with guidelines established by health authorities. They provide essential support, ensuring that individuals feel heard and respected throughout the clean-up process, which is a fundamental aspect of their service.
Biohazard Scenes
Biohazard scenes require immediate intervention from crime scene cleanup professionals due to the presence of infectious materials that pose significant risks to public health and necessitate effective chemical disinfection processes.
These hazardous environments can result from various incidents, such as pathological waste disposal, violent crimes, or accidents involving infectious agents. For instance, a site contaminated with blood, bodily fluids, or other biological materials can serve as a breeding ground for dangerous pathogens, thereby threatening the health and safety of individuals in the vicinity.
Cleaning professionals play a crucial role in these situations, employing a range of decontamination methods to restore safety and security. In the realm of forensic cleanup, key components of their approach include:
- Disinfecting Agents: Utilisation of approved chemicals to eliminate potential contagions, including COVID-19, HIV, Hepatitis B, and Hepatitis C.
- Personal Protective Equipment (PPE): Adoption of specialised gear to ensure the safety of cleaning personnel.
- Controlled Waste Disposal: Implementation of proper disposal methods for contaminated materials to prevent further exposure.
The urgency of the response is paramount; swift cleanup significantly mitigates the risk of disease transmission, allowing affected areas to be returned to a safe condition for public re-entry. Cleaning professionals not only restore cleanliness but also provide peace of mind, underscoring their vital role in safeguarding community health. Various emergency services often collaborate with these professionals to ensure efficiency.
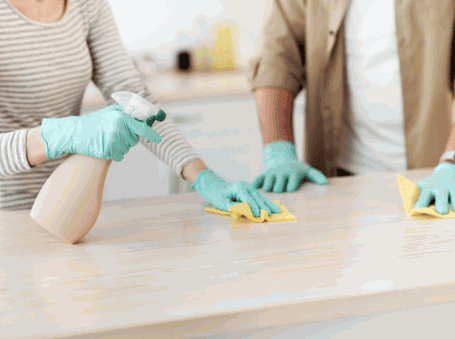
What Are The Steps Involved In Crime Scene Cleaning?
The crime scene clean-up process encompasses several essential steps aimed at ensuring comprehensive remediation and safety. This process begins with an initial assessment and planning phase, followed by the meticulous removal of biohazardous materials, typical in biohazard cleaning operations.
Subsequently, the site undergoes thorough cleaning and sanitisation, proper waste disposal, deodorisation, and ultimately, the restoration and reconstruction of the area to its pre-incident conditions.
Assessment And Planning
The initial step in crime scene clean-up involves a comprehensive assessment and planning process, during which cleaning professionals evaluate the scene to identify biohazard risks and determine the necessary resources for effective remediation.
During this critical phase, experts meticulously consider various factors that may affect both the safety of the clean-up team and the integrity of the evidence. They assess environmental conditions, including ventilation and potential contaminants, to develop a coherent and effective action plan.
Effective remediation necessitates not only the identification of hazardous materials but also the implementation of appropriate techniques and equipment to manage them safely. Thorough communication with law enforcement, the American Bio Recovery Association, and the Institute for Inspection Cleaning and Certification is essential to ensure adherence to all protocols, thereby streamlining the overall process.
By concentrating on these elements, professionals can mitigate health risks while facilitating a more efficient recovery and restoration of the affected space.
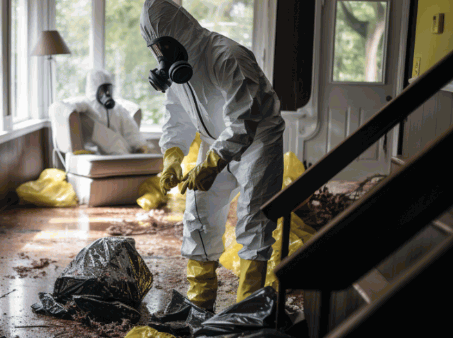
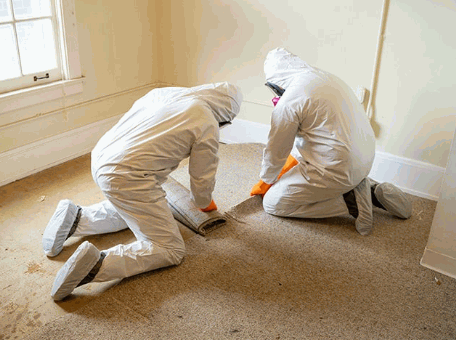
Removal Of Biohazardous Materials
The removal of biohazardous materials from crime scenes is an essential procedure that ensures the safe extraction and disposal of infectious substances, such as blood and bodily fluids, in accordance with health and safety regulations. This is particularly important in states like California, Florida, and Georgia, where adherence to these regulations is strictly enforced.
This complex process requires a meticulous approach and the involvement of trained professionals who utilise a variety of precautionary measures to ensure safety and compliance. Primarily, the use of personal protective equipment (PPE) is crucial, as it protects workers from potential exposure to harmful pathogens. This equipment typically comprises gloves, goggles, face shields, and biohazard suits, all designed to provide a barrier against contamination. The standards for PPE are often set by OSHA to ensure the highest level of safety.
- Cleaning professionals undergo specialised training programmes that emphasise not only the technical skills necessary for effective cleanup but also the protocols required to prevent cross-contamination. These training programs are designed to handle contaminated scenes efficiently.
- Such comprehensive training ensures that these professionals can identify various biohazardous materials and understand the appropriate disposal methods mandated by law.
By adhering to these critical protocols, the risk of contamination is significantly minimised, thereby playing a vital role in safeguarding public health.
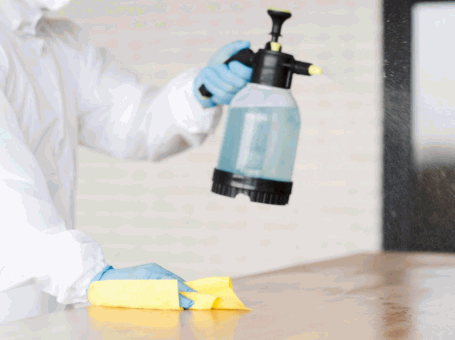
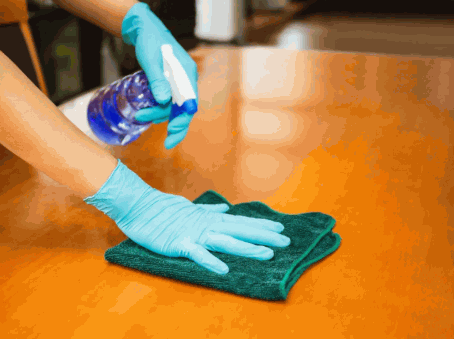
Cleaning And Sanitization
Cleaning and sanitisation processes are initiated following the removal of biohazardous materials, during which cleaning professionals apply chemical disinfection methods to ensure the complete elimination of harmful pathogens and infectious materials from the affected area.
Once the initial clearance is completed, the focus transitions to thorough disinfection, which is essential for restoring safety within the environment. This process entails the application of specialised cleaning agents specifically designed to penetrate surfaces and neutralise any remaining contaminants.
Professionals typically utilise a combination of the following:
- Enzymatic cleaners: These agents effectively break down biological substances, facilitating their removal.
- Disinfectants: High-grade chemical solutions, such as bleach or hydrogen peroxide, are frequently employed to eradicate bacteria, viruses, and fungi.
- Steam cleaning: This method employs high-temperature steam to deeply sanitise surfaces, ensuring that pathogens are rendered inactive.
The significance of these meticulous cleaning practices is paramount, as they not only restore the site to a safe condition but also mitigate potential health risks for future occupants.
Learn more: How Often Should Surfaces Be Cleaned
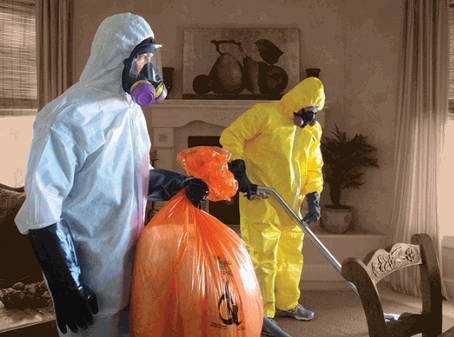
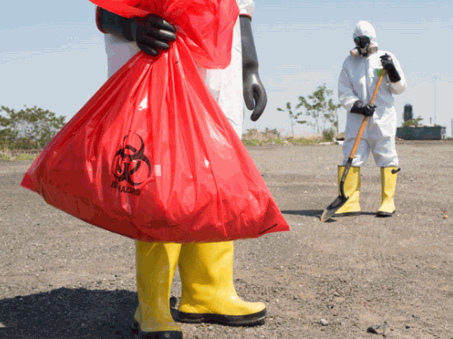
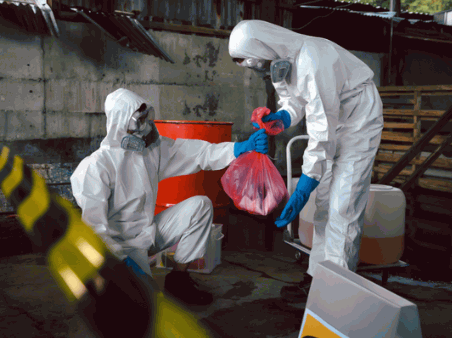
Disposal Of Waste
Proper disposal of waste is a critical component of crime scene cleanup, as it entails the safe and compliant handling of biohazard materials in accordance with health and safety regulations. This process not only safeguards the well-being of those involved in the cleanup but also protects the broader community from potential risks associated with hazardous waste.
In the context of biohazard disposal, several essential protocols and legal requirements must be strictly adhered to:
- Licensing: It is imperative to collaborate with certified professionals who possess the necessary licences to handle and transport hazardous materials.
- Labeling: Waste generated during the cleanup process must be accurately labelled to indicate its biohazard status, ensuring that anyone who may come into contact with it is aware of the associated risks.
- Storage: Waste should be disposed of in designated containers that comply with stringent regulations for biohazardous substances.
- Disposal Methods: Approved disposal methods, such as incineration or deep burial, should be utilised to eliminate biohazard materials effectively.
Failure to dispose of biohazard waste properly can pose significant risks to public health and safety, potentially resulting in severe environmental contamination or exposure to infectious agents.

Deodorization
Deodorisation is a vital final step in the crime scene clean-up process, wherein specialised cleaners eliminate residual odours associated with biohazard scenarios to ensure a fresh and safe environment.
The methods employed during deodorisation consist of various advanced techniques specifically designed to effectively neutralise unpleasant scents. Professionals commonly utilise products such as ozone generators, which convert oxygen into ozone—a highly reactive gas that oxidises the organic compounds responsible for the odours.
Another prevalent approach involves the use of encapsulants—specially formulated sprays that trap and encapsulate odour molecules, thereby preventing their escape into the air.
This step is essential for restoring properties, as lingering odours can serve as a constant reminder of trauma and may significantly impact the psychological well-being of occupants. Without comprehensive deodorisation, a space remains uninhabitable, undermining the livability and emotional recovery of those affected by the incident.
Thus, ensuring a clean atmosphere free from unwanted odours is integral to the healing process.
Restoration And Reconstruction
The final stage of crime scene clean-up encompasses restoration and reconstruction, in which cleaning professionals diligently work to repair and restore the property to its original condition, thereby assisting victims and their families in reclaiming their space following a traumatic event. This stage is crucial for victims coping with the aftermath of diseases and other biohazard incidents.
This critical phase extends beyond mere restoration; it significantly contributes to the psychological healing process for affected individuals and communities. By addressing both structural repairs and aesthetic enhancements, this process fosters a renewed sense of normality and safety.
- Repairs to property typically involve the restoration of walls, floors, and ceilings that may have sustained damage during the incident.
- Repainting surfaces serves to eliminate the visual reminders of the traumatic events, facilitating the families' ability to move forward.
- Structural adjustments may be necessary to ensure the integrity and safety of the building, thereby enhancing the peace of mind for those returning.
In essence, through meticulous attention to detail, this restoration process is fundamentally about rebuilding lives, underscoring the importance of a welcoming and comfortable environment as a foundation for recovery.
What Are The Safety Measures For Crime Scene Cleanup?
Safety measures are of the utmost importance in crime scene cleanup, as professionals must protect themselves and the public from potential health risks posed by hazardous materials and biohazards, including those encountered in trauma and blood cleanup operations.
This necessitates strict adherence to established protocols, including the proper use of personal protective equipment (PPE), safe disposal methods, effective disinfection practices, and the assurance of adequate ventilation. These protocols are essential in managing biohazards and preventing the spread of diseases such as COVID-19, HIV, Hepatitis B, and Hepatitis C.
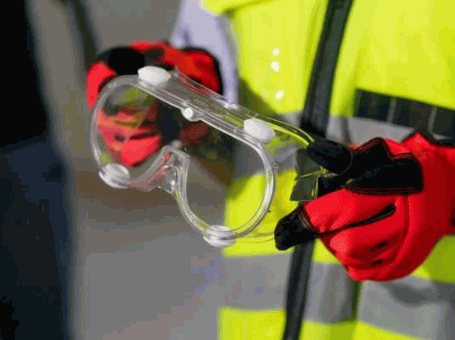
Personal Protective Equipment (PPE)
Personal protective equipment (PPE) is a critical requirement for cleaning professionals involved in crime scene clean-up, as it provides essential protection against exposure to hazardous materials, infectious substances, blood, and chemical disinfectants.
During the clean-up process, it is imperative for these professionals to utilise a comprehensive range of PPE to effectively mitigate risks. Each category of equipment is designed to serve a specific purpose in safeguarding their health and ensuring compliance with health regulations, as mandated by organisations such as OSHA and the American Bio Recovery Association. For example:
- Gloves: These are essential for protecting the hands from pathogens and chemicals, creating a barrier against contaminants that may remain on surfaces.
- Masks: Properly filtered masks are necessary to prevent the inhalation of airborne pathogens and toxic fumes, thereby safeguarding the respiratory health of cleaning personnel.
- Body Suits: Full-body suits provide extensive protection by covering skin surfaces, thereby minimising direct contact with potentially hazardous materials.
The use of appropriate PPE not only enhances safety but also reinforces the commitment to health protocols that are vital in managing the sensitive nature of crime scene environments, which often involve biohazardous materials like blood and bodily fluids.
Proper Disposal Of Biohazardous Materials
Proper disposal of biohazardous materials is an essential safety measure in crime scene clean-up, ensuring that hazardous waste is managed in accordance with health and safety regulations as well as legal requirements. This is particularly important in states like California, Florida, and Georgia, where strict guidelines are enforced.
In this process, it is important to understand that biohazardous waste includes a wide range of materials, such as contaminated sharps, bodily fluids, and items that have been in contact with infectious agents. Adhering to established guidelines is not merely advisable; it significantly mitigates the health risks associated with exposure to harmful pathogens.
The importance of safe handling and disposal methods cannot be overstated, as improper disposal can lead to serious consequences not only for individuals involved in the clean-up but also for the wider community.
Legal considerations frequently involve compliance with state and national regulations, which dictate specific procedures for the handling and transportation of these materials. Waste generators must ensure the employment of certified waste carriers, as non-compliance may result in substantial fines and legal repercussions.
Understanding the significance of safe practices in the disposal of biohazardous materials is crucial for promoting public health and safeguarding the environment. The Institute for Inspection Cleaning and Certification provides guidelines that help ensure compliance and safety in these practices.
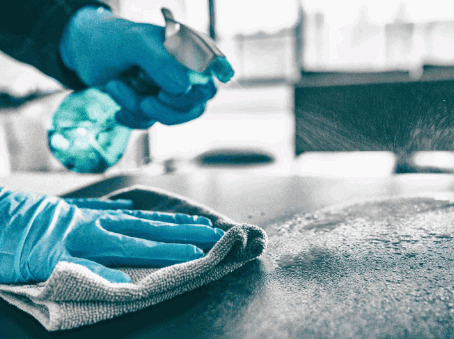
Disinfection And Sanitization
Disinfection and sanitisation are essential components of crime scene clean-up, as they effectively eliminate pathogens and harmful bacteria present in biohazardous materials, thereby ensuring a safe environment for future occupancy.
Various methods are utilised to guarantee a comprehensive cleaning process, including the application of heavy-duty disinfectants specifically formulated to combat viruses, bacteria, and fungi. Among the most effective chemicals are bleach solutions and enzymatic cleaners, which function by breaking down organic matter and neutralising potential threats.
Application techniques may include spray-and-wipe methods as well as fogging, which disperses disinfectants into the air, allowing them to settle on surfaces. Furthermore, specialised equipment such as electrostatic sprayers can provide uniform coverage, ensuring that no contaminated area is left untreated. Crime scene cleaning often requires these meticulous techniques to effectively remove biohazards and maintain safety standards.
The significance of thorough disinfection cannot be overstated; it plays a crucial role in health and safety, preventing the spread of diseases and ensuring that the site is fully restored for safe occupancy. Crime scene technicians must adhere to stringent protocols to establish a sterile environment that safeguards both future residents and clean-up personnel from harmful exposure.
Proper Ventilation
Proper ventilation is essential during crime scene clean-up to effectively manage airborne contaminants and odours, thereby providing a safer environment for cleaning professionals and ensuring compliance with health and safety standards.
To achieve optimal ventilation, employing a combination of methods can significantly enhance airflow and decrease the concentration of hazardous materials. Among these techniques, the strategic use of fans is particularly effective for boosting circulation. Positioning high-velocity fans in various corners of the affected area facilitates the rapid displacement of stagnant air. Additionally, opening windows not only allows fresh air to enter but also creates cross-ventilation, which can assist in:
- Dispersing unpleasant odours
- Reducing humidity levels
- Minimising the risk of inhaling toxic substances
The implementation of air purification systems equipped with HEPA filters can further trap particulate matter, contributing to a healthier working environment. Prioritising these ventilation strategies is crucial for ensuring both safety and effectiveness during the clean-up process, particularly in environments where biohazard exposure poses a significant concern.
Why Is Professional Crime Scene Cleaning Necessary?
Professional crime scene cleaning is essential for the thorough removal and remediation of biohazards, such as blood and infectious agents, as well as for safeguarding public health and safety following traumatic incidents. Trained cleaning professionals possess the necessary expertise to manage sensitive and hazardous situations effectively.
This specialised service is vital as it mitigates numerous health risks associated with exposure to biological materials, which can present severe dangers to individuals who are untrained. By engaging professional assistance, one can avoid the risks associated with improper cleaning methods that may inadvertently spread contamination or exacerbate emotional distress.
Experts in this field also provide invaluable emotional support to victims and their families during these difficult times, offering a compassionate presence while managing the logistics of cleanup. They are well-versed in the legal regulations surrounding biohazard disposal, and compliance with these laws is critical.
Therefore, enlisting professional crime scene cleaners not only protects health and wellbeing but also ensures compliance with legal standards.
What Are The Legal Requirements For Crime Scene Cleaning?
Legal requirements for crime scene cleaning are essential to ensure compliance with health and safety standards, including the proper biohazard remediation practices mandated by organisations such as OSHA and the American Bio Recovery Association. These regulations are designed to protect both the public and cleaning professionals.
Understanding and adhering to these guidelines is critical for maintaining a safe working environment and preventing potential legal repercussions. Failure to comply with OSHA regulations can result in significant penalties and pose health risks due to exposure to hazardous materials commonly found at crime scenes, as dramatized in media like "CSI: Crime Scene Investigation."
It is important to recognise that crime scene cleanup involves more than just physical cleaning; it necessitates a comprehensive understanding of the required protocols.
- Cleaners must be adequately trained and equipped to handle biological waste safely.
- Personal protective equipment (PPE) must always be utilised to minimise exposure risks.
- Proper disposal methods for biohazards are strictly regulated and must be followed to prevent environmental contamination.
By fully comprehending these legal requirements, businesses and individuals engaged in cleanup operations can ensure that their actions positively contribute to public health and safety while fulfilling their legal obligations.
Cleaning surfaces has become increasingly important in today's fast-paced and germ-prone environments. This discussion emphasizes the significance of surface sanitation, identifying the most frequently touched and germ-prone areas, as well as recommending optimal cleaning frequencies for both high-touch and low-touch surfaces. Additionally, it explores the most effective cleaning products, weighing the benefits of natural alternatives against harsher chemicals, and provides effective techniques for maintaining cleanliness. The aim is to offer practical tips for ensuring that spaces remain cleaner for extended periods.
Why Is Cleaning Surfaces Important?
Cleaning surfaces is essential for upholding cleanliness and preventing the transmission of bacteria and germs that can present significant health risks. Engaging with a microbiologist can provide insights into effective cleaning strategies. Regular disinfection of high-touch surfaces, such as kitchen appliances and worktops, not only aids in eliminating harmful pathogens like E. coli and Salmonella but also ensures food safety and compliance with hygiene standards established by health inspections.
Furthermore, maintaining a clean environment plays a critical role in infection prevention, thereby reducing the likelihood of illnesses caused by contaminants that proliferate on unclean surfaces.
What Are The Most Frequently Touched Surfaces?
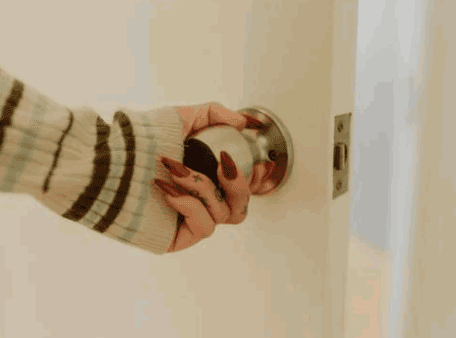
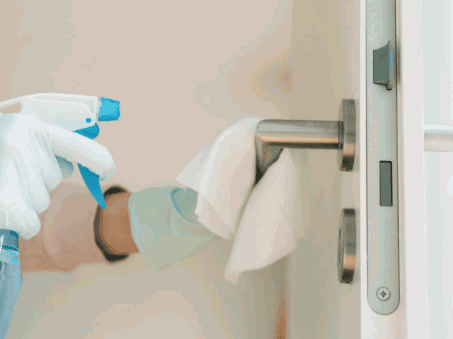
High-touch surfaces, such as doorknobs, light switches, and worktops, are often exposed to germs and can serve as reservoirs for bacteria that may lead to infections. Engaging in washing hands practices can mitigate some of these risks.
Cleaning experts recommend that these surfaces receive regular attention in a cleaning schedule to minimise the risk of contamination. By prioritising these areas in daily cleaning routines, individuals can substantially reduce the presence of viruses and allergens in their environment.
What Are The Most Germy Surfaces?
Certain surfaces are widely recognised as hosts for bacteria, primarily due to their frequent contact with skin cells and environmental factors. This includes understanding the microbiome present on these surfaces. Research indicates that everyday items such as sponges, towels, and toilets can harbour a significant number of germs, making them prime candidates for cleaning techniques aimed at infection prevention. Identifying and addressing these contaminated surfaces is essential for maintaining hygiene in any environment.
The surfaces that are most often overlooked include:
- Kitchen sponges, which can contain over 10 million bacteria per square inch.
- Bathroom taps and handles, which are frequently touched after handwashing and often retain grime and germs.
- Mobile phones, which can exhibit higher levels of contamination compared to a toilet seat.
Studies, such as those cited in Popular Science, demonstrate that regular cleaning protocols can substantially reduce bacterial levels. The use of disinfectants with proven efficacy on these surfaces is critical. Routine disinfection not only reduces the risk of infection but also fosters confidence in cleanliness, particularly in shared spaces such as offices and homes.
Incorporating daily sanitising practices enhances overall health and well-being, underscoring the importance of awareness alongside proactive hygiene measures.
How Often Should Surfaces Be Cleaned?
Establishing an effective cleaning schedule is crucial for ensuring that surfaces are cleaned with sufficient frequency to mitigate the risk of germ transmission and uphold health and safety standards.
The frequency of cleaning intervals may vary depending on factors such as surface type, usage patterns, and the presence of potential contaminants, including bacteria, allergens, and viruses. Regular risk assessments and COSHH training are recommended for optimising cleaning schedules.
By implementing a regular cleaning routine, organisations can promote hygiene and contribute to the overall well-being of individuals in both residential and commercial environments.
How Often Should High-Touch Surfaces Be Cleaned?
High-touch surfaces should be cleaned multiple times a day, particularly in shared environments where the risk of germ transmission is elevated. Experts advise the use of effective disinfectants to thoroughly sanitise these surfaces, which may include door knobs, lift buttons, and kitchen worktops. Consistent cleaning intervals are essential to minimise the accumulation of harmful bacteria and viruses, thereby ensuring a healthier space for all users.
Frequently used high-touch surfaces may include:
- Light switches
- Handrails
- Shared electronic devices such as phones and tablets
- Toilet fixtures
Cleaning professionals recommend that these items be sanitised multiple times throughout the day, especially during flu season or outbreaks of contagious illnesses. Research indicates that uncleaned surfaces can harbour pathogens capable of surviving for several hours, thereby increasing the likelihood of transmission among individuals.
Implementing a routine of regular disinfection not only reduces illness rates but also contributes to a safer, more welcoming environment for users, ultimately promoting greater community health.
How Often Should Low-Touch Surfaces Be Cleaned?
Although low-touch surfaces may not require as frequent cleaning as high-touch surfaces, they nonetheless play a vital role in maintaining overall hygiene. Using cleaning techniques that target these surfaces, such as periodic dusting and disinfecting, can effectively eliminate allergens and bacteria that may accumulate over time. Consistent attention to items such as walls, shelves, and furniture significantly contributes to a healthier living environment.
Low-touch surfaces encompass various items that are often overlooked, including light switches, cupboard handles, and door frames. To ensure these areas remain hygienic, it is advisable to clean them at least once a week, while also integrating them into a broader cleaning schedule that prioritises high-touch surfaces.
- Walls: Wipe down surfaces every two to three months.
- Shelving units: Dust and disinfect monthly.
- Furniture: Regularly clean surfaces, particularly in shared living spaces.
By maintaining these surfaces alongside high-touch areas, individuals can achieve comprehensive hygiene and reduce the risk of allergen accumulation and potential illness.
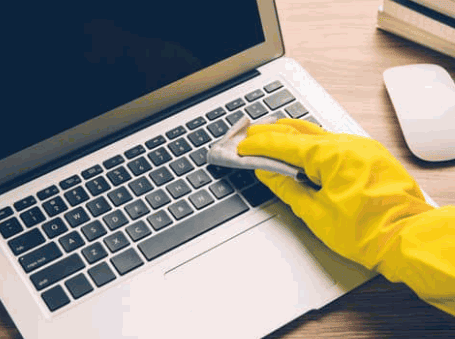
How Often Should Electronics Be Cleaned?
Electronics, including smartphones, tablets, and remote controls, can serve as potential reservoirs for germs and should be cleaned regularly to support infection prevention. Regular maintenance of these devices is essential not only for hygiene but also for their longevity. Experts recommend utilising appropriate cleaning products that effectively eliminate bacteria and viruses without damaging screens or surfaces. Establishing a routine cleaning schedule that includes electronics is crucial for ensuring that these frequently used devices do not contribute to the spread of germs.
To maintain optimal cleanliness, consider the following best practices:
- Choose the right cleaning products: Select isopropyl alcohol or disinfectant wipes specifically designed for electronics. Consulting with cleaning experts can aid in choosing the best products. It is advisable to avoid harsh chemicals that may damage sensitive surfaces.
- Establish a cleaning frequency: Based on usage patterns, it may be prudent to clean devices once a week, while high-touch items should be sanitised daily.
- Implement proper techniques: Gently wipe down screens and surfaces with a microfiber cloth; for crevices, use compressed air or soft brushes to dislodge dirt.
- Store devices correctly: Keeping electronics in clean, designated areas minimises dust accumulation and further contamination.
Adopting these practices will enhance hygiene and contribute to the prevention of illness, establishing invaluable habits in our technology-driven lives.
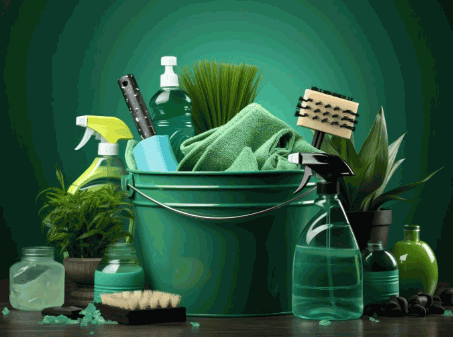
What Are The Best Cleaning Products For Surfaces?
Selecting the most effective cleaning products is essential for properly disinfecting surfaces and ensuring the prevention of infections. Engaging in deep cleaning practices periodically ensures thorough sanitation. The market provides a wide range of cleaning products, including both chemical-based cleaners and natural alternatives, which can effectively eradicate bacteria and viruses.
By gaining a comprehensive understanding of specific cleaning methods and the appropriate products for various surfaces, individuals will be better equipped to maintain cleanliness while prioritising health and safety.
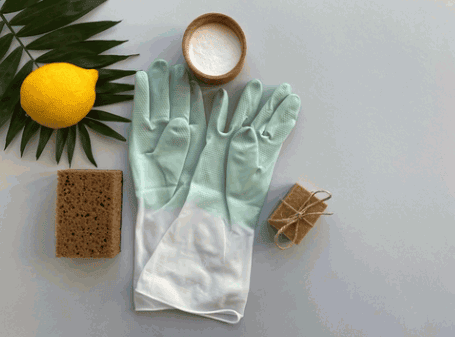
What Are The Benefits Of Using Natural Cleaning Products?
Natural cleaning products present a safe and environmentally friendly alternative to conventional cleaners, offering numerous health and safety benefits. By utilising ingredients that minimise the risk of exposure to harsh chemicals, users can effectively reduce the presence of environmental bacteria and allergens within their residences. This approach not only fosters a cleaner environment but also enhances the overall well-being of individuals, particularly those who are sensitive to synthetic cleaning agents.
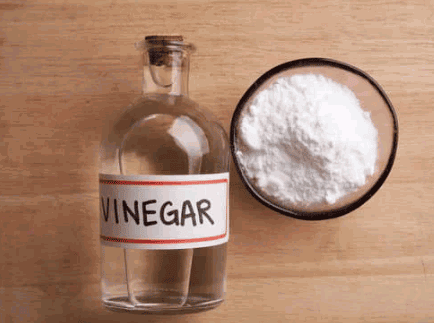
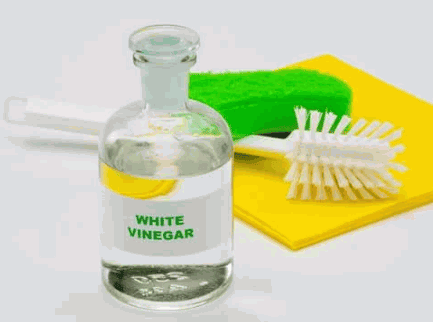
One of the notable characteristics of natural cleaning products is their effectiveness, which can be attributed to the potent properties of common ingredients. For example, vinegar is well-regarded for its capacity to penetrate and eliminate grime, while bicarbonate of soda serves as an excellent deodoriser and mild abrasive.
- Essential oils such as tea tree and lavender not only provide pleasant fragrances but also possess antimicrobial properties.
- Castile soap, derived from vegetable oils, functions as a versatile base for various cleaning tasks, offering a gentle yet effective means of removing dirt and pathogens.
By incorporating these natural elements into regular cleaning routines, individuals can achieve pristine surfaces without the concern of harmful residues remaining in their homes.
Delve into: Is White Vinegar Good For Removing Mould
What Are The Risks Of Using Harsh Chemical Cleaners?
While harsh chemical cleaners can effectively eliminate germs and bacteria, they also present significant health risks to users and the environment. Prolonged exposure to these chemicals may result in respiratory issues, skin irritation, and other health problems, undermining the very infection prevention they are intended to provide. It is essential to consider these risks when selecting cleaning products and to explore safer alternatives that maintain effectiveness without compromising health.
Adopting safer cleaning practices is not only beneficial for individual well-being but also necessary for the protection of our planet. Natural cleaning solutions, such as vinegar, bicarbonate of soda, and essential oils, offer a powerful yet gentle means of achieving cleanliness. Beyond health concerns, the environmental impact of harsh chemicals can be extensive, contributing to pollution and adversely affecting aquatic ecosystems when they are washed away, thus impacting high touch surfaces where these chemicals are often used.
To promote a more sustainable approach to cleaning, consider the following recommendations:
- Choose biodegradable products that easily break down in nature.
- Utilise homemade cleaning mixtures that are both safe and cost-effective.
- Explore certifications and labels that indicate environmentally friendly options.
By making informed choices, individuals can significantly reduce both health risks and the environmental footprint associated with traditional cleaners.
What Are The Proper Techniques For Cleaning Surfaces?
Proper cleaning techniques are essential for ensuring that surfaces are effectively sanitised and free from bacteria, which is crucial for infection prevention. This requires an understanding of appropriate cleaning methods for various materials, including the correct procedures for sanitising sinks and other high-contact areas.
Adhering to a systematic approach to cleaning, along with the implementation of proper handwashing techniques, can significantly reduce the risk of contamination and contribute to a healthier environment.
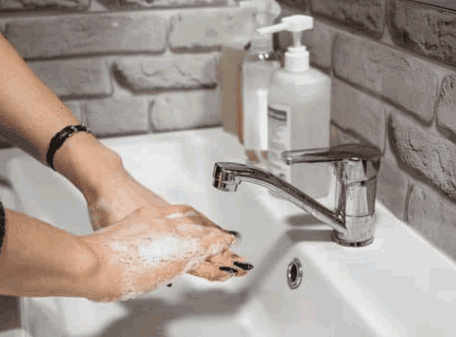
What Are The Steps For Proper Handwashing?
Proper handwashing is a fundamental aspect of hygiene and plays a critical role in the prevention of infections. To effectively eliminate germs and bacteria, individuals should adhere to specific procedures, which include using soap and hot water to thoroughly cleanse the hands for a minimum of 20 seconds. This practice not only reduces the likelihood of transmitting harmful pathogens such as E. coli and Salmonella but also reinforces good hygiene habits in both public and private settings.
The implementation of this essential routine commences with wetting the hands under clean, running water. Following this, an adequate amount of soap should be applied to cover all surfaces, including areas between the fingers and beneath the nails.
Careful scrubbing, which must last at least 20 seconds, can significantly diminish the presence of germs. Research indicates that proper handwashing can reduce respiratory infections by up to 21%. Experts advocate for individuals to repeat this process frequently, particularly before handling food or after using the lavatory.
Implementing effective handwashing techniques contributes to the safeguarding of personal health as well as the well-being of those in proximity.
- Step 1: Wet hands with clean, running water.
- Step 2: Apply soap and lather thoroughly.
- Step 3: Scrub for at least 20 seconds.
- Step 4: Rinse well under clean, running water.
- Step 5: Dry hands using a clean towel or air dry.
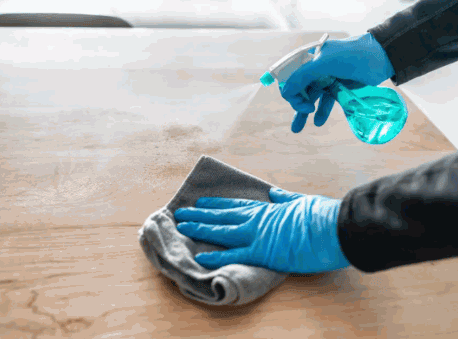
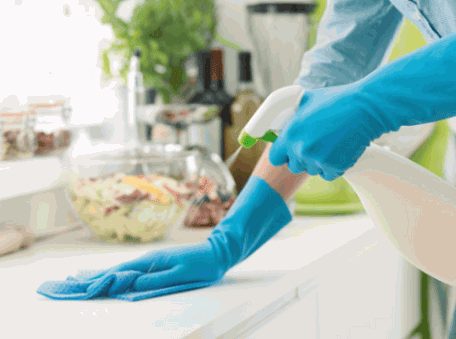
What Are The Steps For Proper Surface Cleaning?
To ensure effective surface cleaning, it is imperative to adhere to proper procedures that encompass both cleaning methods and disinfection processes. The process should commence with the removal of dirt and dust from surfaces, followed by the application of appropriate cleaning products designed to eliminate bacteria. Disinfection is essential to eradicate germs, thereby promoting health and safety in any environment.
Each phase of surface cleaning plays a critical role in maintaining hygiene standards, particularly in shared and high-traffic areas. The process can be delineated into the following steps:
- Initial Dust Removal: Begin with a microfibre cloth or a vacuum to capture loose particles. This initial step prevents dirt from becoming embedded in surfaces and reduces the quantity of disinfectant required.
- Choosing the Right Cleaning Products: Select products tailored to the specific surface type. For instance, glass cleaners are optimal for windows, while multi-surface solutions are suitable for worktops. It is crucial to ensure that the selected cleaner is both safe and effective.
- Application: Apply the cleaning solution in accordance with the manufacturer’s instructions to achieve maximum efficacy. Allow the solution to sit for a few minutes to effectively break down grime.
- Disinfection: Following the cleaning process, utilise EPA-approved disinfectants to eliminate any remaining pathogens. Special attention should be given to frequently touched areas, such as door handles and light switches, which are common surfaces that often harbor germs.
- Final Touch: Wipe down surfaces with a clean cloth to remove any residue, thereby promoting a polished and hygienic finish.
By systematically adhering to these steps, one can significantly enhance cleaning outcomes, ultimately fostering a healthier environment.
How Can I Keep Surfaces Clean For Longer?
Maintaining clean surfaces over extended periods necessitates the implementation of consistent cleaning practices and a comprehensive cleaning schedule tailored to the unique requirements of the environment.
By establishing regular cleaning intervals and incorporating preventive measures, individuals can significantly extend the cleanliness of their surfaces while minimising the accumulation of bacteria and allergens.
This approach not only improves the aesthetic appeal of spaces but also contributes to a healthier living or working environment.
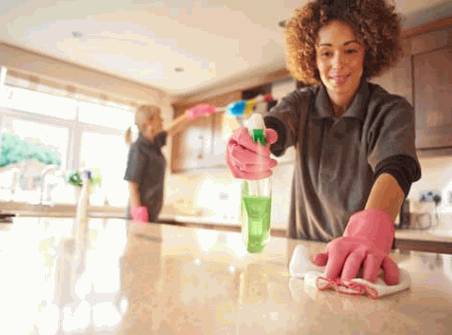
What Are The Benefits Of Regular Cleaning Schedules?
Implementing regular cleaning schedules provides numerous benefits, including enhanced hygiene, improved health safety, and a reduction in bacterial buildup in both residential and commercial environments. A structured approach to cleaning ensures that surfaces remain sanitised and free from allergens, which is particularly crucial in food-related businesses where cleanliness is of utmost importance. Regular cleaning promotes a sense of order and alleviates stress associated with clutter and dirt.
Along with these advantages, adherence to a cleaning schedule can significantly enhance productivity by fostering a more organised environment. For example, a clutter-free workspace enables employees to concentrate more effectively, ultimately leading to increased efficiency.
Within households, established cleaning routines can encourage family members to take responsibility for their surroundings, thereby instilling lifelong habits of cleanliness and accountability.
- Regularly cleaning shared spaces, such as kitchens and bathrooms, minimises the risk of illness transmission among family members or colleagues.
- A clean environment contributes to improved mental health, as research indicates a direct correlation between cleanliness and reduced anxiety levels.
- Maintaining a cleaning schedule can extend the lifespan of furnishings and appliances, resulting in long-term cost savings.
What Are The Tips For Maintaining Clean Surfaces?
To maintain clean surfaces effectively, it is essential to adopt specific strategies that promote hygiene and utilise appropriate cleaning products. Regular attention to high-touch surfaces and the incorporation of diverse cleaning habits into daily routines can significantly reduce the presence of germs and bacteria. Simple actions, such as employing the correct cleaning supplies and maintaining consistency, are crucial in achieving enduring cleanliness.
Implementing a structured approach can enhance the overall effectiveness of cleaning efforts. Consistency is paramount; dedicating a few minutes each day to targeted cleaning can yield substantial benefits. It is advisable to establish a checklist that includes the following:
- Wiping down surfaces, such as worktops and door handles, with disinfectant wipes.
- Regularly sanitising shared items, including remote controls and light switches, which are considered high touch surfaces.
- Utilising microfibre cloths for dusting, as they effectively trap more dust and allergens.
Investing in reliable cleaning products, such as multi-surface cleaners and antibacterial sprays, can streamline the cleaning process. According to Popular Science, maintaining hygiene is not solely about deep cleaning but also involves cultivating daily habits that reinforce a hygienic environment and prevent the spread of bacteria.
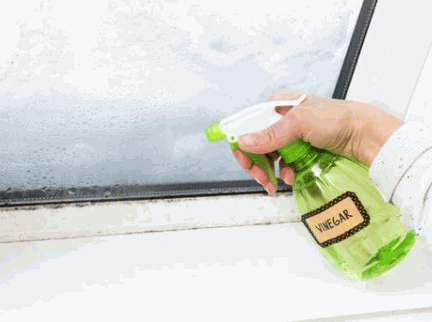
White vinegar, a widely recognised household staple, serves not only as a culinary ingredient but also as an effective cleaning agent capable of addressing various household issues, including mold. Its use in cleaning processes is particularly valued for its non-toxic and eco-friendly nature. It is essential to comprehend the nature of mould and its growth patterns for successful removal. This article examines the efficacy of white vinegar in combating mould, outlines its effectiveness, discusses potential risks, and provides practical recommendations for safe usage. Whether one is addressing a minor patch of mildew or a more significant mould problem, this article offers valuable insights to assist in reclaiming one's space.
What Is White Vinegar?
White vinegar, commonly referred to as household vinegar, is a versatile cleaning agent composed primarily of acetic acid and water. This clear liquid is widely used in both culinary applications and as an effective cleaning solution within homes.
Its elevated acidity renders it a potent tool for tackling various forms of dirt and grime, including mould growth and stains. Numerous households employ white distilled vinegar due to its eco-friendly properties and non-toxic characteristics, making it a popular option for do-it-yourself cleaning solutions.
How Is White Vinegar Used For Cleaning?
White vinegar is an exceptional cleaning solution that effectively addresses a wide range of household cleaning tasks, including disinfecting surfaces and removing stubborn stains.
Its natural acidity efficiently breaks down grime, allowing for versatile applications, whether used as a standalone cleaner or in combination with other ingredients such as essential oils for added fragrance.
Many individuals incorporate vinegar into their cleaning routines as a non-toxic alternative to harsh commercial cleaners, establishing it as an essential item in eco-conscious households seeking effective cleaning methods.
Find out more: What Is Crime Scene Cleaning
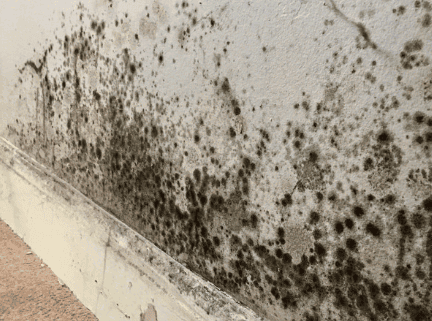
What Is Mould?
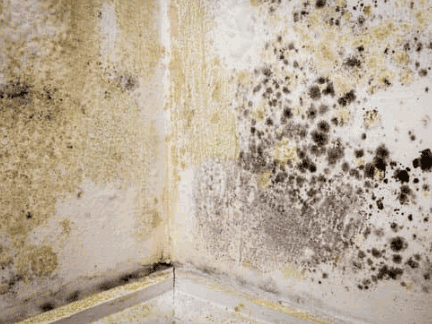
Mould, a type of fungus, manifests in various forms and species, flourishing in damp environments that facilitate its reproduction through mould spores. Common species such as Cladosporium, Penicillium chrysogenum, and Aspergillus fumigatus can inflict considerable damage to properties and present significant health risks to humans.
The growth of mould can result in allergic reactions, respiratory issues, and other health-related hazards. Therefore, it is imperative to understand the nature of mould and implement effective strategies, including cleaning tips and preventive measures, to prevent its proliferation in residential settings.
What Causes Mould To Grow?
Mould growth is influenced by several environmental factors, primarily humidity levels, availability of organic materials, and inadequate ventilation. When moisture accumulates in areas with insufficient airflow, an ideal breeding ground is created for mould spores, which can lead to potential health hazards and property damage. Understanding these causes is essential for implementing preventive measures to maintain a healthy living environment and protect against mould infestation.
High humidity, particularly when levels exceed 60%, is a significant contributor to mould proliferation, especially in spaces such as basements, bathrooms, and kitchens.
- When moisture levels rise, it is crucial to ensure proper airflow and conduct regular maintenance to mitigate damp conditions.
- Inadequate ventilation exacerbates the problem by trapping moisture and preventing surfaces from drying.
- Organic materials, including wood, paper, and fabric, can serve as food sources for mould, underscoring the necessity of maintaining a clean and dry environment.
Therefore, investing in dehumidifiers and ensuring that ventilation systems operate efficiently can help establish an environment less conducive to mould growth. By controlling humidity levels and promoting airflow, individuals can significantly reduce the risk of mould, effectively safeguard both health and property, and prevent future mould infestations.
Is White Vinegar Effective In Removing Mould?
White vinegar is widely acknowledged as an effective solution for mould removal, primarily due to its acetic acid content, which disrupts the cellular structure of various mould species.
When applied appropriately, this household vinegar can penetrate porous surfaces and eliminate mould spores, rendering it a popular choice for individuals seeking a non-toxic, eco-friendly cleaning agent.
Numerous homeowners have successfully incorporated white vinegar into their cleaning routines to address mould stains and prevent future mould growth. For additional cleaning power, using a cleaning brush with stiff bristles can enhance the cleaning process.
How Does White Vinegar Kill Mould?
White vinegar effectively eliminates mould primarily due to its acetic acid content, which disrupts the cell membrane of mould spores, leading to their destruction. The acidic environment created by vinegar not only inhibits mould growth but also assists in dislodging and removing existing mould stains during the cleaning process. Consequently, white vinegar is a practical option for homeowners seeking to address minor mould issues without resorting to harsh chemicals.
The effectiveness of white vinegar as a cleaning agent lies in its ability to penetrate the structure of mould and mildew, providing an eco-friendly solution that minimises potential harm to both humans and pets. When utilising white vinegar, the acetic acid functions in the following ways:
- Disrupting the membrane: The primary mechanism involves the acid compromising the integrity of the cellular membranes of mould spores, resulting in their rupture and ultimate death.
- Creating an inhospitable environment: The mild acidity prevents spores from germinating and establishes conditions that inhibit further growth.
- Removing stains: Along with its cleaning properties, vinegar also addresses surface stains, restoring areas affected by mould to a cleaner condition.
For improved results, using a spray bottle to evenly distribute the vinegar can be beneficial. Therefore, the use of white vinegar not only addresses immediate mould-related issues but also contributes to a fresher living environment, making it a preferred choice for many homeowners.
What Types Of Mould Can White Vinegar Remove?
White vinegar is an effective agent for the removal of various mould species, including common moulds such as Cladosporium and the more notorious black mould, when used correctly. Its unique ability to penetrate porous surfaces enables it to address mould infestations on painted walls, fabrics, and tiles, positioning it as a versatile cleaning solution. In cases of severe mould issues, it may be necessary to seek professional assistance in conjunction with vinegar treatments.
Along with Cladosporium and black mould, vinegar is capable of targeting other species such as Aspergillus, Penicillium, and Alternaria, all of which are known for their propensity to thrive in damp environments. The effectiveness of vinegar across different surfaces is particularly noteworthy:
- Porous materials: White vinegar penetrates deeply, disrupting the roots of mould.
- Non-porous surfaces: It can be easily wiped away, providing quick results.
- Fabrics: This solution is ideal for treating mould stains without the use of harsh chemicals.
Applying vinegar in areas such as bathrooms and kitchens, where moisture levels are typically high, can greatly aid in mould removal. For optimal results, it is advisable to consider combining vinegar with bicarbonate of soda, which serves as a natural deodoriser and an additional mould deterrent. Utilising a cleaning brush with stiff bristles can enhance the cleaning process and ensure effective removal of mold from surfaces.
Are There Any Risks Associated With Using White Vinegar For Mould Removal?
While white vinegar is widely recognised as a safe and effective cleaning agent for mould removal, it is important to acknowledge certain health risks and considerations.
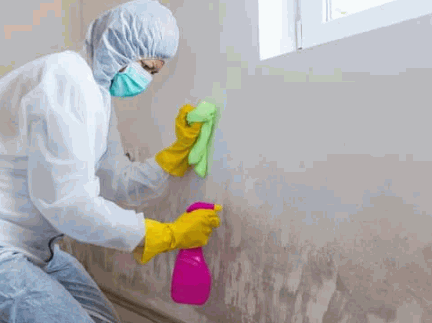
Direct exposure to concentrated vinegar may lead to skin irritation or allergic reactions, particularly in sensitive individuals. It is recommended to utilise protective gear, such as gloves and masks, when handling vinegar, especially in poorly ventilated spaces where significant mould growth is present.
Can White Vinegar Damage Surfaces?
While white vinegar is an effective cleaning solution, it has the potential to damage certain surfaces if not used appropriately. For instance, it may etch or dull natural stone surfaces such as granite or marble, and extended exposure can weaken grout and sealants. Therefore, it is essential to test vinegar on a small, inconspicuous area prior to widespread application to mitigate potential health hazards and ensure compatibility with various cleaning products.
Along with natural stone, the following surfaces may also be adversely affected:
- Wooden surfaces: The acidity of vinegar can strip finishes and lead to warping.
- Electronics: Direct exposure to vinegar can damage sensitive components.
- Coloured fabrics: Vinegar can cause fading of colours; therefore, it is advisable to refrain from using it on textiles.
To safely use white vinegar for cleaning, it is recommended to dilute it with water, particularly for delicate surfaces. Additionally, ensure that the area is well-ventilated and consider wearing gloves to protect the skin, thereby minimising any potential health risks associated with prolonged exposure to acidic substances. Consult with professional help if necessary, especially for extensive mould infestations.
Adhering to these guidelines will enable individuals to utilise the cleaning properties of vinegar without compromising the integrity of their surfaces, thereby promoting environmental protection by using a natural alternative.

Is White Vinegar Safe To Use Around Children And Pets?
White vinegar is widely recognised as a non-toxic cleaning solution, rendering it safe for use in environments with children and pets when applied in moderation. Its natural composition means that it does not release harmful chemicals commonly found in many conventional cleaning agents, thereby minimising health risks associated with exposure. However, it remains essential to ensure proper ventilation and to avoid direct contact with pets or young children during the cleaning process.
To maximise safety while utilising this effective cleanser and prevent potential health issues, the following best practices should be considered:
- Store Properly: Always keep white vinegar in a securely closed container, out of reach of young children and inquisitive pets, to prevent health issues.
- Ventilate: Ensure that the area being cleaned is well-ventilated to allow for fresh air circulation, which further mitigates any potential irritation.
- Test Surfaces: Before applying white vinegar on surfaces, conduct a patch test to confirm compatibility, particularly on sensitive materials.
- Monitor Use: While its non-toxic nature is a significant advantage, it is advisable to observe children and pets during and after the cleaning process to ensure they do not ingest or play with wet surfaces.
By adhering to these straightforward guidelines, households can effectively harness the benefits of white vinegar for cleaning while ensuring a safe environment for both children and pets.
How To Use White Vinegar To Remove Mould?
Using white vinegar as a method for removing mold is a straightforward DIY cleaning process that can be effectively carried out through a series of simple steps.
- Begin by transferring white vinegar into a spray bottle to facilitate application.
- Apply it generously to the affected areas.
- For persistent mold stains, using a cleaning brush with stiff bristles can help in dislodging the mold while allowing the vinegar to penetrate and thoroughly disinfect the surfaces.
What Is The Best Ratio Of White Vinegar To Water For Mould Removal?
The optimal ratio of white vinegar to water for mould removal generally depends on the severity of the mould problem. A common recommendation is a 1:1 ratio for general cleaning purposes. However, in cases of more persistent mould infestations, utilising undiluted white vinegar may provide superior results, delivering a stronger cleaning solution without compromising its effectiveness.
Understanding how to adjust these ratios can significantly enhance cleaning effectiveness across various scenarios. The following recommendations are based on different levels of mold severity:
- Light Mould Growth: A 1:1 ratio of white vinegar to water is typically adequate for minor mould spots, making it an ideal solution for routine cleaning.
- Moderate Mould Growth: For areas with a higher concentration of mould, a stronger solution with a ratio of 2:1 (two parts vinegar to one part water) can yield better results.
- Severe Mold Infestations: In cases of extensive mold, it is advisable to apply undiluted white vinegar directly onto the affected surfaces, allowing it to sit for 30 minutes before wiping clean. This method is effective against mold species like Cladosporium and Penicillium chrysogenum.
Employing these tailored ratios can facilitate effective mould remediation, ensuring a cleaner and healthier living environment.
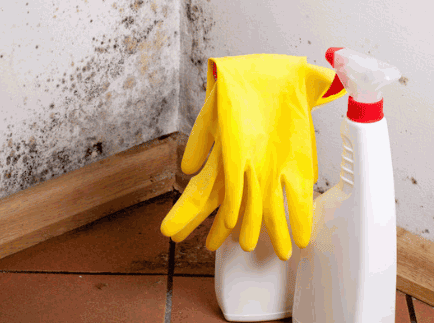
What Tools And Materials Do You Need For Mould Removal With White Vinegar?
To effectively remove mold using white vinegar, it is essential to have several key tools and materials. These include white vinegar, a spray bottle for application, a cleaning brush with stiff bristles for scrubbing away the mold, and protective gear such as gloves, masks, and a Tyvek Suit to ensure safety during the cleaning process.
Along with these primary items, it is advisable to consider the following:
- Bucket: Useful for mixing and storing additional cleaning solutions, ensuring convenient access to all necessary supplies.
- Sponge: Ideal for absorbing moisture and wiping surfaces after scrubbing, thereby aiding in the prevention of mould recurrence.
- Disinfectant: While vinegar is effective, utilising an additional disinfectant can help eliminate any remaining mold spores that vinegar may not fully address.
- Rags or towels: Necessary for drying surfaces after cleaning, as excess moisture can promote mould regrowth.
- Fan or dehumidifier: Helpful in expediting the drying process, reducing humidity levels that can encourage further mould development.
Having these tools readily available not only enhances the thoroughness of the cleaning process but also contributes to a safer environment during mould removal.
Are There Any Other Natural Alternatives For Removing Mould?
Along with white vinegar, there are several natural alternatives for mould removal that can be equally effective in specific circumstances.
Options such as bicarbonate of soda, hydrogen peroxide, and essential oils, including tea tree oil and lavender oil, provide eco-friendly cleaning solutions with antifungal properties. These alternatives present viable options for homeowners seeking to address mould issues while avoiding the use of harsh chemicals.
What Are The Benefits Of Using White Vinegar For Mould Removal?
The advantages of using white vinegar for mould removal are numerous, particularly due to its non-toxic properties, which render it safe for both the environment and the inhabitants of a household. As an eco-friendly cleaning solution, white vinegar effectively targets mould while avoiding the potential presence of harmful chemical residues, thereby contributing to improved indoor air quality and a healthier living space.
Along with being an effective agent against undesirable mould growth, this versatile ingredient offers several benefits that make it a preferred choice for many households. One of the most significant factors is its cost-effectiveness; white vinegar is widely accessible and inexpensive, providing an affordable alternative to commercial mould removers. Its ease of use further enhances its appeal—one simply needs to apply it directly to the affected areas and allow it to work.
Employing this natural solution enriches the overall cleaning experience by minimising exposure to harsh chemicals that may cause skin irritations or respiratory issues. This aligns with environmental protection standards and the following are some key benefits:
- Effectiveness: Targets mould spores and prevents future growth.
- Safety: Non-toxic, making it suitable for families and pets.
- Environmental impact: Biodegradable and reduces chemical waste.
This comprehensive approach to mould removal underscores the multitude of reasons why this household staple remains a valued resource in maintaining a clean and healthy environment.
What Are The Limitations Of Using White Vinegar For Mold Removal?
While white vinegar serves as an effective solution for mould removal, it has certain limitations, particularly in cases of extensive mould infestations or specific mould species, such as black mould, which may necessitate professional assistance for complete eradication. Vinegar may also prove less effective on non-porous surfaces where mould can become deeply embedded.
It is important to recognise that while vinegar can act as a suitable first line of defence against minor mould issues, it may not penetrate deeply enough to effectively eliminate mould roots, especially in porous materials such as plasterboard or wood. Homeowners encountering significant mould outbreaks should be vigilant for signs indicating the need for expert intervention. Consider the following scenarios:
- Widespread infestation: If mould covers a large area (greater than 10 square feet), professional remediation is often the most prudent course of action.
- Health issues: Individuals with respiratory issues or allergies should seek expert consultation, as mold can exacerbate these conditions.
- Severe water damage: Ongoing moisture problems that suggest potential structural damage require immediate professional attention.
In addressing challenging mold issues, enlisting the assistance of professionals, such as those found through resources like the U.S. Environmental Protection Agency, is essential to ensure health, safety, and effective removal.
Moss may appear to be a benign element on your roof; however, if left unchecked, it can result in significant complications, necessitating roof repair. This article delves into the nature of moss, the potential risks it presents to your roofing system, and guidelines for identifying and preventing its proliferation, including effective moss control strategies. Additionally, it provides effective removal methods, such as using a garden hose and cleaning products, along with detailed instructions for safely applying treatment to eliminate moss from your roof. Key safety precautions, including the use of safety gear and protective gear, are emphasized to ensure that the project proceeds without issues. Maintaining the integrity of your roof is paramount; therefore, further reading on home improvement and roof maintenance is encouraged.
What Is Moss?
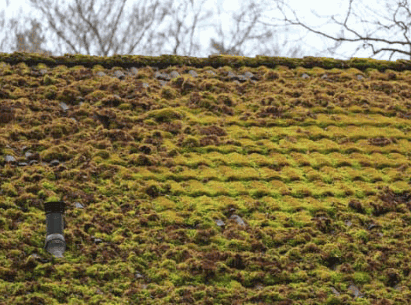
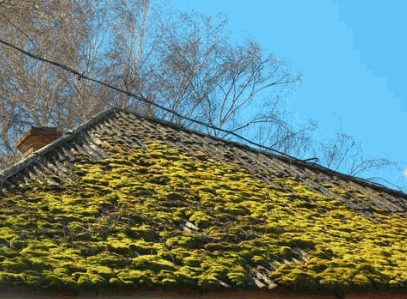
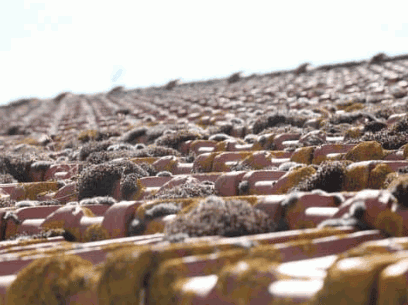
Moss is a small, non-vascular plant that thrives in damp environments, often seen on roof surfaces, where it can cause significant concerns for homeowners. Typically green in colour, moss can grow on various surfaces, including roof tiles, slate tiles, and even shingles, making it essential for homeowners to understand its implications and consider professional roof cleaning if necessary.
Its growth is facilitated by the accumulation of moisture and organic debris, which can lead to further complications such as roof damage and algal growth over time. Understanding moss is crucial for effective roof maintenance, employing cleaning strategies, and utilising products like zinc strips or copper strips to prevent moss growth.
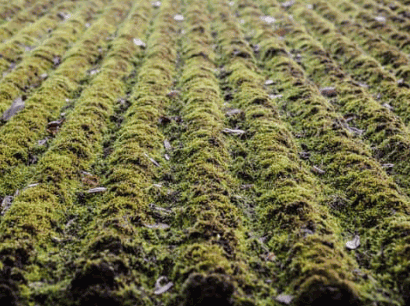
What Are The Dangers Of Moss On The Roof?
The presence of moss on roofs can pose several dangers to homeowners, primarily affecting the roof's integrity and leading to costly repairs. Moss retains moisture, which can penetrate the roofing materials and lead to deterioration of the underlying structure, including roofing nails and roof sheathing. As moss continues to grow, it can not only cause significant damage to the roof but also promote the growth of algae, further complicating the issue. Homeowners must recognize these dangers to ensure proper roof maintenance and timely moss removal to safeguard their investment.
This accumulation of moss creates a perfect environment for moisture retention, allowing water to seep beneath tiles and accelerate degradation. As a result, the life expectancy of the roof is drastically reduced, often resulting in repairs that can be both tedious and expensive. Homeowners should be proactive in combating this issue by:
- Conducting regular roof inspections to identify early signs of moss growth.
- Using proper cleaning techniques, such as gentle brushing or a low-pressure wash, to remove moss without damaging the roof.
- Applying moss-resistant treatments to inhibit future growth.
- Ensuring adequate roof ventilation to minimise moisture accumulation.
By implementing these maintenance strategies, the risk of leaks and structural damage can be significantly mitigated, ultimately preserving the home's value and safety.
How To Identify Moss On The Roof?
Identifying moss on your roof is crucial for maintaining its health and longevity, and there are various methods homeowners can employ to detect its presence. Regular roof inspections can significantly enhance the ability to spot moss early on.
One effective way to identify moss is through regular roof inspections, which can be enhanced using tools like binoculars or a drone camera for a bird's eye view of the roof surface, helping to spot large moss patches or hidden green growth. Moss typically appears as a greenish layer on roof tiles or shingles, resembling velvety patches, and its presence can often be mistaken for algae or other green growths that may flourish in similar environments.
Unlike moss, which has a spongy texture and forms in concentrated areas, algae tends to spread more uniformly across surfaces and are usually darker in colour. Recognising moss early can lead to timely cleaning and maintenance solutions.
- Utilising technology such as drones not only offers a comprehensive view but also allows for high-resolution imaging, making detection easier.
- With the ability to cover large areas quickly, these inspections can reveal hidden growths that may evade conventional methods.
By incorporating these advanced tools into routine assessments, homeowners can better protect their roofs and ensure they remain resilient against potential damage.
What Are The Causes Of Moss On The Roof?
Moss growth on roofs is primarily caused by a combination of environmental factors, moisture accumulation, and external influences such as overhanging trees. When roofs are shaded by trees, they tend to retain moisture, creating an ideal environment for moss to thrive. The type of roofing material, such as roof tiles or slates, can further influence moss growth, as some materials are more susceptible to moisture retention than others. Understanding these causes is essential for effective roof maintenance and moss control.
The area's local climate also plays a significant role in this delicate balance. In regions with high humidity and frequent rainfall, roofs can remain damp for extended periods, which only exacerbates the situation.
- For example, during cooler months or seasons when temperatures fluctuate, condensation may form, contributing to a moist microenvironment.
- Roofs that do not receive adequate sunlight are especially prone to fostering moss growth, as they lack the necessary heat to dry out effectively.
Certain roofing materials can either hinder or help combat moss development. For instance, metal roofs often discourage moisture retention, while asphalt slates may trap water more easily, allowing moss to thrive. Therefore, being aware of these various factors can guide homeowners in making informed decisions about their roofing materials and maintenance practices, which is crucial for long-term preservation and aesthetic appeal.
How To Prevent Moss On The Roof?
Preventing moss on your roof requires a proactive approach to roof maintenance, which can be achieved through various strategies, including the installation of zinc or copper strips. These metal strips work by releasing ions that inhibit moss growth when it rains, providing a long-term solution for moss control. Regular cleaning with environmentally safe and non-toxic solutions can help maintain a moss-free roof, ensuring the longevity and integrity of the roofing materials. Homeowners should also consider routine inspections to catch any early signs of moss growth.
Incorporating additional preventive measures can greatly enhance the effectiveness of the already established methods. Here are some techniques to consider:
- Metal Strips: Not only do these strips help combat moss, but they also prevent its spread by creating a hostile environment for its growth.
- Regular Cleaning: Utilising gentle pressure washing paired with eco-friendly moss removers ensures that debris does not accumulate, setting the stage for moss growth.
- Routine Maintenance Checks: Scheduling frequent inspections can help identify potential issues early, allowing homeowners to act before moss becomes a significant problem.
By adopting these practices, individuals can protect their roofs, extend the lifespans of their roofing materials, and maintain the aesthetics of their homes.
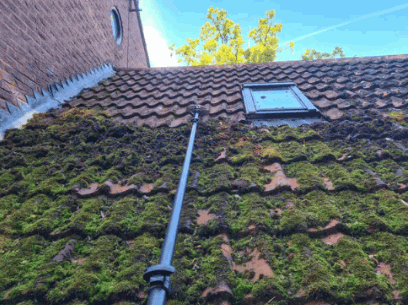
What Are The Different Ways To Remove Moss From The Roof?
There are several effective methods to remove moss from roofs, each varying in approach and effectiveness, catering to different homeowners' needs and preferences.
These methods include:
- Manual removal with a soft brush
- Chemical treatments using commercial moss killers or DIY solutions
- Pressure washing for more extensive moss growth
Each technique has its advantages and disadvantages, and it is crucial to consider the type of roofing material and the severity of the moss infestation before choosing the appropriate method for moss removal.
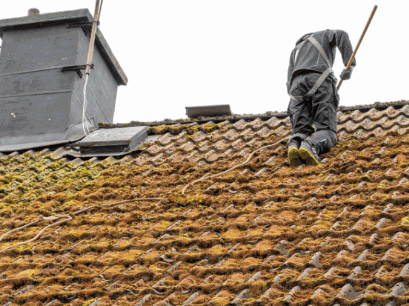
Manual Removal
Manual removal is one of the simplest and most effective ways to eliminate moss from the roof, utilising tools such as a soft brush or broom specifically designed for roof cleaning. This method allows homeowners to work carefully, ensuring that they do not damage the roof tiles or shingles in the process. It is essential to wear appropriate safety gear, such as harnesses and non-slip shoes, to prevent accidents when working on sloped surfaces.
To effectively execute this process, one must begin by gathering the necessary tools, which may include:
- Soft-bristle brush or broom
- Safety harness
- Non-slip shoes
- Ladder
- Bucket for debris
Before climbing onto the roof, ensure that the ladder is stable and positioned safely on the ground. As the moss removal takes place, it is vital to gently brush the moss away, working from the top downwards. This technique helps prevent any loose debris from collecting in lower areas, thereby promoting better drainage.
While focusing on the task, be cautious not to scrape too hard, as this could lead to damage to roofing materials. Consider performing this maintenance on a sunny day, as the heat can make the moss less resilient, facilitating a smoother removal process. Regular inspections and timely interventions can significantly prolong the lifespan of the roofing materials.
Chemical Treatment
Chemical treatment is a popular method for moss removal that involves the application of commercial solutions specifically designed to kill roof moss and prevent its regrowth. Homeowners can choose from a range of cleaning products, including non-toxic solutions that are environmentally safe and effective. It is essential to carefully follow the manufacturer's instructions to ensure safe application and minimise any potential harm to surrounding plants and environments.
Chemical treatments come in various forms, including granular, liquid, and foaming options, each offering distinct benefits for treating moss on hard surfaces.
- Granular treatments are often easy to apply and can provide long-lasting results, making them ideal for larger areas.
- Liquid solutions are typically quick-acting and can penetrate moss effectively, ensuring thorough elimination.
- Foaming options can adhere better to vertical surfaces, enhancing their effectiveness in hard-to-reach areas.
When deciding on a treatment, it is crucial to weigh the effectiveness against potential environmental impacts. Homeowners should also consider alternative methods, such as mechanical removal, using biological solutions like biocide, or home remedies that support ecosystem health.
Proper safety measures, including wearing protective gear and keeping pets and children away during application, are paramount in minimising risks and ensuring that the surrounding flora remains unaffected.
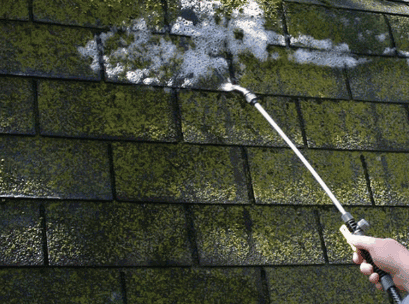
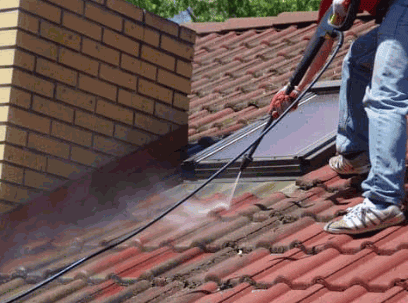
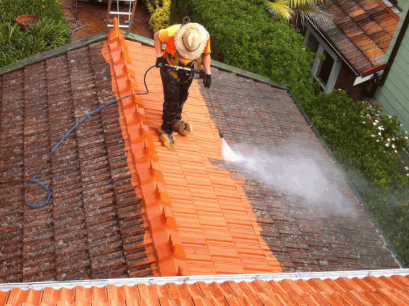
Pressure Washing
Pressure washing is an effective yet powerful technique for removing moss from roofs, utilising high-pressure water jets to dislodge moss and debris from the roof surface. This method can quickly clean large areas but must be undertaken with caution to avoid damaging the roof tiles or shingles. It is advisable to adjust the pressure settings and use a wide spray nozzle to minimise any risk to the roofing materials during this cleaning process.
Before initiating a pressure washing project, one should consider various factors to ensure optimal outcomes and safety. Proper personal protective equipment (PPE) such as gloves, goggles, and a mask is essential to safeguard against potential hazards. Selecting the right high-pressure washer can significantly affect the efficiency of the operation.
Investing in a quality pressure washer with adjustable pressure settings is crucial, and one may also want to explore environmentally friendly detergents that can facilitate better cleaning without harming surrounding vegetation.
- Safety Precautions:
- Always secure ladders and work in pairs when possible.
- Check the weather; avoid pressure washing in strong winds or rain.
- Cover nearby plants with tarpaulins to protect them from overspray.
When to opt for pressure washing over traditional cleaning methods often hinges on the extent of moss accumulation and the type of roofing material. For significant build-up, pressure washing can be the most efficient choice due to its ability to reach all nooks and crannies effectively.
What Are The Steps To Spray Roof For Moss?
Spraying a roof for moss removal involves a systematic approach that ensures effective treatment and minimal risk to the roof's integrity. The initial step is to gather all the necessary supplies, including a garden hose, spray nozzle, cleaning solution, and protective equipment, which will aid in a safe and efficient application process.
Preparing the roof by clearing debris and ensuring accessibility is crucial for a successful application, followed by mixing the solution and applying it evenly across the roof surface. Rinsing the roof afterward ensures all residues are washed away, paving the way for ongoing roof maintenance.
Gather Supplies
Gathering supplies is the foundational step in preparing to spray your roof for moss removal, ensuring that you have everything necessary for a successful cleaning operation.
Essential items include a garden hose with a spray nozzle, a cleaning solution specifically designed for moss removal, and safety gear such as gloves and goggles to protect yourself during the process. Selecting the right cleaning solution is particularly crucial; it should not only effectively combat moss but also be safe for your roof's material. Consider using environmentally friendly products that minimise damage to surrounding plants and wildlife.
- Ensure that the garden hose has a sufficient length to reach all areas of the roof.
- It might be beneficial to invest in a ladder stabiliser for added safety while working at heights.
- Alternative cleaning solutions, such as a vinegar-water mixture or bicarbonate of soda paste, may provide an eco-friendly option for those looking to avoid harsh chemicals and prefer DIY solutions.
Being adequately prepared not only enhances effectiveness but also promotes safety while working at heights, allowing you to focus on effectively removing moss without unnecessary risks, especially when working slowly and carefully with ladders.
Prepare The Roof
Preparing the roof is a critical step before applying any moss removal solution, as it ensures that the cleaning process is effective and safe.
Before proceeding with any treatment, it is essential to conduct a detailed and systematic roof inspection. Checking for loose tiles or slates, and capturing any signs of damage, such as cracks, can prevent further complications later.
Following the inspection, one should focus on debris removal, ensuring that accumulated leaves, branches, and other materials are carefully cleared from the roof surface. This not only optimises the effectiveness of the moss removal solution but also aids in preventing water pooling, which could lead to additional roof issues.
- Use a broom or leaf blower for large debris.
- Hand-pick smaller items on the roof.
- Pay special attention to clean gutters and valleys where debris tends to accumulate.
By prioritising this preparation phase, homeowners can ensure a safer and more efficient moss removal process, leading to a healthier roof in the long run.
Mix The Solution
Mixing the solution correctly is pivotal to the success of your moss removal effort, as the right concentration will enhance the cleaning effectiveness while ensuring roof safety and protecting roof shingles.
To achieve the optimal results, it is essential to ensure that the appropriate ratio of cleaning solution to water is maintained. Proper mixing not only maximises the effectiveness of the solution, allowing it to penetrate more deeply into moss, but it also minimises the risk of damage to surfaces. Following the manufacturer’s guidelines meticulously ensures that all components interact in harmony, promoting a thorough cleaning action while maintaining roof integrity.
During the mixing process, it is advisable to take specific safety precautions to safeguard against any adverse reactions or exposure to harsh chemicals. Here are key considerations:
- Always mix in a well-ventilated area to avoid inhalation of fumes.
- Use personal protective equipment, including gloves, eye protection, and masks as needed.
- Store the mixed solution in a clearly labelled container to prevent accidental misuse.
By adhering to these guidelines, not only is personal safety prioritised, but the overall effectiveness of the cleaning solution is greatly enhanced, providing you with a clean and safe roof.
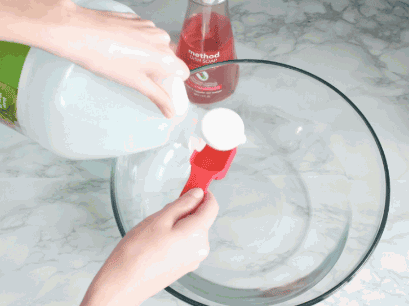
Apply The Solution
Applying the solution evenly across the roof surface is essential for effective moss removal, ensuring that every area is treated for optimal results.
To achieve this, it is crucial to utilise a garden hose with a spray nozzle, which allows for better control and distribution of the cleaning solution. Even coverage is not only important for removing moss but also for protecting the roofing materials from potential damage caused by uneven application.
When working from the top of the roof downwards, this method prevents streaking and ensures that the solution drains effectively.
- Be sure to concentrate efforts on areas with heavy moss growth, where the solution needs extra time to penetrate and work effectively.
- After applying the solution, allow it to soak in for the recommended time as per the product's instructions, usually ranging from 15 to 30 minutes.
This soaking time is critical for breaking down the moss and supporting the overall effectiveness of the cleaning process. Timing your application on a dry, warm day can significantly enhance the solution's performance and drying capability, further minimising any potential roof damage.
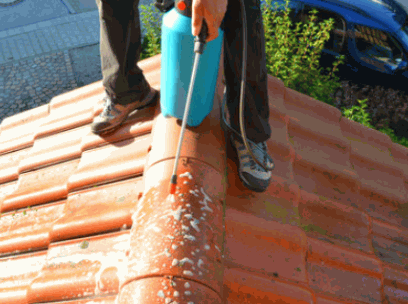
Rinse The Roof
Rinsing the roof after applying the moss removal solution is a critical step that ensures all residues are washed away, leaving your roof clean and free from harmful chemicals. This practice not only protects your roof's surface but also promotes overall system health, especially after fall rains.
Effective rinsing requires attention to detail and the correct techniques to maximise results. Begin by using a garden hose equipped with a powerful spray nozzle. Start at the peak of the roof and move downwards, ensuring that the water is directed at a 45-degree angle to facilitate proper runoff. This technique allows any residual cleaning solution to flow off the roof rather than pooling in valleys or crevices, which could lead to future moss growth.
- Thorough rinsing is essential, as any leftover chemicals can deteriorate roofing materials over time. Consider using DIY solutions for effective cleaning.
- Incorporate periodic checks after rainfall to ensure that debris does not accumulate on the roof's surface.
By committing to a diligent rinsing schedule, one enhances the roof's aesthetic appeal while reinforcing its durability against the elements.
Maintain The Roof
Maintaining the roof after moss removal is vital for preventing future growth and ensuring long-term roof health, involving regular inspections and cleaning efforts.
Proper roof maintenance should be seen as a key investment in the longevity of your home. Homeowners are encouraged to establish a comprehensive schedule for roof inspections, ideally twice a year, during spring and autumn, to uncover any early indicators of moss, algae, or wear.
In addition, regular cleaning of gutters and downpipes is critical; these components must be kept clear to support efficient water flow and prevent damage.
Another proactive strategy is to create a
- routine cleaning schedule
- perform routine inspections
- implement preventive treatments
Learn about: How Much Does Painting A Roof Cost
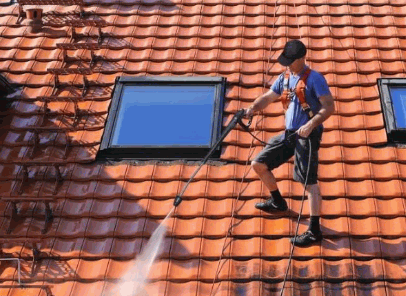
What Are The Safety Precautions To Take While Spraying Roof For Moss?
Taking appropriate safety precautions while spraying your roof for moss is paramount to prevent accidents and ensure a successful cleaning process. Homeowners should wear protective gear, including gloves, goggles, and non-slip shoes, to safeguard against slips and exposure to cleaning chemicals. Using ladders correctly and potentially employing safety harnesses can prevent falls while working at height, making the process safer and more efficient.
When embarking on a roof-cleaning endeavour, it is essential to systematically identify potential hazards and mitigate them effectively. Using products like Green CLEAR can help in maintaining safety. Safety measures extend beyond just wearing protective gear; having the right tools and equipment can significantly enhance the safety of the job.
Ensure your ladder is stable and positioned on level ground. Consider using:
- ladder stabilisers
- non-slip matting
- and safety ropes.
Before starting, inspect for any weather conditions that might contribute to slippery surfaces, such as rain or dew. Having someone on the ground to assist or call for help can add an extra layer of security.
Always follow the manufacturer's instructions for the cleaning products being used, as improper use can lead to dangerous situations for both the worker and the environment.
Roof painting is not merely a cosmetic enhancement; it represents a significant investment that can improve the aesthetic appeal of your home while providing essential protection for your roof against environmental elements. This article will examine the process of roof painting, the benefits it confers, and the various factors that influence its overall cost. Whether you are contemplating a do-it-yourself project or engaging the services of a professional, this discussion aims to provide valuable insights that will assist you in making informed decisions and potentially reduce expenses. Continue reading to acquire comprehensive knowledge regarding the considerations involved in painting your roof.
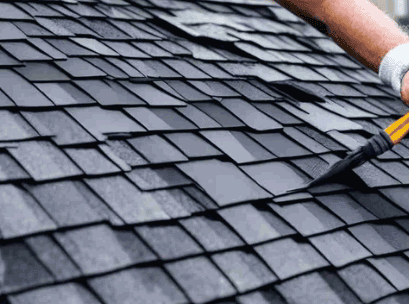
What Is Roof Painting?
Roof painting is a crucial aspect of home maintenance that involves applying a protective and aesthetic coating to roofing materials, such as roof tiles or metal roofs. This process not only enhances the visual appeal of the property but also contributes to energy efficiency by reflecting sunlight and reducing heat absorption.
Homeowners often consider roof painting during renovations, which can range from traditional painting to advanced roof coatings designed to waterproof and protect against weathering. The choice of materials and techniques used for roof painting can significantly impact both the lifespan of the roof and the overall value of the property. When selecting materials, consider not only the initial painting costs but also the long-term benefits, such as energy efficiency and reduced need for repairs.

Why Should You Consider Painting Your Roof?
Painting your roof can have multiple benefits that extend beyond aesthetics, making it a worthwhile investment for homeowners. A freshly painted roof significantly improves the overall appearance of the home, increasing kerb appeal and potentially boosting property value.
Additionally, roof painting provides essential protection against weathering and environmental factors such as moss growth, which can lead to damage if left untreated. By choosing the right roof paint, homeowners can ensure their roofs remain in optimal condition for years to come.
Improves Aesthetics
Roof painting significantly enhances the aesthetic appeal of a property, making it more attractive to prospective buyers and visitors alike. This is especially relevant to those considering a renovation project, as the updated look can greatly enhance the overall value of a home.
By selecting the right colour and finish, homeowners can transform their roofs, creating a modern or classic look that complements the overall design of their homes. Whether you choose traditional roof tiles or more advanced roof coatings, the right choice can reflect your personal taste and improve the property's kerb appeal.
The influence of aesthetics extends far beyond mere appearance; it plays a vital role in determining home value and kerb appeal. Potential buyers often react favourably to well-planned colour schemes, which can emphasise the architectural features of a home. When choosing hues, it is essential to consider:
- Complementary Colours: Selecting shades that harmonise with the cladding and landscape enhances visual coherence.
- Quality Finishes: The right finish can elevate the look of roofing materials, ensuring they not only shimmer but withstand the elements.
- Durability: A smart choice in roof painting not only improves aesthetics but also offers protection against weather damage.
In fact, rejuvenating an older property through roof painting can breathe new life into its façade, attracting discerning buyers who appreciate a well-maintained exterior. This strategic improvement, paired with thoughtful landscaping and exterior touches, could significantly impact first impressions and long-term value.
Increases Property Value
Investing in roof painting can lead to a noticeable increase in property value, making it an appealing option for homeowners looking to enhance their investment. A well-maintained roof demonstrates care and attention to detail, which can attract buyers in a competitive property market. According to experts from the National Federation of Roofing Contractors, a good quality roof paint application can significantly extend the lifespan of your roof.
Research indicates that properties with well-preserved roofing systems can see an increase in value of up to 15% or more, especially when potential buyers are considering the ongoing maintenance costs associated with home ownership. A fresh coat of paint not only improves aesthetic appeal but also adds a layer of protection against the elements, which can prolong the lifespan of the roof itself.
In a recent case study, a homeowner who invested approximately £5,000 in roof painting reported a resale value increase of £30,000, illustrating the efficacy of this strategic investment. The correlation between roof condition and property value cannot be overstated; buyers often perceive a well-painted roof as a sign of overall property integrity.
- Enhanced curb appeal
- Increased energy efficiency
- Extended roof longevity
Ultimately, by choosing to paint the roof, homeowners not only enhance their property's aesthetics but also bolster its marketability, yielding significant returns on their investment.
Protects Roof From Damage
One of the primary benefits of roof painting is its ability to protect the roof from various forms of damage, including weathering, moss growth, and moisture infiltration. By applying a high-quality roof coating, homeowners can effectively waterproof their roofs, extending their lifespan and reducing the need for costly repairs.
These protective coatings act as a formidable barrier against extreme temperatures, ultraviolet radiation, and biological growth, all of which can severely compromise the integrity of the roofing structure. Over time, the absence of such protective measures may lead to premature ageing, resulting in cracks, leaks, and ultimately a hefty financial burden for repairs or replacements.
- Ignoring roof care can allow debris accumulation, which retains moisture and encourages mould growth.
- Failure to address minor issues often escalates into significant problems that require extensive, invasive repairs.
- Professional roof painting not only enhances the appearance of a home but also provides necessary resistance to environmental threats.
Thus, investing in professional roof services is essential to safeguarding one’s property and ensuring long-term durability and performance.
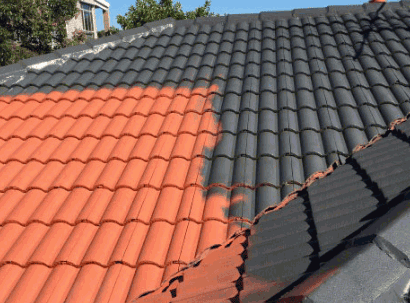
Factors Affecting The Cost Of Painting A Roof
The cost of painting a roof can vary significantly based on several factors, which homeowners should consider when planning their renovation budget. These factors include roof size and pitch, the type of roofing materials used, and the condition of the roof prior to painting.
Furthermore, professional expertise, labour costs, and the chosen materials for the job also play a crucial role in determining the overall price.
Roof Size And Pitch
The size and pitch of a roof are significant determinants of the cost of painting, as larger and steeper roofs typically require more materials and labour to paint effectively. Professional contractors often charge based on the total area that needs to be covered, making these factors critical considerations during the planning phase.
For instance, consider a roof measuring 232.26 square metres with a pitch of 12:12. This steep incline not only increases the difficulty of accessing every angle but also necessitates a greater volume of paint due to overspray and dripping. In contrast, a flat roof of the same area might require less material due to its accessibility and lower likelihood of paint loss during application. Engaging professional services, like can help mitigate these challenges, ensuring optimal efficiency and cost-effectiveness.
The choice of paint can vary according to roof dimensions and incline. A high-performance, thicker paint may be optimal for steep roofs to withstand the elements, but it comes at a higher cost. As a result, budget planning should take into account:
- Roof size
- Pitch and accessibility impact
- Material selection based on performance
- Labour costs due to complexity of the job
To summarise, accurately estimating costs requires a careful evaluation of these elements, which directly influence both the resource allocation and the total expense incurred during the painting project.
Look into: Is Roof Spraying Worth It
Type Of Roofing Material
The type of roofing material significantly impacts the overall cost of painting, as different materials have varying requirements for preparation and application.
For instance, asphalt shingles, metal roofs, and tiles each necessitate specific products and techniques, which can affect both the price and the durability of the finished result. Products like Climashield™ and Smartseal are popular options that offer robust protection against weathering and moss growth.
When considering roofing materials, it is essential to understand how they influence not only the aesthetic appeal but also the financial aspect of painting projects. Different surfaces require tailored approaches:
- Asphalt shingles: These roofing types often require a primer to ensure proper adhesion, which could increase material costs.
- Metal roofs: Due to their slick surface, a specialised metal-friendly paint and sometimes additional labour for preparation are necessary, raising the overall expense.
- Tile roofs: If your choice is tile, the unique texture demands more effort in applying paint evenly, further driving up costs.
Understanding these factors can help homeowners make informed decisions that balance quality and budget in their roofing projects.
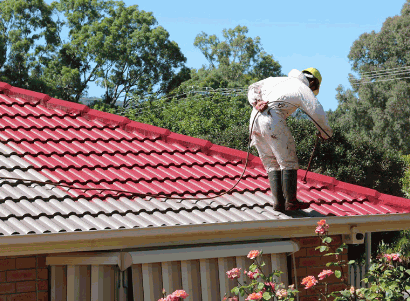
Condition Of The Roof
The existing condition of the roof is a crucial factor in determining the cost of painting; roofs that require repairs or significant preparation work will incur higher costs before the painting process can even begin. Homeowners should assess their roof's condition prior to painting to avoid unexpected expenses.
Evaluating the roof's integrity not only influences financial planning but also impacts the longevity and effectiveness of the paint job. Ignoring necessary repairs can lead to more severe issues down the line, potentially damaging both the roof and the home’s interior.
Here’s a checklist of common issues to inspect:
- Leaks: Check for any signs of water damage or leaks.
- Tile Condition: Inspect for missing, cracked, or curled tiles.
- Granule Loss: Look for excessive granule loss on asphalt tiles.
- Moss or Algae: Identify any growth that might require treatment.
- Flashing Issues: Ensure that flashing around vents and chimneys is intact.
Addressing these concerns ensures that the roof is not only ready for painting but also protects the investment in the property overall. For instance, Ellie Rimmer and James Lawrence, experts from the UK, recommend regular inspections to avoid costly repairs.
Number Of Coats Needed
The number of coats required for a successful roof painting project directly affects the overall costs; typically, more coats mean higher material and labour expenses. A professional assessment can help determine the appropriate number of coats based on the current condition and desired finish of the roof.
When considering the number of paint layers, it is essential to recognise how varying finishes and the existing state of the roof can influence this decision. For instance, a smooth surface generally requires fewer layers, while a textured or weathered roof may necessitate additional coats to achieve a uniform appearance. Assessing the roof's condition helps ensure both aesthetic appeal and durability. Consulting with professionals affiliated with the Paint Research Association can provide valuable insights.
- Pros of Multiple Coats:
- Enhanced durability against weather elements.
- Improved colour vibrancy and depth.
- Better concealment of imperfections.
- Cons of Multiple Coats:
- Increased costs for materials and labour.
- Longer drying times between layers.
- Potential for peeling if not applied correctly.
While layering provides benefits, a thorough inspection can help evaluate the necessity of multiple coats, ensuring an effective balance between quality and cost.
Labour Costs
Labour costs are a significant part of the overall expense of roof painting, as skilled professionals who handle the installation may charge varying rates based on their experience, location, and the complexity of the project. Homeowners should factor in these costs when budgeting for roof painting services.
Understanding the nuances of labour expenses across different regions can greatly influence the decision-making process. For instance, contractors in urban areas may command higher fees due to increased demand and the cost of living, while those in rural settings might offer more competitive pricing.
Moreover, the contractor's expertise plays a crucial role; specialists in high-quality materials or unique architectural styles may set premium rates. To strike a balance between quality and affordability, homeowners should consider the following strategies:
- Researching local contractor rates through reviews and referrals
- Obtaining multiple quotes to compare pricing and services
- Evaluating the experience level of the contractors to understand the value they provide
By carefully assessing these factors, homeowners can ensure they receive a fair price without compromising on the quality of their roof painting project.
Additional Services
Additional services such as cleaning, repairs, and priming can add to the overall costs of roof painting, but they are often necessary to ensure a successful and long-lasting finish.
When embarking on a roof painting project, homeowners should recognise the significance of these processes not only as a means to enhance aesthetic appeal but also to maintain structural integrity.
Proper surface preparation through cleaning is critical, as it removes dirt, mould, and debris that can hinder paint adhesion. Using primer on unpainted roofs or repairing damaged sections helps achieve a smooth and even application, ultimately prolonging the roof's lifespan. Evaluating these aspects can lead to better budget planning, potentially saving costs on future repairs due to neglect.
- Cleaning: Essential for achieving good adhesion.
- Repairs: Addressing issues before painting prevents further damage.
- Priming: Enhances paint durability and finish quality.
Each of these components contributes not only to the immediate visual improvement but also ensures optimal performance and longevity of the roof system, making them wise investments in the overall maintenance strategy.
What Is The Average Cost Of Painting A Roof?
The average cost of painting a roof can range from £400 to £4,500, depending on various factors such as roof size, type of materials, and prevailing market rates.
For instance, a three-bedroom house typically falls within this price range. Homeowners should seek quotes from professionals to get a clearer picture of the potential costs involved based on their specific circumstances.

DIY Vs Hiring A Professional
Regarding roof painting, homeowners often face the decision of whether to undertake the project themselves (DIY) or hire a professional contractor. While DIY projects may save on labour costs, they require significant expertise, and the right materials, and can pose risks if not executed properly, making hiring a professional a compelling option for many.
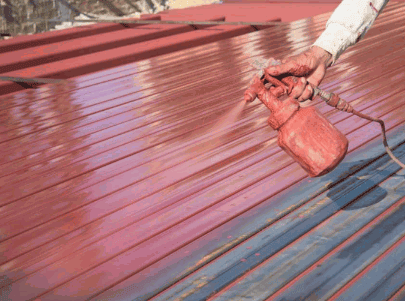
Pros And Cons Of DIY Roof Painting
Undertaking a DIY roof painting project offers several benefits, including cost savings and the satisfaction of completing the work yourself, but it also presents challenges such as safety risks and the potential for substandard results without professional expertise.
Homeowners considering this endeavour will find that DIY roof painting can significantly reduce financial outlay compared to hiring professionals. This approach not only allows individuals to save on labour costs but also enables them with a sense of accomplishment when successfully transforming their space. According to a study published in April 2022, DIY projects can save up to 30% of the total costs.
There are important factors to consider:
- Skill Level: The complexity of roof painting can vary greatly, requiring a good understanding of techniques and materials.
- Safety Risks: Working at heights poses inherent dangers, and precautions must be taken to mitigate accidents.
- Time Commitment: DIY projects often require more time than anticipated, which can lead to frustration.
While there are tangible economic benefits, potential DIYers should thoroughly assess their capabilities and the risks involved to ensure a successful outcome.
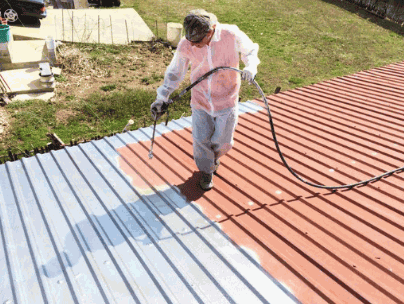
Benefits Of Hiring A Professional
Hiring a professional for roof painting comes with numerous benefits, including the assurance of quality workmanship, access to specialised materials, and valuable expertise that can lead to a more durable and aesthetically pleasing finish. Many professional services offer warranties, providing homeowners with peace of mind.
In contrast to DIY approaches, opting for professionals not only ensures optimal results but also prioritises roof safety. Experienced painters are equipped with the right tools and techniques, enabling them to navigate heights and slippery surfaces effectively. By utilising industry-grade materials and advanced methods, such as Smartseal products, they can enhance the longevity of the paint job, ensuring that it withstands the elements for years to come.
The efficiency gained from hiring experts means that projects are completed in a timely manner, saving homeowners from the hassle of prolonged disruption.
- Enhanced quality and aesthetics
- Access to specialised tools
- Long-term cost savings on repairs
- Satisfaction through warranties offered
All these factors culminate in a smart investment that pays off in durability and visual appeal, making it a wise choice for any homeowner.

How To Choose The Right Roof Painting Contractor
Selecting the right contractor for roof painting is vital to achieving the best results, and homeowners should consider factors such as experience, customer reviews, and obtaining multiple estimates to gauge market rates. A well-chosen contractor can make a significant difference in the quality and longevity of the roof paint application.
When embarking on this journey, it’s essential to ensure that the contractor possesses the necessary credentials and licensing, as this demonstrates a commitment to industry standards and regulations. Begin by:
- reviewing online testimonials from previous clients, which can provide insights into the contractor's work ethic and reliability.
- It’s also beneficial to request references that can help assess their dependability and quality of service.
- Looking for contractors with a solid background in roof painting specifically ensures that they have the specialised knowledge required for optimal results.
Consider contractors affiliated with the National Federation of Roofing Contractors for additional credibility. Always ask about their warranty and insurance coverage, as these elements are pivotal in safeguarding your investment and maintaining peace of mind throughout the process.

How To Save Money On Roof Painting Costs?
Homeowners looking to save money on roof painting costs can explore various strategies, ranging from DIY approaches to budgeting effectively for professional services. Checking platforms like Facebook Marketplace for deals on materials and tools can also help reduce costs.
By planning ahead and prioritising essential tasks, such as cleaning and repairs, homeowners can reduce overall expenses while ensuring a successful painting project.
Roof spraying is a method that can significantly enhance the longevity and efficiency of a roof. This article provides an overview of roof spraying, detailing its functionality and the various advantages it offers, including damage prevention, improved energy efficiency, and enhanced aesthetic appeal. Additionally, it examines the different types of roof coatings available, and the associated costs, and offers guidance on selecting a reputable roof spraying company. Explore the reasons why roof spraying could be a valuable investment for your property.

What Is Roof Spraying?
Roof spraying is a specialised technique involving the application of roof coatings, such as thermal insulation and thermal roof coatings, to enhance the performance and lifespan of roofs. This process not only protects the roof from moisture and moss growth but also improves energy efficiency and overall roof appeal, making it a popular choice among homeowners looking to maintain their roofs effectively. Regular roof inspections can further ensure that any potential issues are addressed promptly.
Roof spraying involves using advanced roof technology to ensure complete coverage and optimum results, ultimately extending the life of the roof and providing better insulation for the home. This advanced approach also includes roof sealing for enhanced protection.

How Does Roof Spraying Work?
Roof spraying works by applying a specialised roof coating to the surface of the roof, which is usually preceded by a thorough cleaning, often involving pressure washing to remove dirt and debris. This step is crucial for enhancing roof insulation and ensuring the roof's lifespan.
This method is executed by qualified roofing professionals who ensure that the coating adheres properly and provides optimal protection against roof deterioration and moisture issues. Regular roof cleaning services further help in maintaining the integrity of the coating.
Depending on the type of coating selected, the application can significantly enhance the roof's ability to reflect heat, thus improving energy efficiency for the entire house. Incorporating loft insulation can further improve overall home insulation.
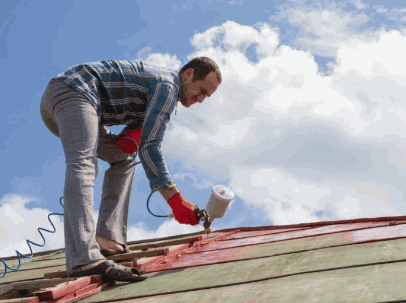
What Are The Benefits Of Roof Spraying?
The benefits of roof spraying are numerous, making it a wise investment for homeowners looking to enhance their property's roof performance and aesthetics.
By applying a protective roof coating, homeowners can prevent roof damage and deterioration caused by environmental factors while also improving the overall energy efficiency of their homes. Additionally, roof spraying can enhance roof appeal and value, contributing to the long-term maintenance and longevity of the roof. This process often involves roof surveyors to assess the condition and ensure the best approach is taken.
This treatment not only addresses existing issues but also safeguards against future roof problems.
Prevents Roof Damage
One of the primary advantages of roof spraying is its ability to prevent roof damage, which can arise from harsh weather conditions, moss growth, and moisture accumulation.
By creating a protective barrier, roof spraying significantly reduces the risk of long-term deterioration and extends the life of roofing materials. This preventive measure is crucial, as it shields against elements such as ultraviolet rays, heavy rain, and snow accumulation, which are notorious for causing wear and tear on roofs.
Regular maintenance and timely treatment not only preserve structural integrity but also ensure the aesthetic appeal of the property.
- Enhances resistance to moss and algae growth
- Protects against leaks and water ingress
- Reduces the need for expensive repairs
Investing in roof spraying promotes overall roof longevity, making it an essential maintenance practice for homeowners and property managers alike.
Take a look: How To Spray Roof For Moss
Increases Energy Efficiency
Roof spraying significantly increases energy efficiency by applying reflective roof coatings that help maintain a cooler roof temperature, reducing the need for excessive air conditioning.
By employing advanced thermal insulation technology, these coatings effectively minimise the heat absorption of roofs, which directly translates into lower energy costs. When the sun’s rays hit a traditional roof, much of that heat penetrates into the building, forcing cooling systems to work overtime to maintain a comfortable indoor environment.
On the other hand, the specialised reflective surfaces of these coatings bounce a significant portion of sunlight away, thereby enhancing energy savings and fostering a more regulated indoor temperature. This not only contributes to unprecedented efficiency but also spans a wide array of benefits:
- Reduced need for frequent air conditioning adjustments.
- Prolonged lifespan of cooling equipment due to less strain.
- Enhanced comfort levels in living and working spaces.
The application of these energy-efficient coatings stands out as a crucial strategy for homeowners and businesses aiming to cut costs while sustaining an optimal indoor climate.
Enhances Aesthetic Appeal
Another crucial benefit of roof spraying is its ability to enhance roof aesthetics, giving the home a fresh and well-maintained appearance. Engaging with roofing companies can help homeowners choose the best options for their specific needs.
When considering the diverse types of roofing materials—such as asphalt shingles, metal, or tiles—each can dramatically benefit from appropriate roof coatings. These enhancements not only protect the roof but also elevate its visual appeal, making the entire property more inviting. Regular roof painting also plays a role in maintaining the roof's look.
Homeowners may notice that applying a reflective coating can help diversify the colour palette and texture choices, enhancing overall kerb appeal.
- For asphalt shingles, a dark coat can create a striking contrast against the home’s cladding.
- Metal roofs can benefit from bright, reflective coatings, which serve to keep the home cooler while improving shine.
- Tile roofs become even more pronounced and elegant with lighter, softer tones that align with modern architectural trends.
Choosing the right coating is essential as it not only impacts the appearance but also contributes to long-term maintenance, reinforcing the need for a thoughtful approach to roof aesthetics. Roof recommendations from professionals can guide these choices effectively.
Saves Money On Cooling Costs
By improving energy efficiency through roof spraying, homeowners can significantly save on cooling costs during the warmer months.
Not only does this energy-efficient solution reduce immediate expenses, allowing homeowners to allocate funds towards other essential aspects of their household budget, but it also promotes a healthier, more comfortable living environment.
Regular maintenance of the roof, particularly through innovative treatments like spraying, can yield long-term savings. By preventing deterioration and extending the lifespan of roofing materials, homeowners can avoid costly repairs and replacements in the future.
- Enhanced insulation leads to reduced energy consumption.
- Lower monthly bills contribute to improved financial stability.
- Reducing the frequency of major repairs means more significant savings over time.
Investing in this type of roof treatment not only boosts equity in the property but also increases its overall market value, making it a wise financial decision.

What Are The Different Types Of Roof Spraying?
There are several different types of roof spraying techniques, each utilising distinct roof coatings tailored to meet specific roofing needs.
The most common types include:
- Acrylic roof coatings
- Silicone roof coatings
- Polyurethane roof coatings
Each offering unique benefits in terms of durability, flexibility, and moisture protection. Understanding these options helps homeowners choose the right solution for their roof maintenance and insulation needs. Inquiring about roof claims and potential government grants can also assist in making informed decisions.
Acrylic Roof Coating
Acrylic roof coatings are a popular choice for roof spraying due to their versatility and ease of application, making them ideal for various types of roofs.
These coatings offer significant benefits, especially when it comes to enhancing roof maintenance and improving the overall aesthetics of a building. One of the primary advantages is their exceptional UV resistance, which helps to shield roofs from the damaging effects of the sun's rays. This protection not only extends the lifespan of the roof but also minimises the need for frequent repairs.
- Reflective properties: Acrylic coatings reflect sunlight, reducing heat absorption and keeping the building cooler, which ultimately leads to lower energy costs.
- They create a seamless waterproof barrier, preventing leaks and water damage.
- These coatings are available in various colours, offering homeowners the ability to customise.
Using acrylic roof coatings not only contributes to long-term durability but also adds an attractive appearance to rooftops, making them a wise investment for any property owner.
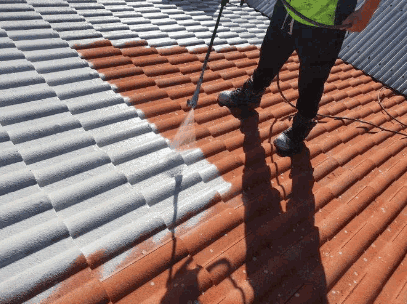
Silicone Roof Coating
Silicone roof coatings are known for their exceptional waterproofing and moisture protection capabilities, making them a reliable option for roof spraying.
These innovative coatings provide a seamless barrier that not only prevents leaks but also contributes to the overall durability of the roofing system. When considering roof protection, it’s essential to note that these coatings exhibit remarkable longevity, often lasting up to 20 years or more with proper maintenance.
- They have the ability to reflect sunlight, thereby reducing cooling costs and enhancing roof efficiency.
- These coatings are also highly resistant to extreme weather conditions, including heavy rain, hail, and ultraviolet rays, making them an ideal choice for roof tiles.
- They are designed to expand and contract with temperature fluctuations, ensuring a tight seal over time.
By choosing silicone roof coatings, property owners can invest in a long-term solution that safeguards against moisture intrusion and roof moisture while enhancing energy efficiency.
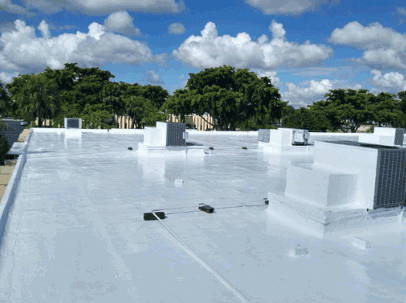
Polyurethane Roof Coating And RENOTEC Roof Coating
Polyurethane roof coatings offer superior durability and flexibility, making them suitable for areas prone to foot traffic and roofing challenges.
These advanced coatings provide a resilient barrier that not only withstands the rigours of harsh weather conditions but also protects against UV damage, preventing premature degradation of the roofing substrate. This means that, regardless of environmental stressors, the structural integrity of the roof is significantly enhanced. By investing in polyurethane roof coatings, property owners can enjoy:
- Longer lifespan: The coatings extend the roof lifespan, reducing the frequency of costly replacements.
- Energy efficiency: They reflect sunlight, which can help lower cooling costs.
- Seamless application: The fluid application reduces the risk of leaks caused by seams and joints compared to traditional roofing materials.
Ultimately, routine roof treatments and maintenance with these coatings pave the way for a more sustainable and cost-effective roofing solution.

How Much Does Roof Spraying Cost?
The cost of roof spraying can vary widely based on several factors, including the type of roof, the condition of the existing roofing materials, and the specific type of roof coating chosen. Engaging roof professionals can help in making informed decisions.
Homeowners should consider the long-term investment that roof spraying represents, as it can lead to significant savings in roof maintenance costs and improve energy efficiency. This includes evaluating the potential for roof replacement savings.
Factors Affecting Roof Costs
Several factors can affect the cost of roof spraying, such as the size of the roof, the complexity of the work, and the type of coating selected.
Understanding these elements is essential for homeowners, as each significantly influences the overall expense associated with the spraying process.
For instance, the size of the roof not only determines the amount of material needed but also affects the labour costs, as larger areas take more time to complete. The complexity of the work—such as the slope and accessibility of the roof—can lead to variations in pricing; roofs that are harder to reach may require specialised equipment and additional safety measures.
The choice of coating plays a pivotal role; certain materials, which offer enhanced durability and energy efficiency, may come with a higher initial investment.
As such, homeowners should seek guidance from roofing professionals to obtain accurate estimates and gain insights into the long-term benefits of different options, including roof tiles cleaning and maintenance.
Average Cost Of Roof Spraying
The average cost of roof spraying generally ranges from £1,500 to £4,000, depending on the factors previously mentioned, including the type of roofing material, the size of the roof, and the specific services being offered by the contractor.
Homeowners looking to invest in roof maintenance will find that prices can fluctuate based on various considerations. Typically, the cost per square metre can range from £0.15 to £0.50, with averages falling around £0.30. It’s essential to compare different services to determine the best fit for one’s needs.
Here’s a brief overview of what you might encounter:
- Basic cleaning and spraying: £1.50 - £2.50 per square metre
- Advanced protective coatings: £3.00 - £4.00 per square metre
- Full service with repairs: £4.00 - £6.00 per square metre
When reaching out to various roofing companies, homeowners should ensure they examine what is included in the quoted price, including warranties and follow-up services. Making informed decisions can lead to significant long-term savings in roof maintenance.

Is Roof Spraying Worth It?
Determining whether roof spraying is worth the investment involves considering the long-term savings, protection against weather damage, and overall impact on roof value and roof investment.
Homeowners who choose roof spraying often find that the benefits far outweigh the costs, particularly in terms of extending the lifespan of their roofs and enhancing property aesthetics.
Additionally, roof spraying can prevent costly repairs associated with roof deterioration, making it a sensible choice for many homeowners. Avoiding roof scams is also crucial in this process.
Long-term Savings
One of the primary reasons homeowners choose roof spraying is the potential for long-term savings on roof maintenance and roof repair costs.
By investing in roof spraying, homeowners can significantly reduce the frequency and cost of repairs, which often come with typical wear and tear over time. This specialised treatment not only enhances the roof's durability but also acts as a protective barrier against elements like harsh weather, UV rays, and algae growth.
As a result, the lifespan of the roofing material is extended, which means homeowners can avoid the expense and hassle associated with premature roof replacement. In fact, utilising roof spraying can lead to:
- Lower repair costs due to fewer issues arising.
- Decreased frequency of necessary maintenance interventions.
- Enhanced energy efficiency, contributing to lower utility bills.
Thus, adopting roof spraying as a proactive measure can lead to substantial financial savings in the long run, making it a wise choice for prudent homeowners.
Protection Against Weather Damage
Roof spraying provides essential protection against weather damage, ensuring that roofs can withstand harsh conditions and remain durable over time.
By applying a specialised protective coating, the integrity of the roofing system is significantly enhanced. This process effectively combats a range of potential weather-related issues, including:
- UV damage: Over time, the sun's rays can deteriorate roofing materials, leading to cracks and leaks.
- Water damage: Heavy rains can cause moisture ingress, which, if left untreated, may result in mould growth and structural decay.
- Wind-related damage: High winds can lift and displace tiles, making roofs vulnerable to further elements.
Engaging with roofing professionals is paramount to ensure the correct application of the spray. Their expertise ensures that the right materials are used and that the coating is evenly distributed, maximising protection and lifespan.
Improved Energy Efficiency
By enhancing thermal insulation, roof spraying significantly improves the energy efficiency of the home, resulting in lower energy bills.
When homeowners invest in measures such as roof spraying, they not only create a more comfortable living environment but also see a noticeable impact on their monthly expenses. Improved thermal management means that the home requires less energy to maintain a consistent temperature, particularly during the sweltering summer months and the chilly winter nights. As a result, energy efficiency becomes a core component of sustainable living.
- Lower reliance on heating and cooling systems
- Reduced carbon footprint
- Enhanced property value
With better insulation, the flow of heat is regulated more effectively, enabling homeowners to enjoy consistent indoor temperatures regardless of external weather conditions. This not only promotes relaxation but also minimises wear and tear on HVAC systems, further amplifying savings over time. By prioritising such energy-efficient upgrades, residents can transform their homes into havens of comfort and efficiency, while simultaneously benefiting their finances.
Increased Roof And Property Value
Investing in roof spraying can lead to an increase in property value, as it enhances the overall aesthetic appeal and structural integrity of the roof.
A well-maintained roof not only boosts visual attractiveness but also represents a significant aspect of the property's investment potential. Many buyers consider the roof's condition as a key factor when purchasing a home, often associating it with long-term costs and future maintenance. Thus,
- Roof spraying helps in preventing damage caused by mould, algae, and other environmental factors.
- As a result, the lifespan of a roof is extended, reducing the need for replacement.
- This not only means savings for homeowners but also reflects positively on overall property valuation, ensuring a higher roof value.
Therefore, by ensuring the roof remains visually pleasing and structurally sound, one fosters an inviting environment, thereby improving the likelihood of a favourable appraisal in the future.
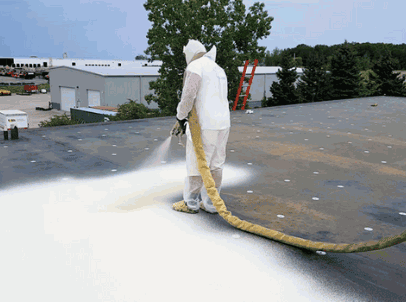
How To Choose A Reliable Roof Spraying Company?
Choosing a reliable roof spraying company is crucial for ensuring high-quality work and optimal results, thus protecting your investment. Homeowners should prioritize companies with a solid reputation, demonstrated expertise, and proper certifications and insurance.
Conducting thorough research and reading reviews can help identify trustworthy roofing companies that use reliable roof treatments, including innovative roofing technology, and techniques.
Research And Read Reviews
Researching and reading reviews are essential steps in choosing a roof spraying company that meets your standards for quality and service. Be wary of roof scamming by checking references and credentials.
To effectively navigate the multitude of options available, one should begin by utilising credible online resources and local directories. Start by identifying multiple candidates through a comprehensive web search or by consulting with friends and family for personal recommendations. Once you have a shortlist, focus on reading customer feedback to gain insight into their experiences.
- Consider looking at dedicated review sites where clients discuss their satisfaction levels.
- Pay attention to responses from the companies, as this can indicate their commitment to customer care and service quality.
- Look for patterns in the feedback—both positive and negative—that can help you assess the reliability and professionalism of the contractors.
By taking these steps, you can confidently select a roof spraying company that aligns with your needs.
Check For Certifications And Insurance
It is important to ensure that the roof spraying company you choose has the necessary certifications and insurance coverage to protect your property and projects.
A reputable roof spraying company not only demonstrates its expertise through various certifications but also provides essential peace of mind to clients through comprehensive insurance policies. These certifications serve as a validation of the company’s qualifications, assuring clients that they are working with skilled professionals who adhere to industry best practices. By selecting a certified provider, clients can feel confident that the work will be carried out efficiently and safely.
Insurance coverage plays a critical role in maintaining client trust. It safeguards against numerous risks associated with property damage or accidents that may occur during the project. Without the presence of adequate insurance, clients could be left vulnerable to significant liabilities, which underscores the necessity of working with a well-insured company that focuses on roof safety.
- Certifications reflect knowledge and expertise in roof spraying techniques.
- Insurance protects clients from financial repercussions related to damage.
- A certified, insured company enhances overall project reliability and trust.

Get Multiple Quotes
Obtaining multiple quotes from different roof spraying companies can help you compare prices and services offered, ensuring you make an informed investment decision.
By evaluating various offers, you can uncover potential differences in not just cost, but also in the quality of workmanship and types of materials used. This degree of comparison allows homeowners to tailor their choices based on their specific needs and budget.
When reviewing these quotes, pay particular attention to the following elements:
- Scope of Services: Examine what is included in each quote, such as preparation work, the type of spray used, and any follow-up services.
- Materials and Products: Inquire about the quality and durability of the products being proposed, as lower-cost options may lead to higher long-term expenses.
- Warranties and Guarantees: Reliable companies should offer assurances on their work, which adds value to the overall investment.
It’s crucial to consider the company’s reputation and previous customer reviews, as the cheapest option may not always provide the best overall value. For example, companies offering cavity wall insulation might provide additional energy savings.
Keeping windows sparkling clean is essential for maintaining a bright and inviting home, and the best window cleaning tools can make all the difference.
But with so many options available, including innovative cleaning solutions and reliable vacuum cleaners, how do you choose the right window cleaner?
This article explores the ins and outs of window cleaners, from what makes a quality product to the ingredients you should avoid, ensuring you have the best cleaning performance.
It also covers different types of cleaners, the best choices for various surfaces, user-friendly features, safety measures, and some DIY solutions.
Get ready to transform your window cleaning routine with effective cleaning products and practical cleaning tips!
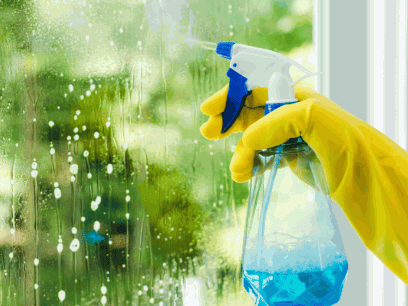
What Is Window Cleaner?
A window cleaner is a specialised cleaning solution or device designed to remove dirt, grime, and streaks from glass surfaces, ensuring a sparkling finish that enhances visibility and aesthetics. Trusted brands like Kärcher and Vileda offer tested window cleaners with remarkable cleaning efficiency.
Utilising modern cleaning tools, such as effective window vacuums and environmentally friendly products, these cleaners not only make the task of cleaning windows easier but also help maintain the longevity of the glass, ensuring quality results.
Trusted brands have developed various formulations and gadgets to cater to different cleaning needs, making window cleaning a doddle for both professional window cleaners and household chores.
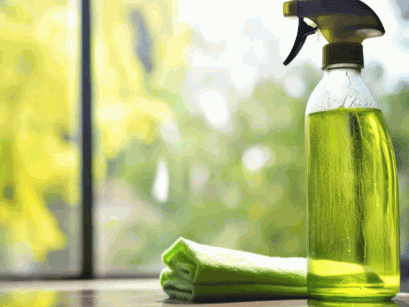
What Makes A Good Window Cleaner?
A good window cleaner is characterised by its cleaning performance, ease of use, and ability to deliver quality results without leaving streaks or residues behind. Quality cleaning tools and cleaning product features enhance the overall experience and visibility in your spaces, making them essential for maintaining a polished look all year round.
When selecting the right tools, it's crucial to consider their user-friendly features, such as ergonomic grips and lightweight designs, which can reduce fatigue during long cleaning sessions, especially when tackling high windows.
Joining online communities can help you access reliable independent reviews from sources like The Independent and Good Housekeeping Institute, allowing you to make informed decisions about the products that suit your specific needs. For instance, brands like Windex and Ecover are renowned for their effectiveness and environmentally friendly ingredients.
Not only do these products cleanse glass surfaces with remarkable clarity, but they also tend to incorporate practical tips for use and cleaning expertise, ensuring that each application delivers optimal results.
Remember to always follow the manufacturer's guidance for the best practices in achieving streak-free finishes and cleaning windows efficiently.
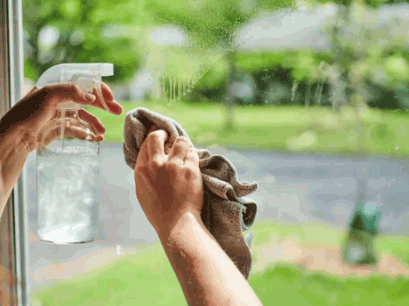
What Ingredients Should Be Avoided In Window Cleaners?
When selecting window cleaners, it’s crucial to avoid certain ingredients that can harm both the environment and the glass surfaces. Products containing harsh chemicals may provide short-term cleaning benefits but can lead to long-term damage and poor cleaning performance. Eco-friendly products that are free from harmful substances not only contribute to safer cleaning techniques but also promote sustainability, making them a preferred choice among trusted brands.
Common harmful ingredients often found in conventional window cleaners include ammonia, which can produce toxic fumes, and phthalates, linked to reproductive health issues. Not only can these chemicals irritate skin and eyes, but they can also negatively impact indoor air quality.
In contrast, eco-friendly alternatives utilise natural ingredients like vinegar and essential oils, which effectively cut through grime while being gentle on surfaces and safe for users and pets alike, promoting cleaning without chemicals.
- Vinegar: A natural degreaser.
- Essential oils: Provide pleasant scents and added cleaning power.
- Biodegradable surfactants: Help lift dirt without leaving toxic residues.
By switching to these safer options, users not only protect their health but also contribute to a healthier planet by choosing eco-friendly products.
What Are The Different Types Of Window Cleaners?
Window cleaners come in various forms, each designed to meet specific cleaning needs, from traditional solutions to innovative window cleaning gadgets. Among the most popular types are portable cleaning tools such as effective window vacuums, which quickly remove moisture and dirt from glass surfaces, and versatile steam cleaners that can also tackle stubborn grime on multiple surfaces, enhancing cleaning efficiency.
Each type offers unique benefits and can be a game-changer for those looking to achieve spotless, sparkling glass with minimal effort, using easy cleaning methods.
Ammonia-based Window Cleaners
Ammonia-based window cleaners are widely recognised for their ability to cut through tough grime and deliver cleaning efficiency, making them a popular choice among both professional and DIY cleaners. These cleaners work by breaking down dirt and residues, often resulting in a streak-free finish on glass surfaces, which is essential for maintaining clear visibility and aesthetics.
While the effectiveness of these cleaners is undeniable, there are certain considerations users should be aware of. For instance, ammonia can produce strong fumes, which may be irritating to the eyes, nose, and throat when inhaled. Safety precautions are crucial; always ensure adequate ventilation when using these products. They can cause damage to certain surfaces, such as wood or fabric, so users must be cautious and read labels carefully.
- Pros: Excellent for tackling stubborn stains.
- Cons: Can be harmful if not used properly.
- Always wear gloves to protect your hands.
- Consider using a diluted solution for everyday cleaning tasks, ensuring cleaning without chemicals.
By implementing these practical cleaning tips, users can maximise the benefits while minimising potential risks associated with ammonia-based cleaners, maintaining cleaning efficiency.
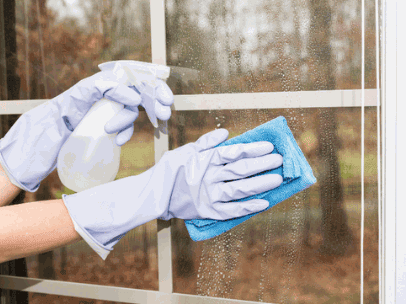
Vinegar-based Window Cleaners
Vinegar-based window cleaners have gained popularity as an eco-friendly alternative for effective cleaning, providing a natural solution that is both safe and efficient. This type of cleaner leverages the acidic properties of vinegar to dissolve dirt and residues, making it a favoured choice for those looking to clean without chemicals while still achieving quality results and sparkling glass.
The effectiveness of vinegar-based cleaners lies in their ability to cut through grime and eliminate streaks, ensuring a crystal-clear finish. Users appreciate how simple it is to prepare these cleaners at home; a common recipe involves mixing one part vinegar with one part water in a spray bottle. Many find that using a microfibre cloth enhances the cleaning process, trapping dust and dirt rather than just pushing it around.
- For optimal results, it is recommended to clean windows on a cloudy day to prevent the solution from drying too quickly.
- Some even add a few drops of washing-up liquid to their mixture for extra cleaning power.
Those who have made the switch to vinegar-based solutions often share their satisfaction, noting improved air quality and an overall fresh feeling in their homes. With these benefits, it is easy to see why this method has gained a loyal following.
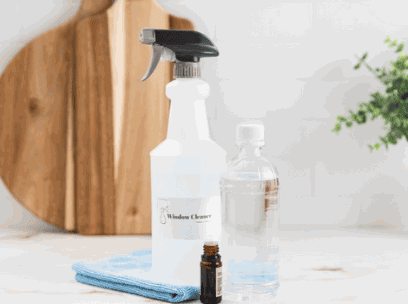
Natural/ DIY Window Cleaners
Natural or DIY window cleaners offer an affordable cleaning option that allows users to create effective cleaning solutions using household items, fostering creativity and sustainability. Common ingredients such as bicarbonate of soda, lemon juice, and cornflour can be combined to develop cleaning techniques that rival commercial products in performance while being eco-friendly and economical.
By opting for these environmentally friendly alternatives, individuals not only reduce their exposure to harsh chemicals found in many traditional products but also contribute to a greener planet. DIY window cleaners are simple to make, allowing everyone to tailor their cleaning solutions based on personal preferences and needs.
Here are some straightforward recipes:
- Basic Vinegar Solution: Mix equal parts of water and white vinegar in a spray bottle. This is great for cutting through grime.
- Lemon Power Cleaner: Combine water with the juice of one lemon and a teaspoon of cornflour for a streak-free shine.
- Essential Oil Infusion: Add a few drops of essential oils such as lavender or tea tree to your vinegar mix for a pleasant scent and added antibacterial properties.
Users can evaluate the effectiveness of these homemade solutions by comparing them directly with their shop-bought counterparts. A quick test on various window surfaces will reveal their cleaning prowess, all while being an enjoyable DIY project.

What Are The Best Window Cleaners For Different Types Of Windows?
Selecting the best window cleaners for different types of windows is essential to ensure effective cleaning and maintenance, as various glass surfaces require tailored approaches for optimal results, using the best window cleaning tools.
Whether you are dealing with standard glass windows, tinted glass, or hard-to-reach areas, understanding the specific needs of each type will help you achieve sparkling glass and enhance your home’s aesthetic appeal with the right cleaning devices.
Professional window cleaners often rely on specialised products and techniques that can significantly improve cleaning efficiency and effectiveness, leveraging modern cleaning tools.
Best Window Cleaner For Glass Windows
The best window cleaner for glass windows is often a solution that combines effective cleaning performance with ease of use, ensuring streak-free results. Popular options include commercial products designed specifically for cleaning glass surfaces, which often feature user-friendly designs that enhance their application and effectiveness in removing dirt and fingerprints, avoiding cleaning residues.
Many users rave about the effectiveness of products like the Mr. Clean Magic Eraser, known for its ability to tackle tough stains without harsh chemicals. Cleaning reviews online frequently highlight its cleaning product recommendations.
- Another standout is Windex, famed for its streak-free shine and availability in convenient spray bottles. It's often mentioned in cleaning reviews and evaluations.
- For a more eco-friendly choice, consider Method's Glass Cleaner, which utilises plant-based ingredients that users appreciate for both performance and sustainability, making it a powerful window cleaner.
These products not only streamline the cleaning process but also receive high marks in user reviews for their quick-drying capabilities and pleasant scents, making routine cleaning less of a chore. Affordable cleaning options and cleaning product evaluations often highlight their benefits.
Find out more: How To Clean Window Glass
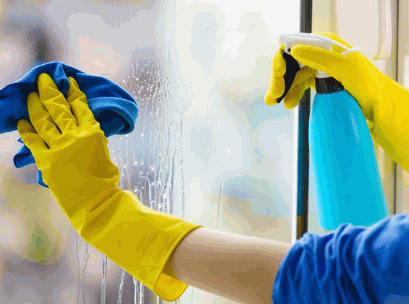
Best Window Cleaner For Tinted Windows
For tinted windows, the best window cleaners are those formulated to clean effectively without damaging the film, ensuring a clear view and maintaining the integrity of the tint. Trusted brands, such as Vileda and Ecover, often provide specialised products that cater to the unique needs of tinted surfaces, combining gentle formulas with effective cleaning techniques.
These cleaners not only enhance the appearance of the windows but also provide a streak-free finish that is vital for optimal visibility while driving. Users often share their satisfaction with products specifically designed for tinted windows, noting how well they remove dirt and grime without leaving any harmful residues.
Here are some key points to consider when selecting these specialised cleaners:
- pH-balanced formulas help preserve the tint’s adhesive and quality.
- Apply with a soft microfibre cloth to prevent scratches.
- Avoid ammonia-based products, which can deteriorate the tint over time.
Many car enthusiasts agree that using such recommended products not only aids long-term maintenance but also enhances the overall aesthetic of their vehicles. Cleaning reviews often commend these products for their cleaning performance tests and high ratings on platforms like Amazon and Argos.
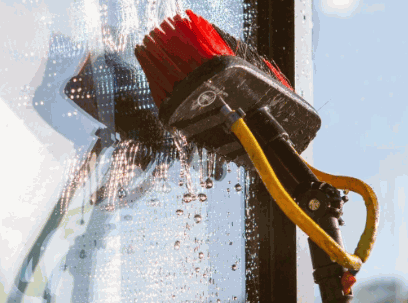
Best Window Cleaner For Mirrors
In terms of cleaning mirrors, the best window cleaners are those that offer a streak-free shine without the need for harsh chemicals, making them safe for everyday use. Many user-friendly products are designed specifically for mirrors, ensuring that users can maintain their reflective surfaces effortlessly and without damaging the glass. Cleaning product choices from brands like Astonish and Mr Muscle are popular among consumers.
To achieve the ideal cleaning experience, it’s worth considering products that boast features like a no-drip formula and easy spray application. These attributes not only make the process smoother but also help in preventing excess liquid from running down the glass, which can lead to streaks. Easy-to-use products like those from Kärcher are often recommended for this purpose.
Here are some reputable options:
- Eco-Friendly Cleaners: These cleaners are not only gentle on the environment but also ensure safety for families and pets.
- Foaming Sprays: A foaming action can better adhere to surfaces, allowing for enhanced cleaning without the mess.
- Microfibre Cloths: Pairing a great cleaner with high-quality cloths can remove dirt and grime effectively, securing that pristine finish.
By selecting the right products, maintaining your mirrors will become a straightforward and efficient task, ensuring that they continue to enhance your space.
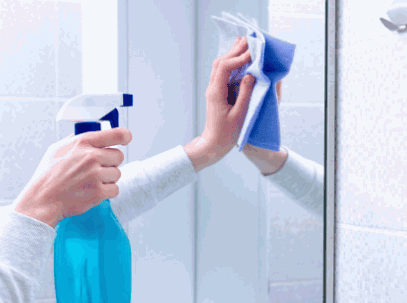
Best Window Cleaner For Hard-to-Reach Windows
For hard-to-reach windows, the best window cleaners often incorporate portable cleaning tools that enable effective access and cleaning from challenging angles. These solutions are designed for convenience and efficiency, allowing both professional window cleaners and homeowners to achieve quality results without compromising safety.
Particularly popular among DIY enthusiasts and professionals alike are products with extendable handles and rotating heads. These features allow users to manoeuvre effortlessly around corners and tight spaces, making tedious cleaning tasks a breeze. Cleaning attachments from brands like Leifheit and Beldray are often recommended for their effectiveness.
- For instance, telescopic window cleaning poles can extend to impressive lengths, allowing one to clean high-rise buildings without the need for scaffolding.
- Innovative squeegee designs that integrate scrubbers make the process even smoother, combining scrubbing and drying in one go.
User experiences often highlight the effectiveness of these tools in maintaining sparkling clear windows, with many noting that the portability of cleaning kits reinforces their ease of use.
Practical tips include using distilled water for streak-free shine and testing new tools on less visible windows to perfect techniques before tackling more prominent displays.

What Are The Safety Measures When Using Window Cleaners?
When using window cleaners, it is vital to adhere to safety measures that protect both the user and the environment, ensuring a safe and effective cleaning experience. Wearing appropriate protective gear, such as gloves and goggles, can safeguard against potential chemical exposure while choosing eco-friendly products can minimise health risks and environmental impact.
Understanding user-friendly features of cleaning supplies can also enhance safety during use.
Proper Ventilation
Ensuring proper ventilation when using window cleaners is essential to minimise the inhalation of potentially harmful fumes and to maintain a safe indoor environment. Good airflow helps dissipate any chemical odours and reduces the risk of respiratory irritation, making it a vital component of effective cleaning techniques.
Maintaining a well-ventilated space is not just a practical consideration but also a key factor in promoting health and safety during the cleaning process. Ventilation is crucial as it allows fresh air to circulate, which helps to dilute any concentrated fumes.
Here are some practical tips to ensure good airflow:
- Open windows and doors to create cross-ventilation.
- Use fans to promote airflow, directing them towards the window to push out contaminated air.
- Consider using air purifiers equipped with HEPA filters that can help capture airborne toxins.
When choosing window cleaners, opt for products labelled as non-toxic or eco-friendly, as these typically have lower levels of harmful chemicals. It’s also a wise idea to test any new product in a small area first to gauge its impact on air quality.
Protective Gear
Wearing protective gear, such as gloves and goggles, is a crucial safety measure when using window cleaners to shield against skin and eye irritation caused by chemical exposure. This simple precaution not only safeguards health but also ensures a more comfortable cleaning experience.
To enhance safety while maintaining your cleaning routine, consider incorporating additional protective items. For instance, using a long-sleeved shirt can protect your skin from drips and splashes, while non-slip footwear ensures stability during high-altitude tasks.
When selecting such gear, keep the following tips in mind:
- Choose gloves made from materials resistant to chemicals, such as nitrile or latex.
- Select goggles that provide a secure fit and prevent any liquids from breaching the eyewear.
- Consider using a face mask if the cleaning solution has strong fumes, ensuring a comfortable atmosphere.
Paying attention to the specific cleaning products being used is essential, as some may require more robust protective measures than others.
Proper Storage Of Window Cleaners
Proper storage of window cleaners is essential to maintain their effectiveness and to ensure safety, especially in households with children or pets. Storing cleaning supplies in a cool, dry place and using child-proof containers can minimise risks and prolong the life of eco-friendly products.
Maintaining an optimal temperature range is crucial. Ideally, window cleaners should be kept between 10°C to 27°C to prevent any chemical degradation or loss of effectiveness. It's wise to check labels for specific instructions on storage.
- Always store these supplies out of reach of children, preferably in locked cupboards.
- Categorise cleaning products to avoid confusion, separating eco-friendly options from harsher chemicals.
- Consider using refillable containers to reduce waste and promote environmental consciousness.
Taking these precautions not only ensures a safer environment but also supports the longevity of the products used.
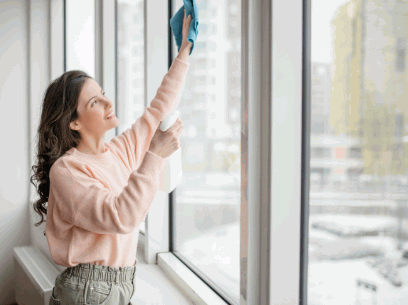
How To Make Your Own Window Cleaner?
Making your own window cleaner is an affordable option that allows you to customise your cleaning solution to meet specific needs while using common household ingredients. Many effective recipes can be created using items like vinegar, lemon juice, or bicarbonate of soda, providing a natural cleaning solution that is both cost-effective and environmentally friendly. Cleaning with vinegar is particularly highlighted by The Independent for its versatility.
Emphasising effective cleaning techniques can help ensure that your DIY cleaner delivers quality results.
Vinegar And Water Solution: A Classic Cleaning Method
A vinegar and water solution is one of the simplest and most effective DIY window cleaners, leveraging the natural cleaning power of vinegar to dissolve dirt and grime without the need for harsh chemicals. This eco-friendly product is not only safe for the environment but also easy to make and use, ensuring that your windows shine with minimal effort. Popular brands like Method and Ecover also offer eco-friendly alternatives.
To create the perfect cleaning mixture, combine equal parts of white vinegar and water, typically one cup of each, in a spray bottle. This simple ratio makes it easy to remember and mix, providing a potent yet gentle solution.
When applying the mixture, it’s best to use a microfibre cloth or a squeegee, as these tools help minimise streaks and ensure a thorough clean without scratching the glass. For optimal results, consider cleaning your windows on a cloudy day to prevent the solution from drying too quickly, which can lead to streaking.
By following these best practices, you can enjoy sparkling windows that truly enhance the beauty of your spaces.
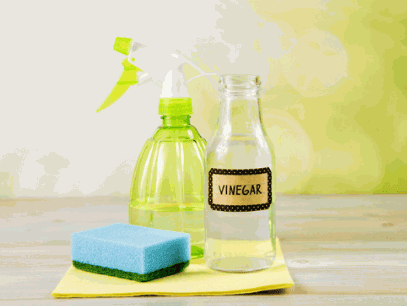
Lemon Juice And Water Solution: A Popular Window Cleaning Method
A lemon juice and water solution is another effective DIY window cleaner that harnesses the natural acidity of lemons to cut through grease and grime while leaving a fresh scent. This easy-to-make cleaner not only offers effective cleaning properties but also serves as a delightful aromatic addition to your cleaning routine. The Good Housekeeping Institute often recommends natural options like this.
To create this powerhouse cleaner, simply mix one part lemon juice with two parts water in a spray bottle. The citric acid in lemon juice not only helps to break down stubborn stains but also acts as a natural antibacterial agent, making this solution both safe and eco-friendly.
When applying the solution, use a microfibre cloth to achieve streak-free results. Lightly dampen the cloth with the mixture and wipe down the windows, making sure to follow a zigzag pattern to cover the surface evenly.
Here are some:
- Tips for Application:
- Apply the solution on cool surfaces to prevent rapid evaporation.
- Wipe with a clean, dry cloth afterward for a brilliant shine.
In comparison to traditional cleaning products, this lemon solution stands out for its affordability and lack of harsh chemicals, ensuring a clean environment without compromising indoor air quality. Retailers such as Amazon, Argos, and Robert Dyas often provide similar natural cleaning agents.
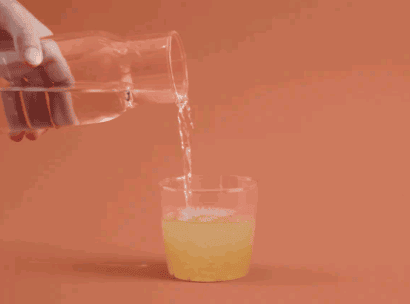
Baking Soda And Water Solution: A Trusted Technique For Cleaning Streak-Free
A bicarbonate of soda and water solution serves as an excellent DIY window cleaner, utilising the mild abrasive properties of bicarbonate of soda to scrub away dirt and residues without scratching the glass. This affordable cleaning option is particularly effective for tackling tough stains and can be combined with other natural ingredients for enhanced cleaning performance. Brands like Mr Muscle and Astonish offer similar effective solutions.
To prepare this cleaning mixture, simply mix three tablespoons of bicarbonate of soda with one litre of warm water in a spray bottle, creating a paste-like consistency that can be adapted based on the required cleaning strength. For added effectiveness, consider incorporating vinegar, which not only amplifies the cleaning power but also leaves windows streak-free.
When applying the solution, follow these tips to maximise results:
- Dampen a cloth or sponge with the mixture before scrubbing to ensure the bicarbonate of soda adheres properly to tougher grime.
- Use a separate microfibre cloth to wipe the surface dry, as this can significantly reduce streaking.
- For outdoor windows, clean during cooler parts of the day to prevent the solution from drying too quickly.
This versatile method is not only easy to prepare but also environmentally friendly, making it a go-to choice for households aiming for a sparkling finish without harsh chemicals. Consider tools from Kärcher and Vileda for optimal application.
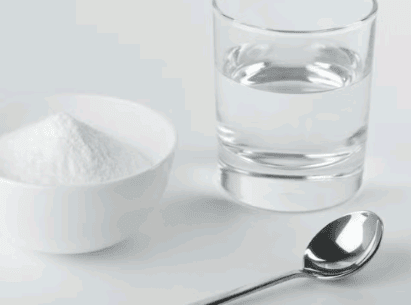
Window blinds, such as Venetian blinds and roller blinds, can transform a room’s ambiance, but they often gather dust and grime over time, emphasizing the need for regular cleaning chores like vacuuming floors and dusting blinds.
Keeping them clean is not just about aesthetics; it’s essential for maintaining air quality and prolonging their lifespan.
This article explores the importance of cleaning window blinds, the consequences of neglecting them, and a variety of types available, including cellular shades and Faux Wood blinds.
You'll also find the materials needed, a straightforward step-by-step cleaning guide, and helpful cleaning tips for ongoing maintenance, like using dish soap and dishwashing liquid.
Dive in to ensure your blinds stay fresh and inviting!
Why Is It Important To Clean Window Blinds?
Cleaning window blinds is an essential household chore that not only enhances the aesthetics of your home but also contributes to a healthier indoor environment. Over time, dust, allergens, and dirt accumulate on blinds, especially in areas like Queens, which may lead to respiratory issues and reduced air quality. Regular tasks such as cleaning windows and washing laundry help keep your environment clean.
According to the Good Housekeeping Institute, regular cleaning is crucial to maintain the function and appearance of various types of blinds such as wooden blinds and fabric blinds. Additionally, a clean living space reflects well on your personal hygiene and creates a welcoming atmosphere for guests.
What Happens If You Don't Clean Window Blinds?
Neglecting to clean window blinds can lead to the accumulation of dirt and allergens, which can pose health risks for individuals with allergies or respiratory issues, complicating their everyday lives and potentially triggering serious health conditions that require medical attention and ongoing management.
For example, those with asthma may find their symptoms exacerbated by the presence of dust mites and mould spores, both of which thrive in dirty blinds. This makes it essential for everyone, especially allergy sufferers, to maintain a regular cleaning schedule.
Here are some common cleaning methods that can effectively remove stubborn stains and ensure a healthier living environment:
- Dusting with a microfibre cloth to capture particles instead of spreading them around.
- Using a vacuum attachment to reach the intricacies of the blinds easily.
- Employing a mixture of warm water and mild detergent for deeper stains when necessary.
Consistent cleaning not only keeps the blinds looking great but also minimises allergens in the air, reinforcing the importance of employing proper cleaning techniques.
Types Of Window Blinds
There are various types of window blinds available, each with its unique characteristics, including:
- vertical blinds
- horizontal blinds
- wooden blinds
- fabric blinds
These require tailored cleaning techniques and specific cleaning products to maintain their appearance and functionality.
Vertical Blinds
Vertical blinds, commonly used for larger windows and sliding doors, require specific cleaning products and techniques to effectively remove dust and dirt, ensuring they maintain their aesthetic appeal and functional integrity over time. Brands like Hillarys and Greenworks offer solutions for these tasks.
In terms of cleaning vertical blinds, choosing the right products is essential. It is advisable to use mild detergents mixed with warm water, along with soft cloths or sponges, to avoid damaging the material.
- Routine maintenance is key; dusting should occur every few weeks, while deeper cleaning might be needed every few months, depending on environmental factors.
- For a quick dust removal, a microfibre duster or a vacuum with a brush attachment can be effective.
Consider using specialised blind cleaning solutions which can help eliminate stubborn grime without harming the texture of the blinds.

Horizontal Blinds
Horizontal blinds, a popular choice for many households, allow for easy dusting and can be maintained with simple cleaning techniques that ensure they remain functional and aesthetically pleasing. By implementing these techniques, one can prolong the lifespan of the blinds, reduce allergens, and keep their living space looking fresh and inviting. Consider using products like Swiffer and Dawn Powerwash Spray for effective cleaning.
To start, gather the necessary materials:
- Microfibre cloths
- Wood or vinyl cleaner
- Warm, soapy water
- A soft brush or vacuum with a brush attachment
Before cleaning, it is advisable to tilt the blinds open, making it easier to reach each slat. Gently wipe down each slat with a microfibre cloth dampened in the soapy water solution, ensuring you catch any dust and debris that may have accumulated.
For stubborn stains, opt for a specialised cleaner suited to the material of the blinds. To prevent future build-up, consider a quick dusting session every week or two.
These simple yet effective habits not only maintain the appearance of horizontal blinds but also keep the environment healthier for you and your family.
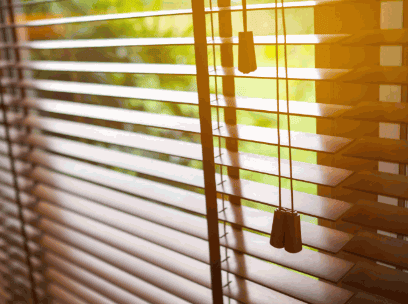
Wooden Blinds
Wooden blinds require a delicate cleaning process to preserve their finish while effectively removing dust and allergens.
To maintain their beauty and functionality, it is crucial to use appropriate cleaning methods and products tailored specifically for wood blinds. Unlike synthetic materials, wood can be sensitive to harsh chemicals and excessive moisture, so using gentle products like those recommended by Architectural Digest is advised.
Start by dusting the blinds with a microfiber cloth or a duster, which will effectively capture dust without scratching the surface. For a deeper clean, use a solution of mild washing-up liquid and warm water, applying it sparingly with a soft cloth. Remember to avoid soaking the wood, as excess water can warp or damage it.
- Use furniture polish occasionally for added shine and protection.
- Avoid commercial cleaners containing ammonia or bleach.
Regular maintenance not only enhances their appearance but also prolongs their lifespan, ensuring your investment remains worthwhile.

Fabric Blinds
Fabric blinds can attract dust and stubborn stains, making regular cleaning essential to maintaining their appearance and ensuring a lasting, fresh look that enhances your home’s aesthetic.
To effectively care for these window treatments, consider using a combination of gentle cleaning solutions and regular maintenance routines, including employing techniques recommended by experts like Yvonne Keal from the Good Housekeeping Institute.
- Begin with a soft brush attachment on a vacuum cleaner or a microfibre cloth to remove loose dust particles.
- For stubborn stains, a mixture of mild soap and lukewarm water can be applied with a soft cloth; always test a small area first to prevent damage.
- When using any cleaning solution, it's advisable to follow the manufacturer’s guidelines for the fabric type.
It’s beneficial to use protective measures, such as avoiding placing blinds in direct sunlight for long periods to prevent fading and discolouration. In doing so, one can prolong the lifespan of their fabric blinds while keeping them looking pristine, as recommended by experts from Hofstra University.

Materials Needed For Cleaning Window Blinds
To effectively clean window blinds, you will need essential materials such as a vacuum cleaner, microfibre cloths, and cleaning solutions like vinegar and washing-up liquid, which provide a comprehensive cleaning approach.
Take a look: What Is The Best Window Cleaner
Vacuum Cleaner
A vacuum cleaner is an effective tool for quickly removing dust from blinds, especially when fitted with a brush attachment, making it a preferred choice for cleaning methods.
Using a vacuum cleaner not only saves time but also enhances efficiency in maintaining the cleanliness of your blinds.
Incorporating the right vacuum attachment can significantly impact results. Here are some tips for choosing the best option:
- Choose a brush attachment specifically designed for delicate surfaces. This helps in preventing damage while ensuring a thorough cleaning.
- Consider a handheld vacuum for tighter spaces, allowing you to reach those tricky angles with ease.
- Look for adjustable suction settings to cater to various materials and dust levels.
By considering these factors, the efficiency of your cleaning routine will be greatly enhanced, providing a fresh and dust-free environment.
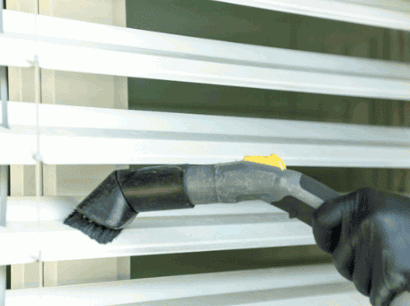
Microfiber Cloth
Microfibre cloths are ideal for dusting and wiping down window blinds due to their ability to trap dust and allergens effectively without scratching surfaces.
This unique material consists of tiny fibres that create a static charge, helping to lift dirt and debris away rather than spreading it around. When using microfibre cloths for cleaning blinds, it is beneficial to adopt a few simple application methods:
- First, gently wrap the cloth around your fingers to create a soft tool that fits snugly into the slats, allowing for efficient cleaning.
- Next, lightly dampen the cloth with a cleaning solution to enhance its dust-attracting properties, preventing finer particles from drifting back into the air.
- For optimal results, ensure cleaning from top to bottom, as this strategy minimises the redistribution of dust.
Maintenance of the microfibre cloths is equally crucial. Wash them in cold water, avoiding fabric conditioners as they can diminish the cloth's effectiveness. Regular cleaning will ensure they maintain their superior dust-trapping capabilities, making them a fantastic and eco-friendly choice for household upkeep.
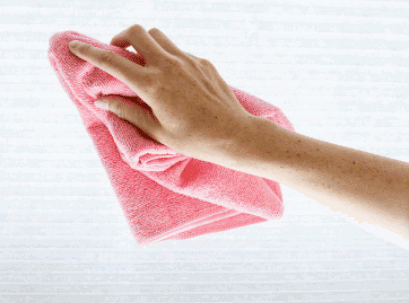
Vinegar Solution
A vinegar solution is an excellent natural cleaner for window blinds, effectively cutting through grime and leaving surfaces streak-free. Not only does this affordable cleaning method minimise the need for harsh chemicals, but it also ensures a safer environment for families and pets alike.
To create the perfect vinegar solution, combine equal parts of white vinegar and water in a spray bottle. This simple mixture can tackle various types of blinds, including fabric, aluminium, and vinyl, making it versatile.
- Gently dust the blinds using a microfibre cloth to remove loose dirt.
- Spray the vinegar solution lightly on the blinds.
- Wipe down each slat with a clean cloth, focusing on any stubborn spots.
The natural acidity of vinegar not only cleans but also acts as a disinfectant, enhancing the overall cleanliness of your living space.
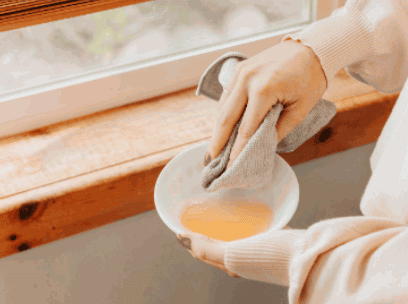
Dish Soap Solution
A washing-up liquid solution can effectively target stubborn stains and provide a thorough cleaning for various types of window blinds.
Creating a washing-up liquid solution is quite simple and can lead to remarkable results. Begin by mixing a few drops of a gentle washing-up liquid with warm water in a bucket. The warm water helps to dissolve grease and dirt more efficiently, making it easier to lift stubborn stains from the blinds.
In terms of application, it’s advisable to use a soft cloth or sponge dipped in the soapy solution, ensuring it’s not overly saturated to prevent drippage. Gently wipe each slat, paying extra attention to any spots that appear to be particularly dirty.
- For tough grime, allow the solution to sit for a minute before scrubbing.
- Always test a small hidden area first to ensure the blinds' material is compatible with the solution.
After cleaning, wipe with a damp cloth to remove any leftover soap and let the blinds air dry for a sparkling finish.
Step-by-Step Guide For Cleaning Window Blinds
This step-by-step guide will help you through the entire cleaning process for window blinds, ensuring that you achieve optimal cleanliness while effectively managing your cleaning tasks.
Dusting The Blinds
The first step in cleaning window blinds is dusting, which can be effectively done using microfiber cloths to capture dust and allergens.
To achieve optimal results, it's essential to approach the task methodically. Begin by selecting a clean microfibre cloth that is slightly damp to enhance its dust-attracting capabilities. Hold the slats of the blinds firmly with one hand while using the cloth in a gentle, wiping motion with the other. This technique ensures that any accumulated dirt is effectively caught and removed without leaving behind residue.
- Tips for thorough cleaning from Yvonne Keal at Hillarys:
- Start from the top and work your way down to avoid resettling dust on already cleaned areas.
- For horizontal blinds, wipe each slat individually, repositioning the cloth to cover all surfaces.
- Use a ladder or step stool if needed to reach higher blinds safely.
Following these guidelines will help keep window blinds looking pristine while minimising allergens in your home. Consider using a Swiffer for quick touch-ups.
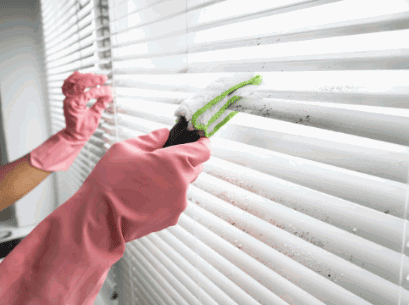
Vacuuming The Blinds With Tools
After dusting, vacuuming the blinds with a vacuum cleaner will remove any remaining dust and debris, providing a thorough cleaning.
Utilising a vacuum cleaner not only enhances the aesthetic of your blinds but also contributes to a healthier living environment. Employing the right attachments is crucial; consider using a crevice tool to effectively reach into corners and crevices where dust tends to accumulate.
Here are some techniques to ensure a meticulous cleaning process:
- Turn the blinds: Angle them fully open to allow for easy access.
- Use the right suction: Adjust the settings on your vacuum to avoid damaging delicate materials.
- Ventilate: Open nearby windows to circulate air, making it easier to see dust floating away.
Regular maintenance, including vacuuming, will prolong the life of the blinds and keep them looking as good as new.
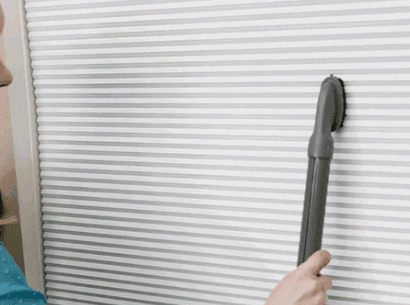
Wiping Down With Vinegar Solution
Using a vinegar solution is a crucial step in the cleaning process, as it helps dissolve grime and leaves the blinds sparkling clean, valuable for cleaning Venetian blinds, Faux Wood blinds, or Pleated blinds, enabling homeowners to maintain the fresh and inviting indoor environment without relying on harsh chemicals.
To properly apply the vinegar solution to the blinds, mix equal parts water and white vinegar in a spray bottle. Lightly mist the blinds, focusing on the areas with more buildup. Use a soft cloth or a microfibre duster to gently wipe each slat, following the direction of the blinds. The vinegar solution not only cleans but also eliminates odours, leaving your home smelling fresh.
After cleaning, it’s important to rinse or dry the blinds to prevent any vinegar smell from lingering. Here are some tips from Jodhaira at Hofstra University:
- Wipe with a damp cloth to remove any excess vinegar.
- Allow the blinds to air dry by leaving them open.
- If necessary, use a clean, dry cloth to speed up the drying process.
By following these steps, you can enjoy the multitude of benefits this natural cleaner offers while ensuring your blinds regain their pristine condition.
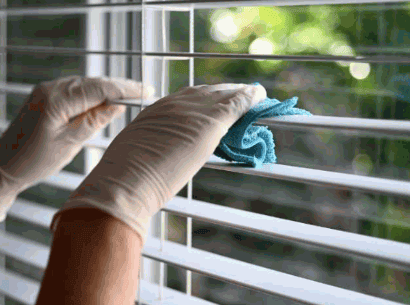
Deep Cleaning With Dish Soap Solution
For a thorough clean, especially for stubborn stains, a washing-up liquid solution can be applied to deep clean the blinds.
This simple yet effective method not only revitalises the appearance of blinds but also aids in maintaining their longevity. To begin, prepare a solution by mixing warm water with a few drops of your favourite washing-up liquid or Dawn Powerwash Spray. The warm water helps to loosen any grime, while the liquid cuts through grease.
- Soaking Method: For more stubborn dirt, use a microfibre cloth soaked in the mixture.
- Gently wipe the surfaces, allowing the solution to penetrate the stains.
- After soaking for several minutes, rinse with clean water using another cloth.
For lighter cleaning needs, a simple rinse with the soap solution followed by thorough drying can work wonders. Always ensure the blinds are completely dry to prevent any moisture damage.
Tips For Maintaining Clean Window Blinds
Maintaining clean window blinds is easier with consistent cleaning tips and a routine that incorporates regular dusting and quick cleaning methods. Consider products like Greenworks or Dishwashing liquid for effective maintenance.
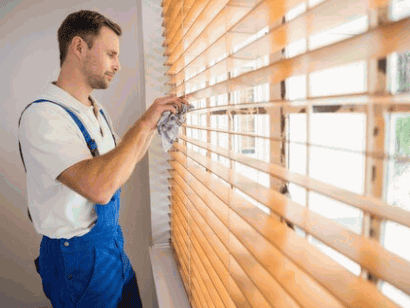
Cleaning windows goes beyond mere aesthetics; it enhances your home's appearance and prolongs the life of your window frames.
Whether you're looking to banish streaks or maintain clarity, understanding the right tools and techniques is essential.
This guide covers the importance of window cleaning, the best tools to use, and step-by-step instructions for various window types, ensuring you avoid common cleaning mistakes.
Find window cleaning tips for maintaining that sparkling finish, ensuring your windows stay pristine all year round.
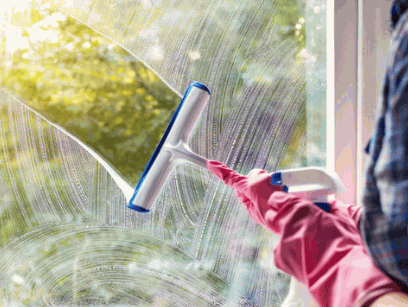
Why Is It Important To Clean Window Glass?
Cleaning window glass is essential not only for aesthetic reasons but also for improving natural light, enhancing your home's ambience, and extending the lifespan of your windows. Dirty windows can accumulate grime, dust, and fingerprints, which can obstruct your view and negatively impact the overall appearance of your home.
Regular cleaning helps maintain window integrity, prevents deterioration, and ensures proper functionality of window treatments. Furthermore, using effective cleaners like distilled vinegar or a baking soda mixture can promote safe cleaning practices, making it a crucial part of home cleaning routines.
Learn more: How To Clean Window Blinds

What Tools Do You Need For Cleaning Window Glass?
To effectively clean window glass, having the right tools is crucial. Essential tools include a reliable glass cleaner, which can be a commercial product or a homemade solution using distilled vinegar, baking soda, or lemon juice, and cleaning equipment like a squeegee for a streak-free finish.
Additionally, a microfibre cloth is essential for dust removal and polishing glass surfaces without leaving fluff behind, perfect for achieving window shine.

What Are The Different Types Of Window Glass Cleaners?
Regarding cleaning window glass, several types of cleaners are available, each with its unique benefits. Commercial glass cleaners are widely used for their convenience, but many homeowners opt for natural alternatives like vinegar cleaner or rubbing alcohol to achieve a streak-free finish while ensuring safe cleaning practices. These DIY cleaners, made from household items, are not only cost-effective but also environmentally friendly, providing effective cleaning solutions without harsh chemicals, such as Invisible Glass Cleaner or E-Cloth Window Cleaning Kit.
In comparing the two approaches, it's essential to consider factors such as effectiveness and safety.
While commercial products often contain powerful solvents and fragrances that can swiftly tackle tough grime, they may irritate sensitive skin or respiratory systems. On the other hand, homemade cleaners typically utilise ingredients like vinegar, bicarbonate of soda, and water, which are generally safe and non-toxic.
- Pros of Commercial Cleaners:
- Quick and efficient
- Readily available
- Designed specifically for tough stains
- Cons of Commercial Cleaners:
- Contains harsh chemicals
- Can cause allergies or irritations
- More expensive long-term
- Pros of Homemade Cleaners:
- Eco-friendly
- Inexpensive and effective
- Customise your fragrance
- Cons of Homemade Cleaners:
- It may require more elbow grease
- Not always effective on heavily soiled surfaces
Ultimately, the choice between commercial and homemade cleaners depends on individual preferences, cleaning needs, and whether a cleaning expert's advice is followed.
What Are The Essential Cleaning Tools?
Essential cleaning tools for window maintenance include a high-quality squeegee, which is crucial for achieving a streak-free finish, and microfibre cloths that effectively remove dust and fingerprints from glass surfaces. Having a variety of cleaning supplies on hand, such as vinegar solution or baking soda paste, gives you the power to you to tackle different cleaning tasks efficiently.
To ensure a comprehensive approach, consider these additional essential tools:
- Bucket: Essential for holding cleaning solutions, a sturdy bucket aids in mixing and transporting your cleaning supplies, preventing spills.
- Scrubber: A soft-bristle scrubber helps to loosen dirt and grime before the squeegee takes over, ensuring a more thorough clean.
- Extendable Pole: For hard-to-reach windows, an extendable pole with an attachment can save considerable time and effort.
- Window Cleaning Solution: A dedicated solution, either commercial or homemade, ensures the best results as it cuts through grease without leaving residue.
Incorporating these tools into your routine not only promotes a polished appearance but also enhances the lifespan of the glass, making each cleaning session more effective. By utilising these essential tools, the quest for spotless windows becomes a manageable task that aligns with advice from the Good Housekeeping Institute.
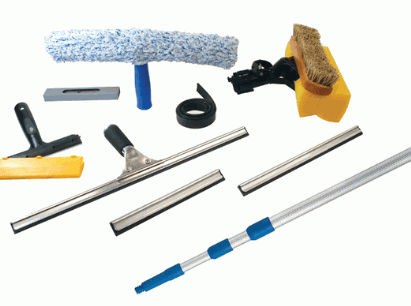
How To Prepare For Cleaning Window Glass?
Preparing to clean window glass involves a systematic approach to ensure efficiency and optimal results. Start by gathering all necessary cleaning supplies and tools, including a squeegee, microfibre cloths, and your chosen cleaning solution, whether it is a vinegar mixture, soapy solution, or commercial glass cleaner.
Additionally, remove any items obstructing access to the windows, such as window screens or furniture, to facilitate a thorough cleaning process that adheres to safe cleaning practices.
What Are The Safety Measures To Take?
Safety measures are crucial when cleaning window glass to prevent accidents and ensure effective cleaning. Always ensure that you have a firm footing, use a stable ladder or platform if cleaning high windows, and avoid using harsh chemicals that could harm your health or the environment. Opt for a vinegar cleaner or other safe cleaning solutions made from household items like cornstarch, and wear gloves if necessary to protect your skin.
Plus a sturdy ladder, consider using a spotter to hold the base or to provide additional support, which can significantly enhance window cleaning safety. Always check the ladder's condition before use, ensuring that it is free from any defects.
Regarding chemical handling, prioritize those that are eco-friendly and non-toxic; this not only protects your wellbeing but also maintains a safer environment for all.
- Wear protective eyewear when spraying any cleaning solution.
- Ensure adequate ventilation if using any chemical products.
- Store all cleaning supplies safely, out of reach of children and pets.
Physical safety is just as paramount; remember to lift heavy cleaning tools with your legs and not your back. By following these basic precautions and adopting safer cleaning solutions, window maintenance can become a much more enjoyable and hazard-free task.
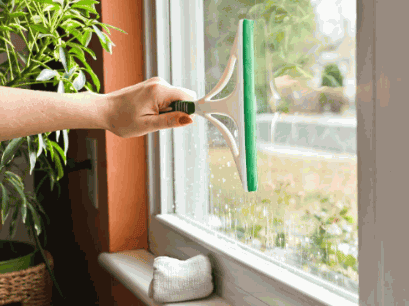
What Is The Best Time To Clean Window Glass?
Utilising advice from experts can enhance your cleaning strategy.
The best time to clean window glass is typically on a cloudy day, as this prevents direct sunlight from causing streaks and allows for better visibility of smudges and dirt. Early morning or late afternoon can also be ideal, as temperatures are cooler, reducing the chances of cleaning solutions drying too quickly during the cleaning process. This timing aligns with the effective cleaning methods recommended by cleaning experts.
Opting for these specific conditions can significantly improve the overall outcome of the task. When window cleaning occurs on a cloudy day, the absence of harsh sunlight makes smudges and other imperfections more easily noticeable, thereby enabling a thorough and effective cleaning. During early morning hours or late afternoons, the mild temperatures not only enhance the performance of cleaning products but also safeguard the surfaces from extreme temperature fluctuations that could affect the integrity of the glass.
- Humidity levels also play a crucial role; moderate humidity can help maintain wetness, ensuring that the cleaning solution works its magic.
- Avoiding windy conditions prevents dust and debris from settling on freshly cleaned windows.
By strategically timing the cleaning process, one can ensure that every window shines beautifully, providing a clearer view and enhancing kerb appeal.
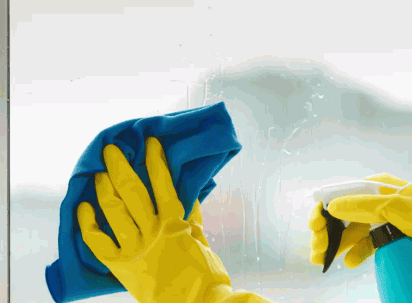
How To Clean Window Glass Step-by-Step?
Cleaning window glass step-by-step ensures thoroughness and a streak-free finish, making the process efficient and effective.
- Start by removing any dirt or debris from the window panes using a dry microfibre cloth.
- Prepare a cleaning solution, which could be a vinegar mixture or a soapy solution.
- Apply the cleaner to the glass.
- Scrub gently with a sponge or cloth.
- Rinse thoroughly with clean water.
- Finish by drying the glass with a squeegee or soft cloth.
Step 1: Remove Any Dirt Or Debris From The Window
The first step in cleaning window glass is to remove any dirt or debris accumulated on the window panes. Using a dry microfibre cloth or a soft brush, gently wipe away loose dust, cobwebs, and other debris to prepare the surface for cleaning.
Not only does this preliminary action ensure a clearer view, but it also plays a crucial role in preventing scratches during the actual cleaning process. Neglecting to remove this surface debris may lead to unwanted scratches, compromising the integrity of the glass.
For effective dirt removal, it is recommended to:
- Start from the top of the window and work your way down.
- Use a soft brush to dislodge stubborn debris without scratching.
- Ensure the cloth used is clean and dry to avoid applying any additional dirt.
This attention to detail sets the stage for an efficient and thorough cleaning, maintaining the clarity and aesthetic of the glass.
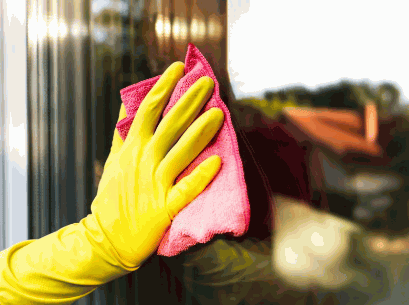
Step 2: Prepare The Cleaning Solution Using DIY And Natural Cleaning Methods
Preparing the cleaning solution is crucial for achieving a streak-free finish on window glass, whether you opt for a DIY cleaner or commercial options.
Among the various options, many prefer making a vinegar-based cleaning solution, which not only cleans but also disinfects effectively. To create this mixture, simply combine equal parts distilled vinegar and warm water in a spray bottle, providing an economical approach to cleanliness. If they are facing particularly stubborn grime, a soap solution consisting of mild detergent diluted in warm water can be exceptionally beneficial. For a more refreshing alternative, mixing two tablespoons of lemon juice with a litre of water offers both cleaning properties and a pleasant scent.
- Vinegar Mixture: 240 ml distilled vinegar + 240 ml warm water
- Soap Solution: 30 ml mild detergent + 1 litre warm water
- Lemon Juice Cleaner: 30 ml lemon juice + 1 litre water
By using these natural ingredients, not only will they ensure a sparkling clean finish, but they will also embrace eco-friendly choices in their cleaning habits, promoting window care with minimal environmental impact.
Step 3: Apply The Cleaning Solution To The Glass Including Window Tracks
Applying the cleaning solution to the glass is key to achieving a thorough cleaning. Use a spray bottle to evenly distribute your chosen cleaning solution over the window surface, focusing on areas with heavy grime or fingerprints for optimal cleaning.
To ensure the best results, it’s essential to maintain a systematic approach while applying the cleaning solution. Begin by thoroughly shaking the spray bottle to mix the solution, allowing for maximum efficacy. Next, hold the bottle approximately 30 centimetres away from the glass surface. This distance helps in achieving an
- even distribution
- preventing over-saturation
- reducing drips
which can often lead to streaks.
Consider the type of product you are using. High-quality glass cleaners can significantly enhance your results and protect against future smudges. Ensure coverage extends to the edges to avoid any build-up of dirt in commonly neglected areas. Always wipe in a circular motion using a microfibre cloth, which is gentle on the glass yet effective in lifting stubborn residues.
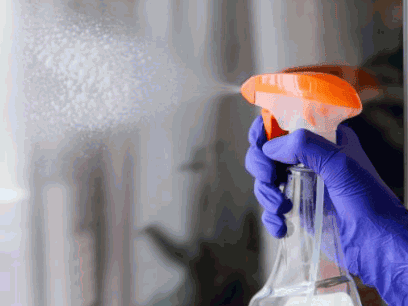
Step 4: Scrub The Glass With A Sponge Or Soft Cloth For Effective Residue Removal
Once the cleaning solution is applied, the next step is to scrub the glass gently with a sponge or soft cloth. Using a microfibre cloth is highly recommended as it effectively lifts dirt without scratching the glass surface. Cleaning windows can be a satisfying task when approached with the right techniques, ensuring a streak-free finish that enhances visibility and aesthetics.
When scraping away grime, it’s essential to maintain gentle pressure and utilise circular motions. This method not only minimises streaks but also ensures comprehensive coverage. To tackle stubborn spots, consider soaking a corner of your cloth in the cleaning solution and allowing it to rest on the blemish for a minute before scrubbing. This extra dwell time helps to break down tough residues, making them easier to remove.
- Utilise a squeegee for larger surfaces to avoid drips and enhance window polishing.
- For tricky areas, a soft-bristled brush can be very effective.
- Always wring out excess liquid from your cleaning cloth to prevent sloppy results.
- Consider using Casabella Microfiber Glass Cloths for an impeccable finish.
Incorporating these techniques will not only simplify the job but also ensure that the glass is left sparkling clean, inviting more natural light into your space.
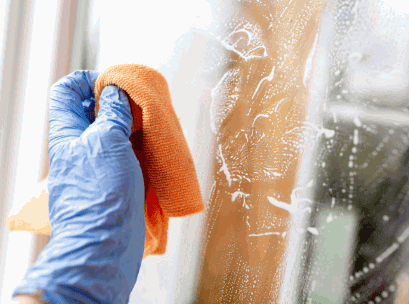
Step 5: Rinse The Glass With Clean Hot Water
Rinsing the glass with clean hot water is vital to ensure all cleaning solution residues are removed and to enhance the effectiveness of fingerprint cleaner.
To achieve a truly spotless finish, it is crucial to follow up your initial cleaning with a thorough rinse. Begin by filling a bucket or bowl with fresh, clean water, ideally using distilled water to prevent any mineral deposits from forming on the surface.
Using a clean sponge or cloth dampened with this water, gently wipe down the windows once more. This method not only helps in eliminating any remaining soap or vinegar residue left after scrubbing but also minimises streaking.
- Avoid rinsing with tap water when possible; minerals can lead to unsightly spots.
- For optimal results, use a soft squeegee after rinsing to remove excess water.
- Ensure the drying cloth is lint-free to prevent any residual fibres from clinging to the glass.
By taking these steps, you ensure a gleaming, streak-free finish that enhances the clarity and brightness of your windows.
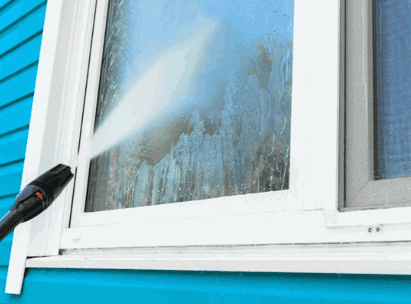
Step 6: Dry The Glass With A Squeegee Or Soft Cloth And Essential Oils
The final step in the cleaning process is to dry the glass using a squeegee or a soft cloth, which is essential for achieving a streak-free finish. Start at the top corner and pull the squeegee downwards in a straight line, wiping the blade with a cloth after each pass to ensure optimal results.
To amplify the effectiveness of drying glass surfaces, consider using essential oils for a pleasant scent and follow a few best practices.
- First, ensure the glass is clean and free from loose debris, as this can lead to unsightly scratches.
- Second, consider using a high-quality squeegee that fits comfortably in your hand. A rubber blade will glide effortlessly and remove water quickly.
- Those using a cloth should opt for microfiber to trap grime and absorb moisture without leaving lint behind.
Work in sections and dry promptly to prevent water spots from forming. By following these guidelines, not only will the windows sparkle, but you'll also avoid common pitfalls that can undermine your hard work.
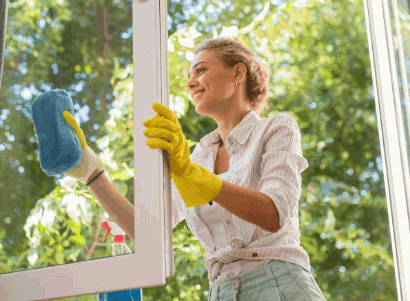
How To Clean Different Types Of Window Glass And Maintain Window Care?
Different types of window glass require tailored cleaning methods to ensure optimal results and maintain their integrity. For instance, tinted glass may need gentler cleaning solutions, while frosted glass can accumulate debris more quickly and require more frequent maintenance.
Understanding the distinct characteristics of each type of glass is essential for effective cleaning practices, as recommended by the Good Housekeeping Institute.
Tinted Glass
Cleaning tinted glass requires special attention to preserve its colour and integrity. Opt for a mild cleaning solution, such as a vinegar mixture, and avoid harsh chemicals that could damage the tint. Always use a soft cloth or sponge to scrub, ensuring you apply gentle pressure to prevent scratches.
Regarding maintaining the clarity and appearance of tinted glass, employing a few key strategies can make all the difference. Users should remember that proper care is essential not only for aesthetic reasons but also to prolong the life of the tinting material.
Here are some best practices, suggested by experts:
- Choose products specifically designed for tinted windows, as they often contain gentle ingredients that won't harm the film.
- Avoid using abrasive cleaners or scrubbers, as these can lead to permanent scratches and reduce the film's effectiveness.
- It is advisable to clean the glass during cooler parts of the day to prevent the cleaning solution from drying too quickly, which can leave streaks.
- Consider applying a protective coating formulated for tinted surfaces after cleaning to help repel dirt and grime.
By following these guidelines, individuals can ensure their tinted glass remains not only beautiful but also functional for years to come.
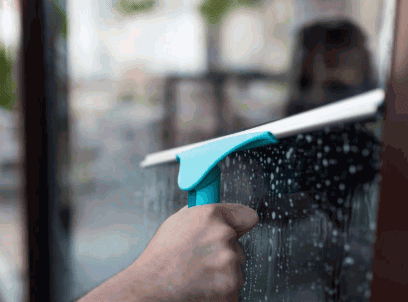
Frosted Glass Cleaning Hacks
Frosted glass can trap more dirt and fingerprints than clear glass, necessitating more frequent cleaning to maintain its appearance. Use a vinegar cleaner for effective residue removal and apply using a soft cloth to ensure a gentle touch that won't scratch the surface.
One of the specific challenges associated with cleaning frosted glass surfaces is their textured finish, which can accumulate grime in uneven pockets, making them difficult to clean thoroughly. To tackle these challenges, consider implementing a few effective strategies:
- Regular Maintenance: Schedule frequent cleanings to prevent major build-up.
- Use the Right Tools: A microfiber cloth or sponge works better than rough fabrics.
- Opt for a Dual Action Cleanser: Pair vinegar with warm water for additional effectiveness.
By incorporating these tips, one can ensure that frosted glass remains in pristine condition while avoiding issues common in cleaning home appliances.
Stained Glass
Cleaning stained glass requires a delicate approach to avoid damaging the artwork while ensuring cleanliness. Use a soft, damp cloth with a gentle cleaning solution such as distilled water mixed with a bit of mild soap to effectively remove grime without harming the glass.
Stained glass, renowned for its breathtaking artistry, also demands careful consideration during maintenance to preserve its beauty and integrity. It is essential to avoid abrasive cleaners or scrubbing brushes that could scratch the surface. Instead, the use of non-toxic solutions or a DIY cleaner is highly recommended for optimal care.
- Always test any cleaning solution on a small, inconspicuous area before applying it to the entire piece.
- Consider using a solution that specifically mentions its compatibility with stained glass.
- Regular dusting with a soft feather duster can help reduce the build-up of grime, making thorough cleaning easier.
Routine inspections can help spot potential issues such as cracked lead or loose glass, which may require professional attention. By adopting these practices, one can maintain the splendour of stained glass for years to come.
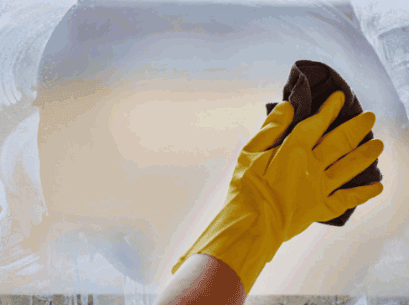
Tempered Glass
Toughened glass is generally more durable than standard glass, but it still requires proper cleaning to maintain its clarity. Using an effective cleaner like a vinegar mixture, scrub gently with a microfibre cloth, such as those found in a Casabella Microfiber Glass Cloths set to avoid scratches, ensuring that no residue remains after cleaning.
To achieve pristine results, consider incorporating the following effective cleaning methods tailored specifically for this resilient material:
- Prepare a solution: Mix equal parts white vinegar and water in a spray bottle for a natural yet potent cleaner that effectively cuts through grime.
- Choose the right tools: Opt for soft sponges or lint-free cloths, as these materials will not leave scratches or lint behind, maintaining that clear and bright appearance.
- Spot test: Always test your cleaning solution on a small, inconspicuous area first to ensure compatibility with the glass surface.
- Dry properly: After cleaning, dry the glass with a squeegee or a clean, dry cloth to prevent streaks and ensure no moisture lingers on the surface.
Incorporating these methods not only enhances the durability of toughened glass but also extends its lifespan, making maintenance a simple yet rewarding task.

Double-Pane Glass
Cleaning double-glazed glass presents unique challenges due to the sealed nature of the units. It’s essential to clean the exterior surface thoroughly and, if accessible, the interior using a mild cleaning solution like a window cleaner to prevent moisture build-up between the panes.
When dealing with moisture trapped between the layers, it’s crucial to understand that traditional cleaning methods may not suffice. If condensation appears, the integrity of the seal might be compromised, allowing air and moisture to linger.
In such cases, seeking professional intervention is often the best course of action to ensure that the longevity of the window is maintained. Regular maintenance not only enhances the aesthetic appeal of your home but also prevents potential damage down the line. Here are a few strategies:
- Use a vacuum cleaner with a small attachment to remove any dust from the edges.
- Consider desiccants if advised by professionals to absorb moisture.
- In severe cases, window replacement may be necessary.
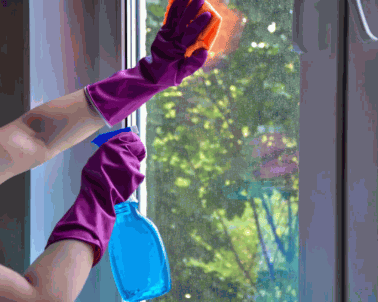
How To Maintain Clean Window Glass?
Maintaining clean window glass involves a combination of regular cleaning and proper care to keep windows in excellent condition. Frequent cleaning helps to prevent the build-up of grime and dirt while using safe cleaning products like homemade vinegar or bicarbonate of soda solutions enhances long-term window maintenance.
Establishing a cleaning schedule ensures windows stay clear all year round.
Regularly Clean Windows
Regularly cleaning windows is essential to preserving their clarity and extending their lifespan. Establishing a cleaning schedule, ideally every month or seasonally helps prevent dirt from accumulating and makes cleaning easier in the long run.
When considering window maintenance, it's important to realise that neglected windows can develop long-term damage, such as etched glass or stubborn stains, which become increasingly difficult and costly to remove.
Incorporating a few straightforward practices into your routine can significantly elevate the overall appearance of your home. Here are some benefits of regular window cleaning:
- Clarity: Clean windows provide a clear view and allow more natural light into your space.
- Longevity: Keeping windows clean helps to extend their lifespan by preventing damage.
- Cost-effectiveness: Regular maintenance reduces the chance of requiring professional services for significant repairs.
Ultimately, by prioritising this simple maintenance task, you facilitate easier future cleanings and enhance the overall aesthetic of your home.
Use Protective Coatings
Using protective coatings on window glass can significantly reduce the accumulation of dirt and grime, making maintenance easier. These coatings can enhance the window's resistance to weather effects and help maintain its clarity, much like using an Invisible Glass Cleaner for longer periods.
Several types of protective coatings are available that cater to different needs and preferences.
- Hydrophobic coatings offer water-repellent properties, causing rainwater to bead up and roll off, taking dirt along with it.
- Low-E glass coatings reflect infrared light, improving energy efficiency while protecting against UV rays that may fade interiors.
- Anti-graffiti coatings make it easier to remove stubborn stains and graffiti without damaging the glass.
- Tinted films provide added privacy and can reduce glare, making indoor spaces more comfortable.
By incorporating these specialised coatings, property owners can not only preserve the aesthetic appeal of their windows but also minimise the frequency of cleaning, saving both time and effort.
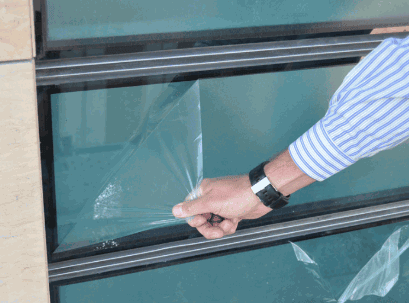
Clean Windows In The Correct Order
Cleaning windows in the correct order is essential for achieving optimal results without missing any spots. Start with the exterior sides of the windows, then proceed to the interior, ensuring a systematic approach that maximises cleaning efficiency.
To maintain clarity and shine, it’s crucial to use the right tools and products. First, gather all necessary supplies including a glass cleaner, microfibre cloths, a squeegee, and a bucket of warm, soapy water. This preparation not only saves time but also enhances the final outcome.
- Begin by removing dust and debris from the window frame and sill.
- Next, apply the cleaner in a zig-zag pattern to ensure even distribution.
- Use the squeegee from top to bottom, wiping the blade with a clean cloth after each pass.
By adhering to this sequence, individuals can achieve streak-free and spotless windows while minimising the risk of having to redo any sections.
Avoid Harsh Chemicals
Avoiding harsh chemicals when cleaning windows is crucial for both your health and the longevity of your windows. Opt instead for safe cleaning solutions, such as vinegar, bicarbonate of soda, or commercially available products free from harmful substances.
Using natural cleaning products not only protects the environment but also ensures that your living space remains free from toxic residues. Many people overlook the potential harm that traditional cleaners can cause, not just to the surfaces they treat, but also to the quality of indoor air. Embracing alternative cleaning options can significantly reduce exposure to allergens and irritants.
- Consider mixing equal parts of water and vinegar for an effective non-toxic cleaner, as recommended by the Good Housekeeping Institute.
- Bicarbonate of soda acts as a gentle abrasive, perfect for removing stubborn stains.
- Look for eco-friendly brands that prioritise sustainability in their formulas, such as Invisible Glass Cleaner.
By making these small changes in cleaning habits, one can ensure that both the windows and health are well cared for.
Inspect For Any Damage
Regularly inspecting windows for any signs of damage, perhaps consulting experts like Cloudy2Clear for guidance, is essential for effective maintenance and prevention of future issues. Look for cracks, chips, or any leaks in the seals, as these can affect both the performance and appearance of the windows.
When undertaking this critical task, homeowners should keep an eye out for several key indicators that can signal underlying problems. Areas to check include:
- Physical Damage: Look closely for any visible cracks or chips that could lead to further deterioration.
- Seal Integrity: Ensure that the seals around windows are intact, as compromised seals can lead to draughts and energy loss.
- Moisture Accumulation: Regularly inspect for condensation between panes, as this can indicate a seal failure.
- Operating Mechanism: Verify that windows open and close smoothly without any sticking or resistance.
Addressing these issues promptly not only enhances the durability of windows but also improves energy efficiency. Consider simple cleaning tips, such as using a soft cloth and gentle window cleaner, to maintain both their clarity and functionality.
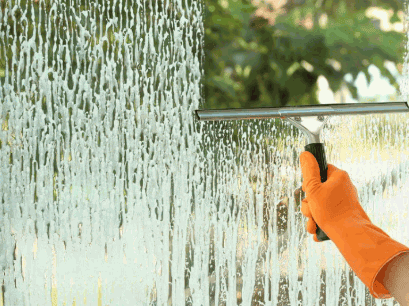
Are you looking to enhance your outdoor space with stylish, durable furniture? Resin wicker patio furniture might be just what you need.
This versatile option combines the beauty of traditional wicker with modern materials, offering a range of benefits that make it perfect for any setting.
We will explore what resin wicker is made of, its advantages, how it compares to other materials and tips for caring for it.
Plus, discover the various styles and reputable brands that can transform your patio into a cozy oasis.
Get ready to elevate your outdoor experience!

What Is Resin Wicker Patio Furniture?
Resin wicker garden furniture is a popular choice for creating stylish and functional outdoor living spaces, combining aesthetic appeal with durability. Made predominantly from synthetic rattan, this type of furniture is designed to withstand the elements while maintaining its charm, making it ideal for gardens, patios, and bistro sets.
Brands like Primrose and Leisuretouch-Rattan offer a wide variety of options, ensuring that homeowners can find the perfect pieces to enhance their outdoor areas. Resin wicker furniture not only provides comfort but also complements a range of garden styles.
What Is Resin Wicker Made Of?
Resin wicker is primarily made from synthetic materials such as High-Density Polyethylene (HDPE) and PVC, which are engineered to mimic the appearance of natural wicker while offering enhanced durability and weather resistance.
These materials not only provide a stunning aesthetic that can complement any outdoor setting, but they also bring numerous advantages over traditional wicker.
For instance, resin wicker is resistant to fading, cracking, and peeling, meaning it can withstand exposure to harsh sunlight and inclement weather without losing its charm. Unlike natural wicker, which requires extensive maintenance including regular cleaning and treatment to prevent deterioration, the synthetic variants require only minimal care, often just a quick wipe down to maintain their beauty.
This ease of maintenance ensures that the garden furniture remains in top condition, allowing homeowners to enjoy their outdoor spaces without the hassle that comes with upkeep.
Learn more: Can You Paint Resin Patio Furniture

What Are The Benefits Of Resin Wicker Patio Furniture?
Resin wicker patio furniture offers numerous benefits that make it an ideal choice for outdoor living spaces, including durability, weather resistance, low maintenance, lightweight design, and versatile aesthetics that cater to various styles and preferences.
Durable And Long-lasting
One of the standout features of resin wicker patio furniture is its durability, crafted to withstand various environmental conditions without compromising its structural integrity or aesthetic appeal. This exceptional resilience allows it to remain vibrant and functional throughout the years, making it a wise investment for any outdoor space.
Constructed from high-quality synthetic materials, resin wicker is designed to resist fading, cracking, and peeling, even in the harshest weather conditions. This ability to endure various climates—from scorching summer heat to bitter winter cold—means that users can enjoy their outdoor furnishings year after year, regardless of where they live.
- In regions with high UV exposure, this type of wicker will not become brittle or discoloured, ensuring that it retains its beautiful appearance.
- Similarly, in areas with heavy rainfall or humidity, the materials used in resin wicker are often treated to be water-resistant, preventing mould and mildew buildup.
Such durability provides peace of mind for homeowners, allowing them to host gatherings or enjoy quiet moments outside without worrying about weather-related damage. Resin wicker furniture exemplifies how thoughtful engineering and quality materials can lead to enduring outdoor solutions.
Weather-resistant
Resin wicker is inherently weather-resistant, allowing it to endure rain, sun, and fluctuating temperatures without fading or deteriorating, making it a perfect option for outdoor living spaces.
This durability is a key advantage for homeowners looking to create inviting, long-lasting outdoor environments. Unlike traditional materials such as natural wicker or wood, which may suffer from mould, rot, or fading over time, resin wicker remains vibrant and intact regardless of the weather conditions. It effectively resists harsh elements, making it suitable for various climates, from humid coastal areas to dry desert regions.
- Natural wicker is prone to wear and tear.
- Wood furniture requires frequent maintenance.
- Metal options often rust or corrode when exposed to moisture.
In contrast, resin wicker combines aesthetic appeal with practical functionality, providing a comfortable, stylish solution for all outdoor furniture needs.
Low Maintenance
One of the major advantages of resin wicker patio furniture is its low maintenance requirements, as synthetic materials do not require regular upkeep like natural wicker or wood, allowing homeowners to enjoy their outdoor spaces without the constant worry of repairs or extensive cleaning efforts.
Unlike traditional wicker or wooden furniture, which can warp, crack, or fade when exposed to the elements, resin wicker offers durability and resistance to moisture and UV rays. This means that owners can simply rinse their furniture with water and mild soap to remove dirt and debris.
Here are some helpful care tips:
- For light cleaning, a soft cloth and soapy water will suffice.
- In the case of stubborn stains, a gentle scrub with a nylon brush can help.
- To maintain its appearance, store furniture indoors during harsh winter conditions.
In comparison, wooden furniture may need regular sanding, sealing, and painting, making resin wicker a more convenient choice for those seeking durability and ease of maintenance.
Lightweight And Easy To Move
The lightweight nature of resin wicker patio furniture makes it easy to move and rearrange, allowing homeowners to adapt their outdoor living spaces according to their needs and preferences.
This flexibility is particularly advantageous when entertaining guests, as it enables quick modifications to seating arrangements or dining setups, ensuring everyone has a comfortable spot.
Imagine hosting a family gathering and, with a simple lift, you effortlessly shift the seating to create an inviting circle around a fire pit. When thunderstorms threaten, being able to swiftly relocate furniture to a sheltered area can protect it from potential damage.
Homeowners can also effortlessly reconfigure their spaces to accommodate various activities such as yoga sessions or children’s outdoor playdates. The ability to transform outdoor environments seamlessly enhances not only functionality but also enjoyment, making the most out of every sunny day and creating memorable experiences.
Versatile Design Options
Resin wicker garden furniture comes in a wide variety of styles and colours, providing versatile design options that can complement any outdoor living space, from contemporary to traditional themes.
The range is truly remarkable, as it spans various designs including sleek modern lines, rustic charm, and even tropical looks that evoke a beachy feel.
Whether you prefer bold colours or muted tones, there's something to suit every taste.
- For a chic contemporary garden, consider deep blues and greys.
- For a cosy traditional patio, earthy greens and browns can enhance warmth.
- Fun, vibrant shades can energise spaces perfect for entertaining.
Resin wicker pieces may feature unique configurations like sectionals or single lounge chairs that adapt seamlessly to any layout.
This flexibility allows individuals to craft personalised outdoor retreats that reflect their style and functionality needs.

How Does Resin Wicker Compare To Other Materials?
When comparing resin wicker to other materials such as natural wicker, metal, and wood, it becomes clear that each material has its own unique set of benefits and drawbacks, making the choice largely dependent on personal preferences and specific uses.
Resin Wicker Vs. Natural Wicker
Resin wicker differs from natural wicker in terms of durability, maintenance, and resistance to the elements, making it a more practical choice for outdoor furniture.
In contrast to traditional materials, which can suffer damage from moisture, sunlight, and temperature fluctuations, resin wicker offers an impressive array of advantages. This synthetic option is crafted to withstand the rigours of outdoor living, meaning it won’t fade, crack, or deteriorate over time. To truly understand why one might prefer resin, it’s essential to consider various elements:
- Care: Resin wicker requires minimal upkeep; a simple rinse with water or a gentle wipe is often enough. Natural wicker, however, may need more careful treatment to prevent mould and mildew.
- Lifespan: Typically, the resin can last up to 10 years or more, whilst natural wicker might last around 5 to 7 years when properly maintained.
- Performance: In terms of performance, resin wicker is resistant to fading and staining, making it ideal for outdoor settings where exposure to the elements is constant.
Choosing resin wicker ensures that outdoor furniture remains both functional and aesthetically pleasing, providing homeowners with a durable and stylish option.

Resin Wicker Vs. Metal
Regarding durability and weight, resin wicker and metal differ significantly, with resin wicker offering a lighter alternative without sacrificing resilience and style.
This contrast is evident when considering their physical properties and practical applications in outdoor settings.
For instance,
- Resin wicker is not only easier to move but also provides flexible design options that can enhance any patio or garden.
- Metal furniture, while often sturdier, tends to be heavier, making it less suitable for those who may wish to frequently rearrange their outdoor spaces.
- When evaluating weather resistance, resin wicker triumphs in being impervious to rust and corrosion, ensuring longevity in varying climates.
Ultimately, the choice between these two materials often comes down to personal preference and specific usage requirements, each catering to distinct tastes and practical needs.

Resin Wicker Vs. Wood
Unlike wood, which requires regular maintenance and is subject to wear from moisture and pests, resin-wicker patio furniture provides a more durable and low-maintenance option for outdoor environments.
This remarkable alternative boasts a range of benefits that appeal to those looking for practicality without sacrificing style. For instance, when considering maintenance, resin wicker effortlessly withstands rain and UV exposure, eliminating the need for frequent repainting or sealing that wood necessitates.
In terms of longevity, high-quality resin wicker can resist fading and cracking for many years, while wood often succumbs to decay when exposed to the elements. As for the aesthetic appeal, resin wicker comes in a variety of colours and designs, mimicking the look of natural materials, which enables easy integration into any outdoor decor.
- Maintenance: Minimal upkeep is required; simply wipe clean.
- Longevity: Resistant to weathering; lasts longer than treated wood.
- Aesthetic Appeal: Available in various styles and colours.
So, when one evaluates outdoor furniture options, choosing between these materials involves more than just preference; it’s about understanding how well they perform under environmental pressures.

How To Care For Resin Wicker Patio Furniture?
Caring for resin wicker patio furniture is straightforward, requiring minimal effort to maintain its appearance and prolong its lifespan, making it an excellent choice for homeowners seeking low-maintenance solutions. With proper care, this type of furniture can withstand the elements and keep looking new for years, allowing families to enjoy their outdoor spaces without the worry of frequent replacements.
To ensure that this furniture lasts as long as possible, consider the following care and maintenance tips:
- Regular Cleaning: Use a soft brush or cloth to remove dirt and debris. For deeper cleaning, a mixture of mild soap and water can be used, followed by rinsing with a hose.
- Storage Suggestions: During extreme weather conditions, store the furniture indoors or cover it with protective tarpaulins to shield it from harsh elements.
- Protective Measures: Applying a UV protectant can help prevent fading and cracking, ensuring that the resin maintains its vibrant colour.
By following these simple guidelines, owners can enjoy their resin wicker patio furniture for many seasons without the hassle of extensive upkeep.
What Are The Different Styles Of Resin Wicker Patio Furniture?
Resin wicker patio furniture comes in a diverse array of styles, including traditional, modern, coastal, and tropical designs, allowing homeowners to choose pieces that best fit their personal tastes and outdoor aesthetics.
Traditional Wicker Style
The traditional wicker style of resin wicker garden furniture reflects classic design elements, often featuring intricate woven patterns and neutral colour palettes that evoke a sense of timeless elegance.
This style not only showcases craftsmanship but also offers incredible versatility, making it suitable for a variety of outdoor settings, from cosy patios to spacious garden decks. Wicker furniture seamlessly integrates into various garden themes, serving as a focal point or a complementary piece amidst vibrant flower beds or minimalist landscapes.
- In Mediterranean-inspired gardens, for example, this furniture pairs beautifully with terracotta pots and lush greenery.
- Conversely, in contemporary environments, it can create a striking contrast against sleek, modern hardscaping.
Its weather-resistant materials ensure durability, allowing this style to maintain its charm through changing seasons, which makes it a pragmatic choice for discerning homeowners looking to enhance their outdoor experience.
Modern Wicker Style
Modern wicker-style patio furniture showcases sleek lines and contemporary designs, utilising resin wicker to create a minimalist aesthetic that pairs well with various outdoor living spaces.
This innovative furniture not only enhances the beauty of a patio but also offers exceptional durability and comfort. With features like weather-resistant materials, modern wicker furniture transforms any garden, balcony, or poolside into a chic oasis.
For instance, consider a sectional sofa set that invites relaxing gatherings or a versatile dining set that adapts effortlessly for al fresco dining.
- Expandable dining tables
- Cosy lounge chairs
- Ottomans for additional seating
Each piece reflects a balance of style and functionality, appealing to those who appreciate both aesthetics and practicality in their outdoor retreats.

Coastal Wicker Style
Coastal wicker-style patio furniture embodies a relaxed, beach-inspired aesthetic, often incorporating light colours and airy designs that evoke the serenity of seaside living.
This particular furniture style is characterised by its use of wicker weaving techniques, creating a visually appealing texture that complements natural light beautifully. Often constructed from materials like rattan or synthetic fibres, it not only adds an inviting touch but is also durable enough to withstand coastal conditions.
- Light and airy colours such as soft whites, gentle blues, and muted pastels are commonly used, enhancing the breezy vibe.
- Design elements often include curved lines and open frameworks, promoting a sense of freedom, much like the ocean's expansive horizon.
- This furniture type is perfect for beach houses or outdoor spaces, allowing for comfortable lounging while enjoying picturesque views.
Ultimately, coastal wicker style furniture cultivates a welcoming atmosphere, ideal for relaxing by the water or entertaining guests under the sun.

Tropical Wicker Style
Tropical wicker-style patio furniture is characterised by vibrant colours, bold patterns, and a playful design that brings a lively, exotic feel to outdoor spaces.
This unique furniture style truly shines in gardens, poolside lounges, or sun-kissed terraces, where it creates an atmosphere reminiscent of far-off tropical locales. The incorporation of natural textures combines with bright hues—think ocean blues, sunset oranges, and lush greens—to evoke a sense of relaxation and festivity.
- For instance, a cosy sectional adorned with Hawaiian print cushions can become the focal point of a backyard gathering.
- Similarly, a vibrant wicker coffee table paired with handcrafted decorative items can further enhance the exotic vibe.
Whether it’s a casual brunch with friends or a serene evening with family, this style enriches outdoor experiences by enveloping spaces with warmth and charm. Wicker furniture’s durability against the elements ensures that its appeal lasts throughout the seasons.

Where Can You Use Resin Wicker Patio Furniture?
Resin wicker patio furniture can be used in various settings, including gardens, patios, and even bistro sets, making it versatile for enhancing both casual and elegant outdoor living spaces.
This adaptability is particularly valuable as it seamlessly complements a range of outdoor environments. For instance, in a cosy garden setting, resin wicker chairs and lounges create a welcoming nook for relaxation or intimate gatherings. On the patio, this stylish furniture can easily transition from morning coffee spots to evening entertainment venues, offering timeless elegance that suits any occasion.
When utilised in:
- balconies
- poolside
lounges, it withstands the elements while providing comfort and aesthetic appeal, proving that adaptability is at the heart of this design choice.

What Are Some Popular Brands Of Resin Wicker Patio Furniture?
Some of the most popular brands offering resin wicker patio furniture include Primrose and Leisuretouch-Rattan, known for their quality products and diverse selections that cater to various styles and budgets.
These brands stand out in the crowded market, each bringing distinctive features and styles to the discerning consumer. For instance, Primrose focuses on sustainability by utilising eco-friendly materials in their designs, ensuring that customers not only enjoy stylish outdoor spaces but also contribute to environmental conservation.
Meanwhile, Leisuretouch-Rattan excels in versatility, offering an extensive range of modular patio furniture that can be customised to fit any outdoor arrangement.
- Primrose: Eco-friendly materials
- Leisuretouch-Rattan: Modular designs
By emphasising innovation and quality, these brands consistently deliver products that boast durability and elegance, making outdoor living enjoyable for everyone.