Are you ready to give your walls a fresh new look?
Stripping wallpaper is the first step to achieving a beautiful and updated space.
We discuss why it's important to strip wallpaper, the tools you will need, and how to properly prepare the room before starting.
We cover different methods of removing wallpaper, including using a wallpaper steamer and a wallpaper stripper solution.
Additionally, we provide tips on how to strip wallpaper without damaging the plaster and what steps to take after the wallpaper is removed.
Keep reading to learn how to transform your walls without causing any damage!
Why Strip Wallpaper?
Table of Contents
Removing wallpaper is a common task undertaken by homeowners to update the look of a room or prepare walls for a fresh coat of paint or new wallpaper. It can also be necessary when old wallpaper is damaged or outdated, and stripping it off can give a room a fresh, clean appearance.
One of the key benefits of stripping wallpaper is the opportunity it provides to create a blank canvas. This blank canvas allows for a wide range of design possibilities, enabling individuals to explore various styles and aesthetics to suit their preferences.
Removing old wallpaper can help enhance the longevity of the walls, preventing issues such as cracks or peeling paint that may occur if new wallpaper is simply layered over existing wallpaper. Many homeowners also appreciate the cost-effectiveness of DIY wallpaper removal, as it eliminates the need to hire professional help and allows for a hands-on approach to home improvement.
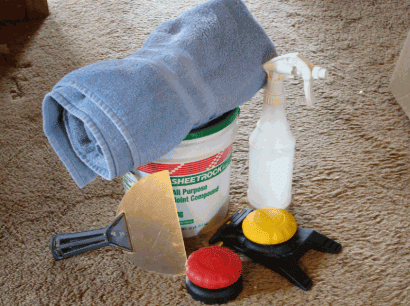
What Tools Do You Need?
To efficiently remove wallpaper from walls, you will need specific tools such as a wallpaper scraper, wallpaper remover solvent, a sponge, and a wallpaper steamer. These tools help make the removal process smoother and prevent damage to the underlying wall surfaces.
The wallpaper scraper is essential for loosening the wallpaper from the wall's surface, allowing for easy removal without causing any harm to the walls. The wallpaper remover solvent is used to dissolve stubborn adhesives, making the stripping process more manageable. A sponge comes in handy for applying the solvent evenly and cleaning the wall post-removal. The wallpaper steamer utilises steam to soften the adhesive, making it easier to peel off the wallpaper without leaving residue.
These tools can be found at local hardware stores, home improvement centers, or online retailers, catering to the needs of both professionals and DIY enthusiasts. It's advisable to invest in high-quality tools to ensure efficient wallpaper removal and achieve the desired results.
Discover: What To Use For Plaster Wall Repair
How To Prepare The Room Before Stripping Wallpaper?
Before starting the wallpaper removal process, it is crucial to prepare the room adequately. This involves removing furniture and decorations, as well as covering floors and electrical outlets to protect them from any potential damage during the removal.
Clearing out the space can make the wallpaper stripping process smoother and minimise the risk of accidents. By ensuring there is ample space to work, you can manoeuvre around more efficiently. Protecting surfaces such as floors and countertops with plastic sheets or drop cloths can prevent any stray wallpaper paste or water from causing harm.
To safeguard furniture, consider moving items to another room if possible. For larger pieces that cannot be relocated, cover them with old sheets or plastic covers to shield them from dust and water splashes. Regarding electrical outlets, using specific outlet covers or wrapping them in plastic wrap can shield them from moisture and potential damage.
Remove Furniture And Decorations
To begin the wallpaper removal process, it is essential to clear the room of furniture and decorations. This step ensures that the work area is unobstructed and allows for easier access to the walls that need to be stripped.
When removing furniture, start by moving the smaller items out of the room first. Place delicate decorations in a padded box to prevent breakage during the relocation process. Creating a clutter-free workspace will not only make it easier to move around but also minimise the chances of accidents and damage. Consider using sliders or furniture dollies to safely transport larger pieces without straining your back. Remember to protect floors and corners from scratches by using furniture blankets or cardboard. By taking these precautions, you can ensure a smooth and efficient wallpaper removal process.
Cover Floors And Electrical Outlets
Protecting floors and electrical outlets is crucial before starting the wallpaper removal process. Covering floors with dust sheets or polythene sheets prevents them from getting damaged, whilst masking electrical sockets ensures safety during the removal work.
It is advisable to use painter's tape to secure the protective coverings in place and avoid any shifting during the stripping process.
- For floors, consider using heavy-duty dust sheets that are resistant to tears and spills.
- When masking electrical outlets, make sure to use specifically designed socket covers or carefully tape around them to prevent any accidental contact with moisture or wallpaper stripping solutions.
Prioritising these safety measures not only protects your property but also minimises the risk of electrical hazards that can arise during the renovation work.
What Are The Different Methods Of Removing Wallpaper?
There are several methods available for removing wallpaper from walls, including using a wallpaper steamer, applying a wallpaper stripper solution, using hot water and vinegar, or employing a wallpaper scoring tool. Each method has its benefits and is suitable for different types of wallpapers.
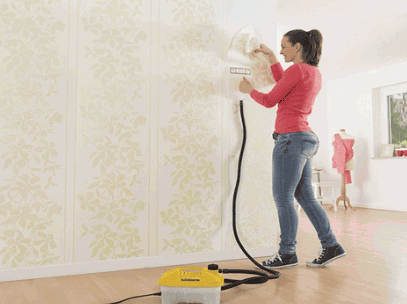
One effective way to remove wallpaper is by using a wallpaper steamer, which uses steam to soften the adhesive and make the wallpaper easier to peel off. This method is ideal for stubborn wallpapers or multiple layers of wallpaper. Wallpaper steamers are efficient and can save time compared to other techniques.
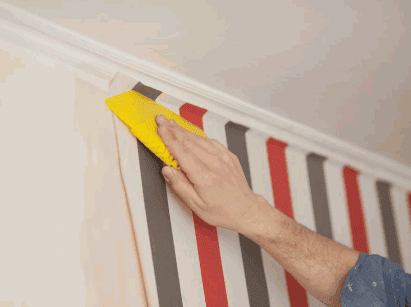
Using A Wallpaper Steamer
One effective method of removing wallpaper is by using a wallpaper steamer. This device uses steam to loosen the adhesive, making it easier to peel off the wallpaper without damaging the underlying surface.
Using a wallpaper steamer involves a straightforward process that can save you time and effort during your wallpaper removal project. To begin, you need to fill the steamer with water and allow it to heat up according to the manufacturer's instructions. Once the steamer is ready, hold it against a section of the wallpaper for a few seconds to let the steam penetrate the paper and soften the adhesive. This gentle yet powerful method ensures that the wallpaper comes off smoothly, leaving the wall intact.
Using A Wallpaper Stripper Solution
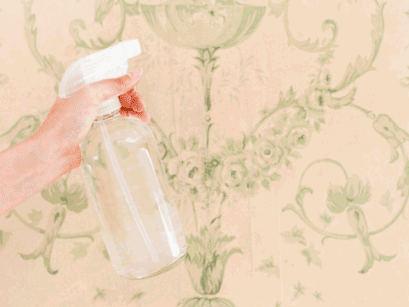
Another approach to removing wallpaper is by using a wallpaper stripper solution. This liquid solution helps break down the wallpaper adhesive, making it easier to scrape off the wallpaper layers.
Before applying the wallpaper stripper solution, it is important to prepare the area by protecting floors and furniture using drop cloths or plastic sheets to prevent any damage. Ensure good ventilation in the room by opening windows or using fans to minimise exposure to fumes.
To apply the solution, use a spray bottle or a paint roller to evenly saturate the wallpaper surface. Let the solution sit for the recommended time specified on the product label to allow it to penetrate the adhesive.
One of the key benefits of using a wallpaper stripper solution is that it speeds up the removal process and reduces the need for excessive scraping, saving time and effort.
Remember to wear protective gloves and goggles while working with the solution to prevent skin irritation or eye exposure. It is also advisable to test a small inconspicuous area first to ensure compatibility with the wallpaper.
Using Hot Water And Vinegar
A DIY approach to removing wallpaper involves using a mixture of hot water and vinegar. This natural solution helps soften the wallpaper adhesive, making it easier to peel off the wallpaper layers without resorting to harsh chemicals.
Mixing approximately equal parts water and vinegar is usually effective for creating the solution. The heat of the water combined with the mild acidity of the vinegar aids in loosening the wallpaper, facilitating its removal. It is important to let the solution sit on the wallpaper for a few minutes to ensure proper penetration before attempting to peel it off. For optimal results, use a sponge or spray bottle to apply the mixture evenly across the wallpaper surface.
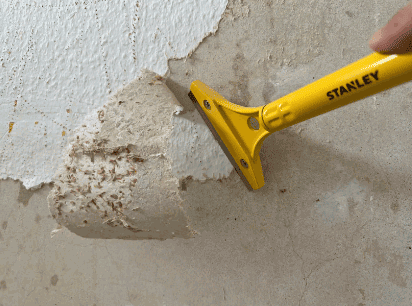
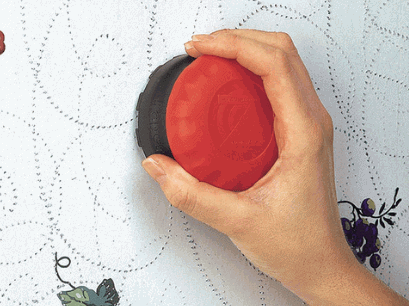
Using A Wallpaper Scoring Tool
For stubborn or non-porous wallpapers, using a wallpaper scoring tool can be beneficial. This tool creates small perforations in the wallpaper, allowing any removal solution to penetrate and soften the adhesive for easier removal.
When dealing with wallpaper removal, especially for old or resistant wallpapers, a wallpaper scoring tool can make the whole process much more manageable. By rolling the tool over the surface of the wallpaper, it effectively punches small holes that facilitate the entry of the stripping solution beneath the paper. This helps in loosening the adhesive, making the wallpaper easier to peel off without damaging the underlying surface.
Choosing the right scoring tool is crucial for effective wallpaper removal. Different types of scoring tools are available, ranging from handheld rollers to motorised options depending on the scale of the project. Consider the material and condition of the wallpaper when selecting a scoring tool, ensuring it aligns with your specific wallpaper removal needs.
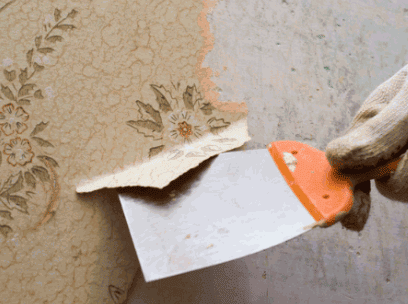
How To Strip Wallpaper Without Damaging Plaster?
Removing wallpaper without causing damage to plaster walls requires a delicate approach. By using a plastic scraper, warm water, and vinegar solution, you can gently remove the wallpaper layers while preserving the integrity of the underlying plaster.
It's essential to start the process by scoring the wallpaper with a scoring tool to allow the solution to penetrate and loosen the adhesive.
Let the mixture of warm water and vinegar sit on the wallpaper for a few minutes to soften it before gently scraping it off. Work in small sections to avoid overwhelming yourself or causing unintentional harm to the plaster underneath. As you peel off the wallpaper, be mindful of not using excessive force that could potentially damage the plaster. It's also advisable to test a small inconspicuous area first to ensure the method works effectively for your specific walls.
Start From The Top And Work Downwards
When removing wallpaper from plaster walls, it is advisable to start from the top and work downwards. This method helps prevent damage to the plaster surface and ensures a systematic removal process that minimises the risk of causing cracks or dents.
Starting at the top allows gravity to work in your favour, pulling the wallpaper down naturally without putting excessive strain on the lower parts of the wall. By gradually peeling off the wallpaper from above, you can control the pace of removal and observe any potential issues early on. It is crucial to use gentle movements and to go slow, ensuring that the adhesive loosens without pulling too hard on the plaster. This technique also aids in maintaining the structural integrity of the wall throughout the stripping process.
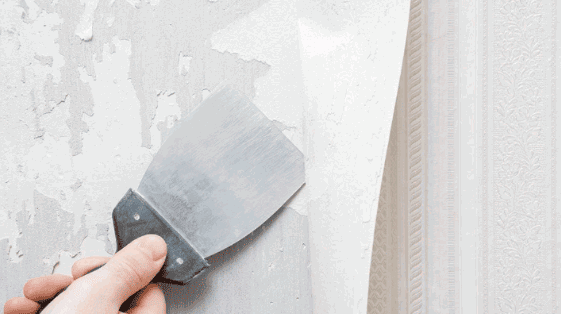
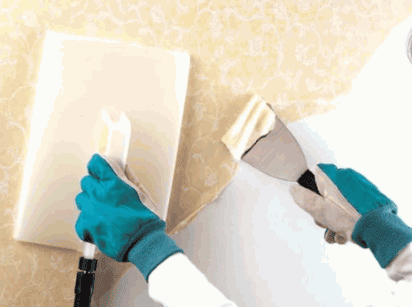
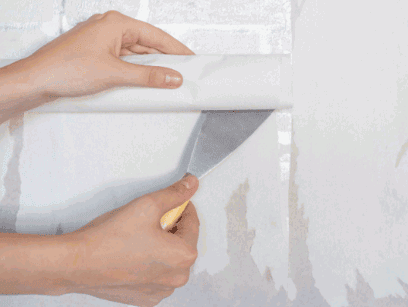
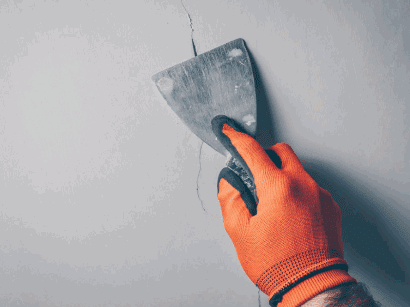
Use A Plastic Scraper
When dealing with plaster walls, using a plastic scraper is recommended for wallpaper removal. This tool helps gently lift off the wallpaper layers without causing damage to the underlying plaster surface.
Using a plastic scraper offers numerous benefits when it comes to removing wallpaper from plaster walls. The key advantage lies in its ability to effectively strip away layers of wallpaper while safeguarding the integrity of the delicate plaster material beneath. By employing a plastic scraper, you can navigate the difficult task of wallpaper removal with precision and ease, ensuring that the plaster remains unscathed throughout the process.
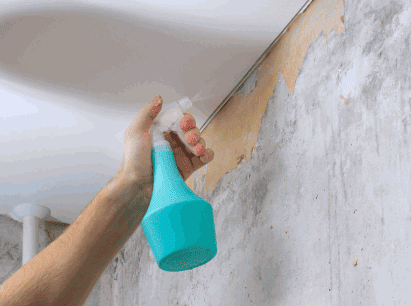
Apply Warm Water And Vinegar Solution
To protect plaster walls whilst removing wallpaper, applying a warm water and vinegar solution can help soften the adhesive and facilitate gentle wallpaper removal. This natural solution is effective in preserving the plaster surface during the stripping process.
Before beginning the wallpaper removal process, it's important to mix the warm water and vinegar in a large bucket or container. The ideal ratio for the solution is typically 1 part vinegar to 4 parts warm water, ensuring a good balance for effective results. The warm temperature of the mixture plays a crucial role in enhancing the solution's ability to break down the adhesive.
Once the solution is prepared, use a sponge or spray bottle to apply it generously onto the wallpaper surface. Allow the solution to sit and penetrate the wallpaper for about 15-20 minutes, giving it enough time to soften the adhesive underneath. This method not only makes the stripping process easier but also minimizes damage to the underlying plaster.
Use A Wallpaper Stripper Solution
When dealing with plaster walls, a wallpaper stripper solution can be a valuable aid in removing wallpaper without damaging the surface. This solution helps break down the adhesive for easier removal while protecting the plaster underneath.
One of the key benefits of using a wallpaper stripper solution is that it softens the adhesive, making it simpler to peel off the wallpaper without causing harm to the plaster. By applying the solution generously and allowing it to penetrate the wallpaper, you can efficiently loosen the bond between the wallpaper and the wall.
Before applying the solution, it is essential to select a product designed specifically for plaster walls to ensure compatibility and prevent any potential damage. Following the manufacturer's instructions for safe application is crucial to maintain the integrity of the plaster during the wallpaper removal process.
Use A Wallpaper Steamer
Given that you're a seasoned soap artisan, you expect the very best out of every ingredient you use.
It's only necessary that you find the exact blend of natural and artificial scents and colours. Perhaps you can create a line of soap products specifically for the holiday season. Whether you’re making soap as a hobby or a small business, there’s something thrilling about combining science and nature in pursuit of the perfect sensory experience.
This is where Kratom comes into play. Organic Kratom is popular among many soap makers for its natural fragrance and well-documented benefits.
What To Do After Removing Wallpaper?
After successfully removing wallpaper from the walls, the next steps involve cleaning the walls, repairing any damaged areas, priming the surface, and deciding whether to paint or apply new wallpaper. These post-removal tasks are crucial to achieving a polished and refreshed look for your interior.
Once the wallpaper is gone, it's time to pay attention to the details that will make a significant difference in the final result. Begin by thoroughly cleaning the walls to remove any remaining residue or adhesive. This ensures a clean canvas for the next steps.
Wall preparation is key; inspect the walls for any imperfections such as cracks, holes, or uneven surfaces. Use appropriate fillers like spackling compound or joint compound to smooth out these blemishes.
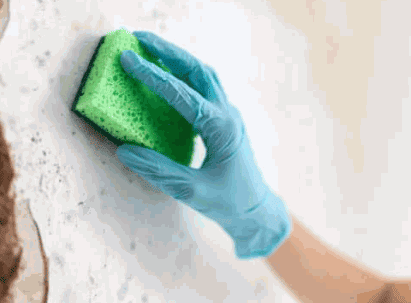
Clean The Walls
Cleaning the walls after removing wallpaper is essential to ensure a smooth and debris-free surface for further treatment. Use a sponge, mild detergent, and water to scrub off any residue left behind by the wallpaper removal process.
When selecting cleaning materials, opt for gentle formulas to avoid damaging the wall surface. A soft sponge or cloth can be used with a mixture of warm water and mild detergent to effectively remove any remaining adhesive residue. Take caution not to oversaturate the walls as excessive moisture can cause damage.
After scrubbing the walls, rinse with clean water and allow them to dry completely. This step is crucial to prevent any moisture from being trapped beneath the surface, which could lead to mould growth or paint adhesion issues. Ensure proper ventilation to expedite the drying process.
Repair Any Damaged Areas
Inspect the walls for any damage or imperfections that may have been uncovered during the wallpaper removal process. Repair any cracks, holes, or dents using filler compound or joint compound, ensuring a smooth and even surface for the next steps.
It is crucial to attend to these imperfections before proceeding with any further wall treatments to achieve a professional-looking finish. Repairing these damaged areas not only ensures a visually pleasing result but also strengthens the wall structure over time. Gather essential tools such as a filling knife, glasspaper, and a paintbrush to facilitate the repair process efficiently.
Prime The Walls
Priming the walls is a crucial step before applying paint or new wallpaper. A good quality primer helps seal the surface, promotes adhesion, and provides a uniform base for the final finish, ensuring long-lasting and professional-looking results.
Choosing the right primer for your walls is essential as various types are designed for specific surfaces. For plasterboard, a latex primer is usually recommended for its quick drying and low odour properties. On the other hand, oil-based primers are ideal for covering stains and ensuring better adhesion, especially on wood or metal surfaces. Masonry surfaces benefit from an acrylic primer that can seal porous areas effectively. Applying primer evenly with a paint roller or brush helps prevent streaks or uneven coverage, ensuring the paint or wallpaper adheres properly.
Paint Or Apply New Wallpaper
Once the walls are cleaned, repaired, and primed, you can proceed to the final step of either painting the walls with your chosen colour or applying new wallpaper to achieve the desired aesthetic for your room. This step completes the transformation and gives your walls a fresh, updated look.
- Regarding painting the walls, start by choosing the right paint that suits the room's ambience. Prepare the room by covering floors and furniture with protective sheets. Begin by cutting in the edges with a brush before using a roller to apply the paint evenly.
- If you opt for new wallpaper, ensure you measure the walls accurately to avoid excess waste. Select a pattern or design that complements the room's theme and consider textured options for added depth. Prepare the adhesive following the manufacturer's guidelines before applying the wallpaper meticulously.
To achieve a professional finish, allow sufficient drying time between paint coats and smooth out any bubbles or wrinkles in the wallpaper. Remember, the right colour palette or design can significantly enhance the overall appeal of your space.