Sometimes all it takes is a little improvement to make something like your tired old driveway seem fresh and new! Not only that but it will compliment your garden.
A brick edging driveway will quickly increase the curb appeal of your home. If you set your mind to it, you can install and add brick edging in a weekend even if you have never done it before. It is all a matter of planning ahead and working smart.
How To Lay Brick Edging Driveway in A Weekend
Table of Contents

To make sure you get all of the work done in a weekend, there are some things that you need to put on your shopping list. This is our mini-guide to your shopping list:
- Spade
- Rope or string to mark the area
- Pegs for running the string in between
- Sand
- Bricks
- High-quality yard brush
- Maybe a liner
- Heavy Duty Gardening Gloves
- Mallet
As a matter of fact, adding brick edging to your driveway is a lot easier than you may think.
Don't forget to measure up. You don't want to end up having to cut bricks in half. That is going to slow you down. Your edging should either be three or five bricks across. Of course, you can make it any width you like. The wider the edging, the longer it is going to take to complete the project.
1. Mark the Area
The first thing you need to do, is to mark the area that you would like to brick. Your driveway is probably edged by the driveway itself on one side. On the other side, you want to measure an area of about 50 cm. That will give your brick edging enough of an impact to make a difference.
Put your marking pegs in and run the string in between them. You have two options. Your driveway edging can exactly follow the shape of your driveway, or you can add curves. If this is your first time taking on the task, it is perhaps easier to follow the line of your driveway.
2. Remove the Grass or Turf
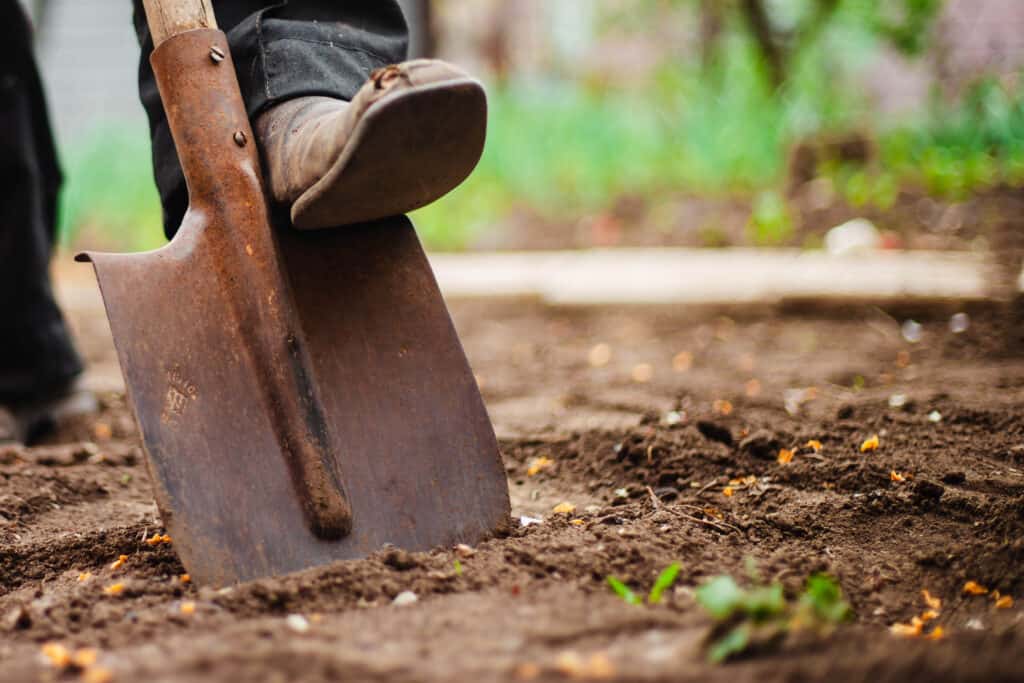
Removing grass and turf is not very difficult at all. If you get it right from the start, it may only take you an hour or two to clear the turf.
With your spade, create a straight line in the grass all of the way to the bottom of your driveway. You simply insert the spade in the grass and make a line. Move on and do the same thing.
You will end up with the turf broken in a long line. Check the turf and find out how well established it is to the ground below. Most of the time, you can just roll the turf back. It is almost like peeling a banana.
If the turf is well established, you may have to move smaller blocks. Simply insert your spade under the grass and lift.
Don't through the turf away. Place it on your driveway or on a plastic sheet. You can use it in other areas of your garden or sell it. If you want to sell it spray lightly with water and cover it with clear plastic sheeting. In that way, it will stay healthy and green until someone picks it up. A great place to advertise your turf for sale is on Facebook Market Place.
3. Add the Sand
Make sure the ground is level and start thinking about adding the sand.
It is at this stage you need to make a decision. Should you use a liner or not? If you do decide to use a liner, make sure that it has good drainage. Many homeowners only use sand. Yes, you may have some weeds popping up in the future, but they are going to be far and few in between. Sand does suppress weed growth.
You can save money by not using a liner. If you do decide to use a liner, it is always best to add a thin layer of sand before you put down the liner. That way, your liner will have protection from any stones or pebbles in the ground.
Once you have added your liner, you put the sand on top. If you are not using a liner, simply add the sand directly onto the ground.
4. The Thickness of The Layer of Sand
The thickness of the layer of sand should be about 3/4 quarters of the height of your bricks. Measure your bricks and do your best to distribute the sand evenly.
Don't worry too much about excess sand if you feel that you have laid down too much sand.
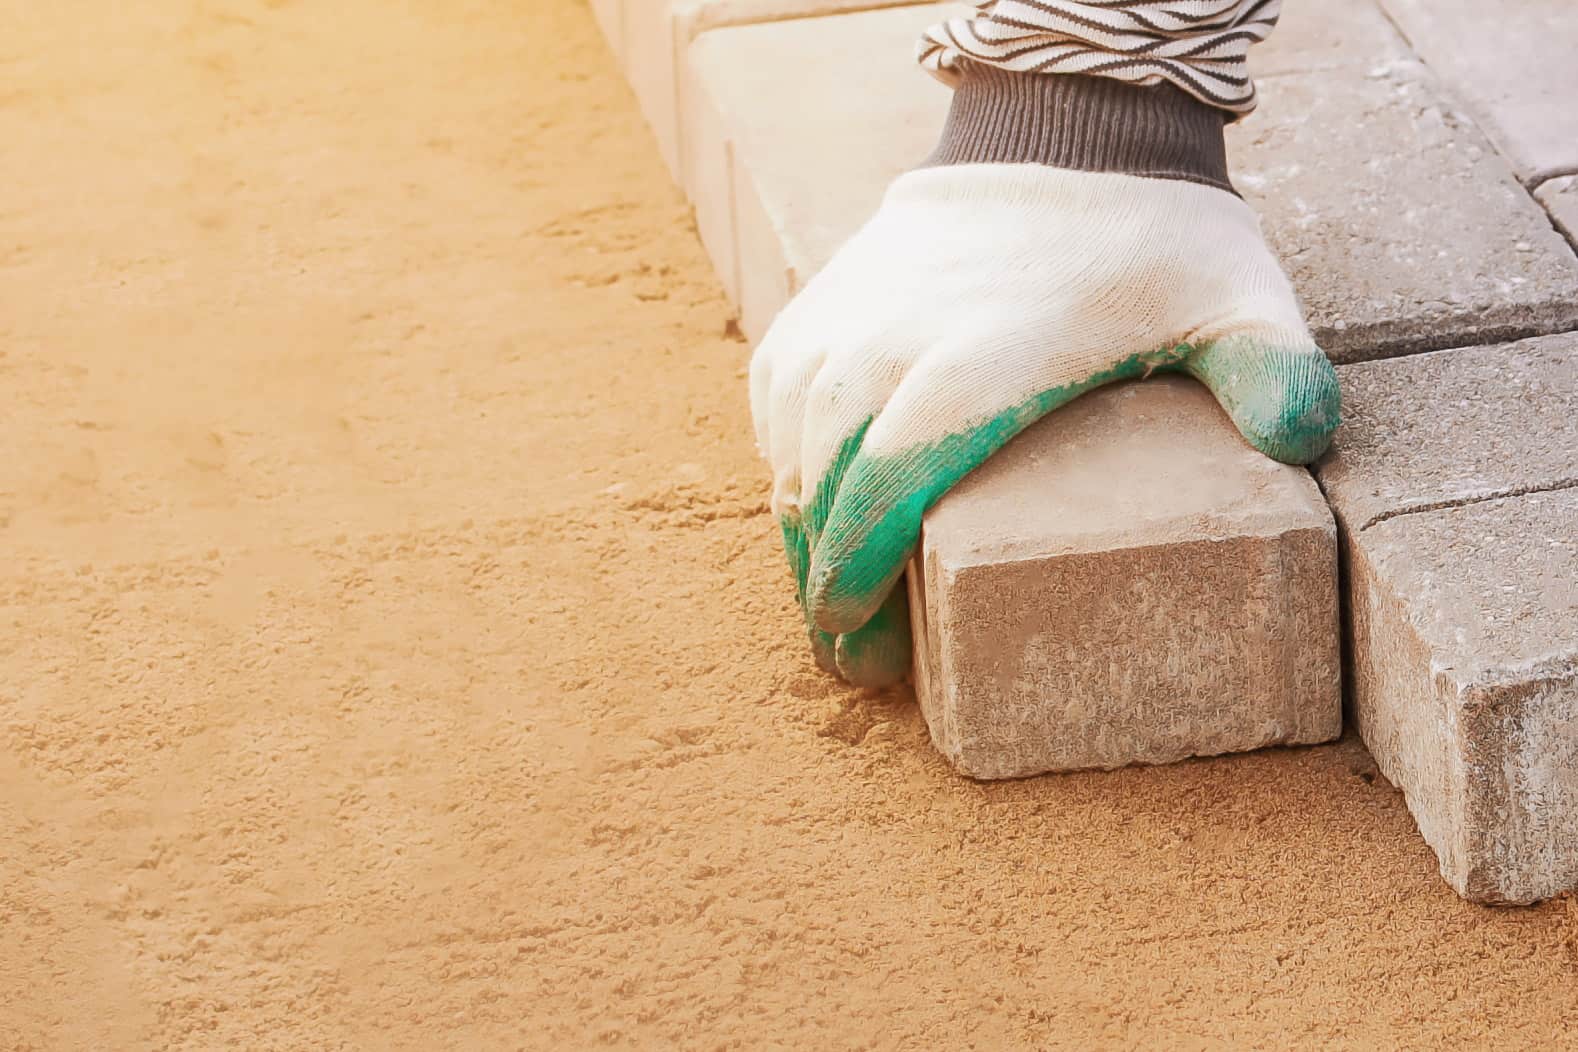
5. Lay the Bricks

It is now time to start laying the bricks. This is kind of hard work. You want to make sure you protect your back and knees.
To make the task easier, work on your knees. It is a good idea to add a pair of knee protectors to your shopping list.
Instead of putting all of your bricks in one place, have a couple of piles stacked up along the driveway. That means you can work more efficiently as you don't have to walk, fill your wheelbarrow up, and walk back with your barrow.
With your mallet in hand, put a brick on top of the layer of sand and tap it down. Complete one row and move on. You will fill your edging up quicker than you think.
Work only in one direction. If someone else works from the bottom up, you risk not ending up meeting perfectly in the middle. This is a weekend project; you are not building an underwater tunnel for traffic or trains.
6. Adding More Sand
Once you have finished laying all of the bricks, it is time to add more sand. With your spade, place piles of sand at equal distances along your new driveway edging.
Take your heavy-duty garden broom or brush and start sweeping in between the bricks. You should have ended up with small spaces in between the bricks even though you have already used sand.
The extra sand will ensure your bricks stay in place. Keep on brushing until the sand is level with the bricks in your driveway.
Once you notice the sand is up to the top of the edge of the bricks, you are done.
There you go. Increasing the curb appeal of your home in a weekend is perfectly achievable. Add a few well-placed plant pots and you will have instantly given your home a complete facelift!
Want to learn more crafty projects? Sure you do! How about What Is Bitmac? or 10 Easy Ways How To Make Your Driveway Look Better!