Are you looking to tackle a plastering project on your own but not sure where to start? This article will guide you through the process of plastering, including why people plaster, the tools and materials needed, how to prepare the wall, mix and apply plaster, achieve a smooth finish, and clean up and maintain your tools. Whether you're a beginner or looking to improve your DIY skills, this comprehensive guide has got you covered. Let's get started!
What Is Plastering?
Table of Contents
Plastering is a technique used to create smooth, even surfaces on walls and ceilings. It involves applying layers of a mixture, typically a combination of plaster and water, to achieve a professional finish.
Plastering serves the dual purpose of enhancing the aesthetic appeal of a space and providing a protective layer to the walls. Whether you are filling in cracks, smoothing out imperfections, or preparing a surface for painting, plastering plays a crucial role in ensuring a flawless final look.
From DIY enthusiasts to seasoned professionals, understanding the method of plastering is essential. The process typically involves preparing the surface, applying the plaster mix with precision, and meticulously smoothing it out for a seamless result. Different techniques, such as float and trowel finishes, can be used to achieve various textures and appearances.
Why Do People Plaster?
People choose to plaster walls to create a smooth and polished finish, enhancing the overall aesthetics of a room. By applying finishing plaster meticulously, they can achieve a flawless look that adds value and appeal to the space.
What Tools And Materials Are Needed For Plastering?
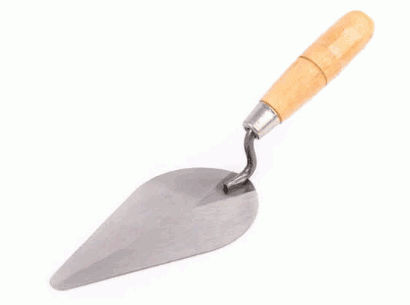
To start a plastering project, you will need various tools and supplies such as a trowel, hawk, plastering float, plastering trowel, plaster brush, bucket and mixing stick, plastering sponge, water, plaster, mixing plaster, and PVA adhesive. These items are essential for ensuring a successful plastering process.
Trowel
A float is a crucial tool in plastering that helps in applying and smoothing plaster on walls. It plays a significant role in achieving a smooth finish by spreading the plaster evenly across the surface.
There are various functions associated with using a float in plastering. Apart from its primary job of applying plaster, it is also used for shaping corners, creating clean edges, and levelling the surface for a uniform appearance. Different types of floats are available, including finishing, pointing, gauging, and margin floats, each serving a specific purpose in the plastering process.
To achieve a smooth finish, proper technique is essential. Keep the float at the right angle and apply even pressure to avoid creating lines or marks on the surface. When selecting a float, consider the size, material, and handle grip for comfort and control.
To maintain optimal performance, regularly clean the float after use, especially when working with cement-based plasters, to prevent build-up and ensure longevity.
Hawk
A hawk is a flat, square board with a handle that is used to hold plaster or mortar for easy application. It is a versatile tool that aids in carrying and applying plaster effectively during the plastering process.
Its flat surface provides a stable base for the plaster, allowing the plasterer to easily scoop up and manipulate the material. The handle helps in securely holding the hawk while working on walls, providing stability and control. A key benefit of using a hawk is that it allows the plasterer to have quick and convenient access to the plaster while working, minimising unnecessary movements and enhancing efficiency.
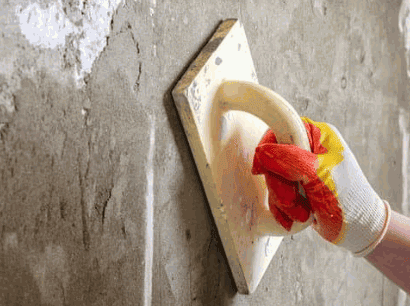
Plastering Float
A plastering float is a tool used to smooth and level freshly applied plaster on walls. It helps in achieving a consistent finish by spreading and compacting the plaster effectively.
There are various types of floats available to cater to different needs in the plastering process. Hawk floats, for instance, are smaller and hand-held, perfect for working on smaller areas or intricate details. On the other hand, darby floats are larger and more suitable for levelling larger sections of plaster quickly.
Using a float involves a delicate balance of pressure and movement. By holding the float at a slight angle, plasterers can smooth out uneven surfaces while guiding the excess plaster to create a more even distribution of material. The back-and-forth motion of the float helps to achieve a seamless and professional finish on the surface.

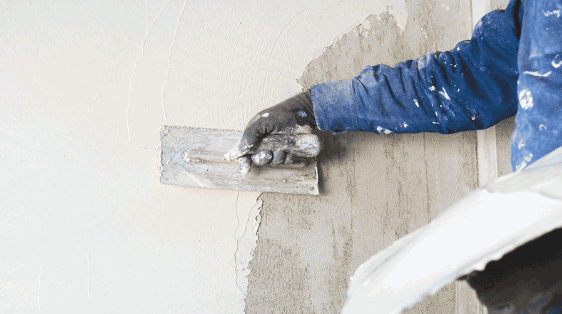
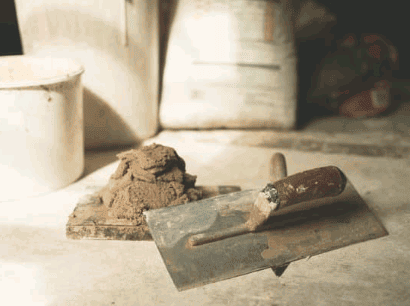
Plastering Trowel
A plastering trowel is a specialised tool designed for applying and finishing plaster on walls. It is essential for achieving a professional and polished look by ensuring an even distribution of finishing plaster.
Plastering trowels come in various sizes and shapes, each catering to different aspects of plaster application. Some trowels have flexible steel blades, allowing for better control and precision during the smoothing process. Others feature ergonomic handles for comfortable grip, reducing fatigue during extended use. For optimal results, it's crucial to select a trowel that suits the size of the project and the type of plaster being used. Investing in a high-quality plastering trowel can significantly impact the overall outcome of your plastering work, ensuring a smooth and flawless finish that stands the test of time.
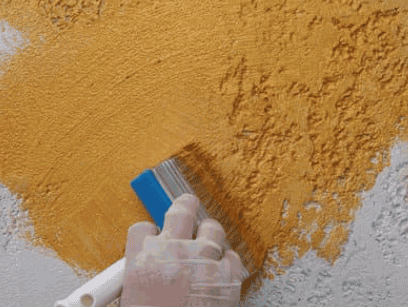
Plaster Brush
A plaster brush is a handy tool used for applying plaster to walls and creating a smooth finish. It helps in distributing the plaster evenly and blending it seamlessly for a polished appearance.
Using a plaster brush effectively involves proper technique and a steady hand. The brush's bristles play a crucial role in achieving a uniform application of plaster, preventing uneven patches. A well-maintained plaster brush ensures consistent results. Regular cleaning with warm
water and mild soap keeps the bristles in optimal condition. When storing the brush, ensure it is dried thoroughly to prevent mould and mildew buildup. Investing in a high-quality plaster brush can make a significant difference in the overall outcome of your plastering projects.
Bucket And Mixing Stick
A bucket and mixing stick are essential for preparing plaster mixtures. The bucket holds the plaster while the mixing stick is used to blend water and plaster thoroughly to achieve the desired consistency.
When mixing plaster, it is crucial to have the right tools for the job. The bucket acts as a container for the dry plaster mixture, ensuring it is contained and manageable during the mixing process.
- The mixing stick, on the other hand, plays a vital role in combining the water and plaster.
- By stirring in a circular motion, the mixing stick helps break up any clumps and distribute the water evenly throughout the plaster.
For optimal results, start by adding water to the bucket before gradually pouring in the plaster while continuously stirring.
Plastering Sponge
A plastering sponge is used for cleaning excess plaster and smoothing surfaces during the plastering process. It helps in achieving a neat and polished look by removing imperfections and ensuring a uniform finish.
Plastering sponges are an essential tool in the toolkit of any professional plasterer, as they offer versatility and efficiency in the job. Their soft and absorbent texture makes them ideal for wiping away excess plaster without damaging the surface underneath.
- When using a plastering sponge, it is important to keep it damp but not dripping wet to prevent diluting the plaster mixture and causing it to run.
- Regularly cleaning and squeezing out the sponge will help maintain its effectiveness and prolong its lifespan, ensuring consistent results.

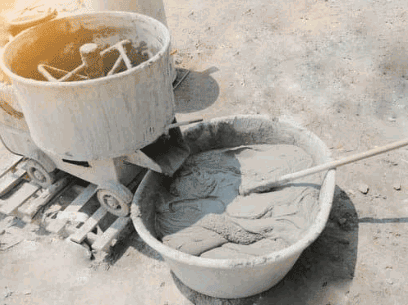
Water And Plaster
Water and plaster are the fundamental components used in creating plaster mixtures. The correct ratio and thorough mixing of water and plaster are essential for achieving the desired consistency and workability of the plaster.
When mixing water and plaster, it's crucial to maintain the right balance. A common starting point is to pour the plaster powder into a mixing container, followed by carefully adding water while constantly stirring. This gradual process helps prevent clumping and ensures a smooth blend. The ideal ratio of water to plaster typically ranges between 0.45 to 0.6 litres of water to 1 kg of plaster. It's advisable to add water gradually to avoid over-saturation and achieve a homogeneous mixture.
How To Prepare The Wall For Plastering?
Preparing the wall before plastering is crucial for ensuring a successful and durable finish. It involves steps such as cleaning the walls, repairing any damages, and applying a PVA bonding agent to enhance adhesion.
- When preparing the wall for plastering, start by thoroughly cleaning the surface to remove any dust, dirt, or residues that could affect the adhesion of the plaster.
- Next, inspect the walls for any cracks, holes, or imperfections, and fill them in with a suitable filler, smoothing it out to ensure a flat surface.
After the repairs, it's essential to apply a PVA bonding agent diluted with water as per the manufacturer's instructions. This bonding agent helps the plaster adhere better to the surface, providing a strong bond and preventing cracks or peeling.
- When mixing the plaster, ensure you use a clean bucket and follow the manufacturer's guidelines for the correct water-to-plaster ratio.
- Apply the plaster evenly and efficiently, working in sections and smoothing out any lumps or bumps as you go.
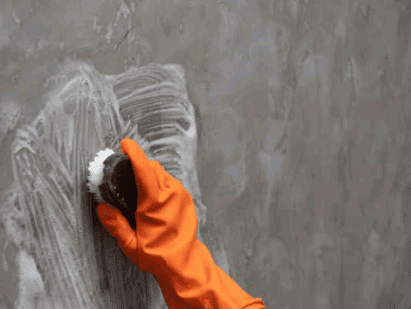
Clean The Wall
Cleaning the wall thoroughly before plastering is essential to remove dirt, debris, and any contaminants that can affect the adhesion and finish of the plaster. It ensures a clean and smooth surface for the plastering work.
- One of the first steps in cleaning a wall for plastering is dusting off loose dirt and debris using a broom or vacuum cleaner. This initial cleaning prevents these particles from intermingling with the plaster, leading to a more even application.
- Removing grease or oily residues further aids in promoting better adhesion. Tools such as detergent solutions and scrub brushes are suitable for tackling such stubborn stains.
- Washing down the wall with water and a sponge or cloth helps to eliminate any remaining grime, ensuring a pristine surface for the plaster to adhere to.
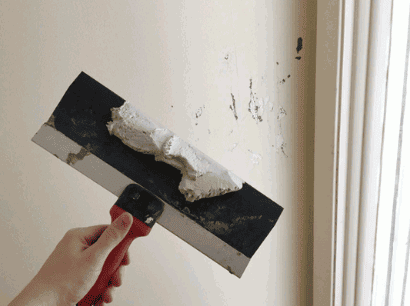
Repair Any Damages
Repairing any damage on the walls is essential before plastering to ensure a seamless and durable finish. Addressing issues such as plaster cracks, holes, or uneven surfaces is crucial for achieving a polished look.
Before getting started with the actual plastering process, it's important to carefully assess the extent of the wall damage.
- For plaster cracks, use a utility knife to widen the crack slightly, remove any loose debris, and fill it with a high-quality crack filler.
- Holes can be patched with a suitable patching compound, ensuring it is smoothed out evenly.
- Imperfections like dents or bumps can be sanded down to create a level surface.
- It's essential to prime the repaired areas before applying plaster to promote adhesion and a uniform finish.
Discover more: How To Strip Wallpaper Without Damaging Plaster
Apply A PVA Bonding Agent
Applying a PVA bonding agent to the walls before plastering is crucial for improving adhesion and ensuring a strong bond between the plaster and the surface. The bonding agent enhances the durability and longevity of the plaster finish.
When plastering, the PVA bonding agent acts as a primer, creating a stable surface for the plaster to adhere to. It also prevents the absorption of moisture from the plaster into the walls, reducing the risk of cracking and peeling over time.
To apply the bonding agent effectively, start by diluting it with water as per the manufacturer's instructions. Using a brush or roller, evenly coat the walls with the solution, ensuring thorough coverage. Allow the bonding agent to dry completely before proceeding with the plastering process for optimal adhesion.
How To Mix And Apply Plaster?
Mixing and applying plaster correctly is key to achieving a smooth and professional finish on walls. The process involves mixing the plaster to the right consistency and applying it evenly using appropriate techniques.
One important tip is to gradually add water to the plaster mix to avoid lumps and ensure a smooth texture. Using a mixing paddle attached to a power drill can make the mixing process quicker and easier. When applying the plaster, start from the top and work your way down, overlapping each stroke slightly to prevent visible seams.
It's essential to keep your tools clean throughout the process to avoid dried plaster affecting the finish. Utilise a hawk and trowel for application, ensuring the plaster is spread evenly and leveled for a seamless result. Practice makes perfect, so don't be discouraged if your first attempt doesn't turn out flawless – keep refining your technique for impressive results.
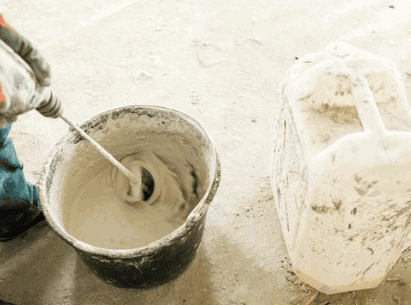
Mixing The Plaster
Mixing plaster involves combining plaster powder with water to create a workable mixture for plastering walls. The correct ratio of plaster to water and thorough mixing are essential for achieving the desired consistency.
When mixing plaster, it is crucial to follow the manufacturer's guidelines to determine the correct ratio which is typically around 1 part plaster to 2 parts water. This ratio may vary slightly depending on the specific type of plaster being used. Start by pouring the water into a clean mixing container, then gradually add the plaster powder while continuously stirring to avoid clumps. Use a paddle mixer or a whisk attachment on a drill to ensure the mixture is well blended.
To achieve a smooth and lump-free plaster mixture, it is recommended to mix the plaster in small batches, working quickly but methodically. The consistency should be similar to a creamy pancake batter, neither too thick nor too runny. Properly mixed plaster is essential for a successful application as it affects the adhesion and workability of the material.
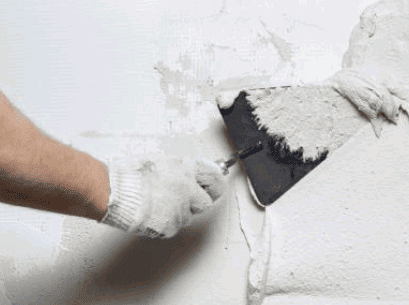
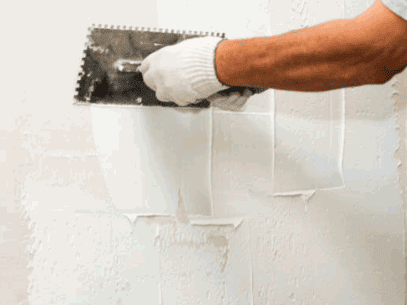
Applying The Plaster
Applying plaster requires skill and precision to achieve a smooth finish on walls. By using the right technique and practising proper application methods, you can ensure an even and polished surface.
When starting, make sure the plaster consistency is just right - not too thin that it drips, yet not too thick that it's hard to spread. It's crucial to invest in quality tools such as trowels, floats, and mixing buckets to aid in the application process.
Remember, practice makes perfect! Take your time to develop a steady hand and consistent strokes. In case of any imperfections or bubbles, troubleshoot by smoothing them out with a damp sponge or using fine-grit sandpaper for a flawless result.

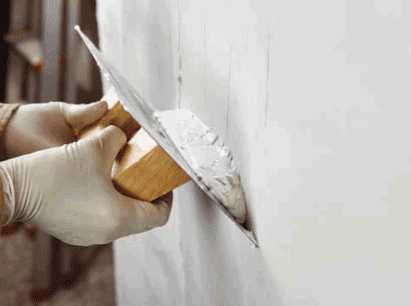
How To Achieve A Smooth Finish?
Achieving a smooth finish on plastered walls requires mastering the right techniques and practising diligently. By focusing on precision and consistency, you can perfect the art of plastering and create flawless surfaces.
One crucial aspect of achieving a smooth plaster finish is understanding the proper consistency of the plaster mix. Ensuring that the mix is neither too wet nor too dry is key to achieving a uniform and polished look.
Additionally, methodical application is essential. Begin by applying a thin base coat evenly across the surface, followed by subsequent layers to build up the desired thickness. Take care to feather the edges and blend each layer seamlessly for a professional finish.
Constant practice is vital for honing your plastering skills. Experiment with different techniques, tools, and textures to expand your repertoire and troubleshoot any imperfections that may arise.
How To Clean Up And Maintain Plastering Tools?
Cleaning up and maintaining plastering tools is essential for prolonging their lifespan and ensuring optimal performance. Proper care and regular cleaning of tools such as buckets, trowels, and hawks can prevent build-up and maintain their functionality.
Regarding cleaning plastering tools, it's important to use the right techniques for each type of tool. For example, for buckets, ensure they are thoroughly rinsed after each use to remove any residual plaster. Trowels should be wiped clean and dried to prevent rust. Hawks, on the other hand, may require scrubbing to remove hardened plaster.
- Storing your tools properly is also crucial. Keep them in a dry, well-ventilated area to prevent rust and corrosion. Consider using toolboxes or hanging racks to organise and protect your tools.
- If you encounter issues like stiff joints in trowels or rust on metal parts, consider applying lubricants or rust removers. Regular maintenance and inspection can help you catch potential problems early.